Create A 2D Game With Unity Engine Part 4: Preparing And Animating The Enemies

Table of Contents

Create A 2D Game With Unity Engine Part 4: Preparing And Animating The Enemies

Reading Time: 6 minutes
Level: Beginner
Version: Unity 2020.3.1 LTS

Help Others Learn Game Development

In part 3 of this tutorial series we created the Player script which is controlling the player’s movement and jumping, as well as animating the player character while he is moving.

We also created the CameraFollow script which makes the Main Camera game object follow the player character when he is moving in the level.

In this part we are going to create and animate the enemies.

Slicing The Enemies Sprite Sheet And Creating Enemy Animator Controllers

Inside the Assets -> Sprites locate the Enemies sprite sheet and slice all individual pieces of that sprite sheet.
 
We did this for the Player sprite as well and I left a link that will help you slice the Enemies sprite sheet in case you don’t know how, I will leave the same link here.
 
Inside the Assets -> Animations folder, Right Click -> Create -> Folder and name it Enemy Animations. Inside the Enemy Animations folder create a 3 new folders and name them Enemy 1, Enemy 2 and Ghost.
 
Right Click -> Create -> Animator Controller and create a new Animator Controller for every enemy that we will have in the game and in total we have 3: Enemy 1, Enemy 2 and Ghost.
 
I will name my Animator Controllers Enemy 1 Controller, Enemy 2 Controller and Ghost Controller, you can do the same.
 
When you are done, the Enemies sprite sheet will be sliced, and you will have the Animator Controllers for all 3 enemies ready same as in the preview below:


Preparing The Enemies

First we are going to prepare the enemies by attaching the appropriate components on them.
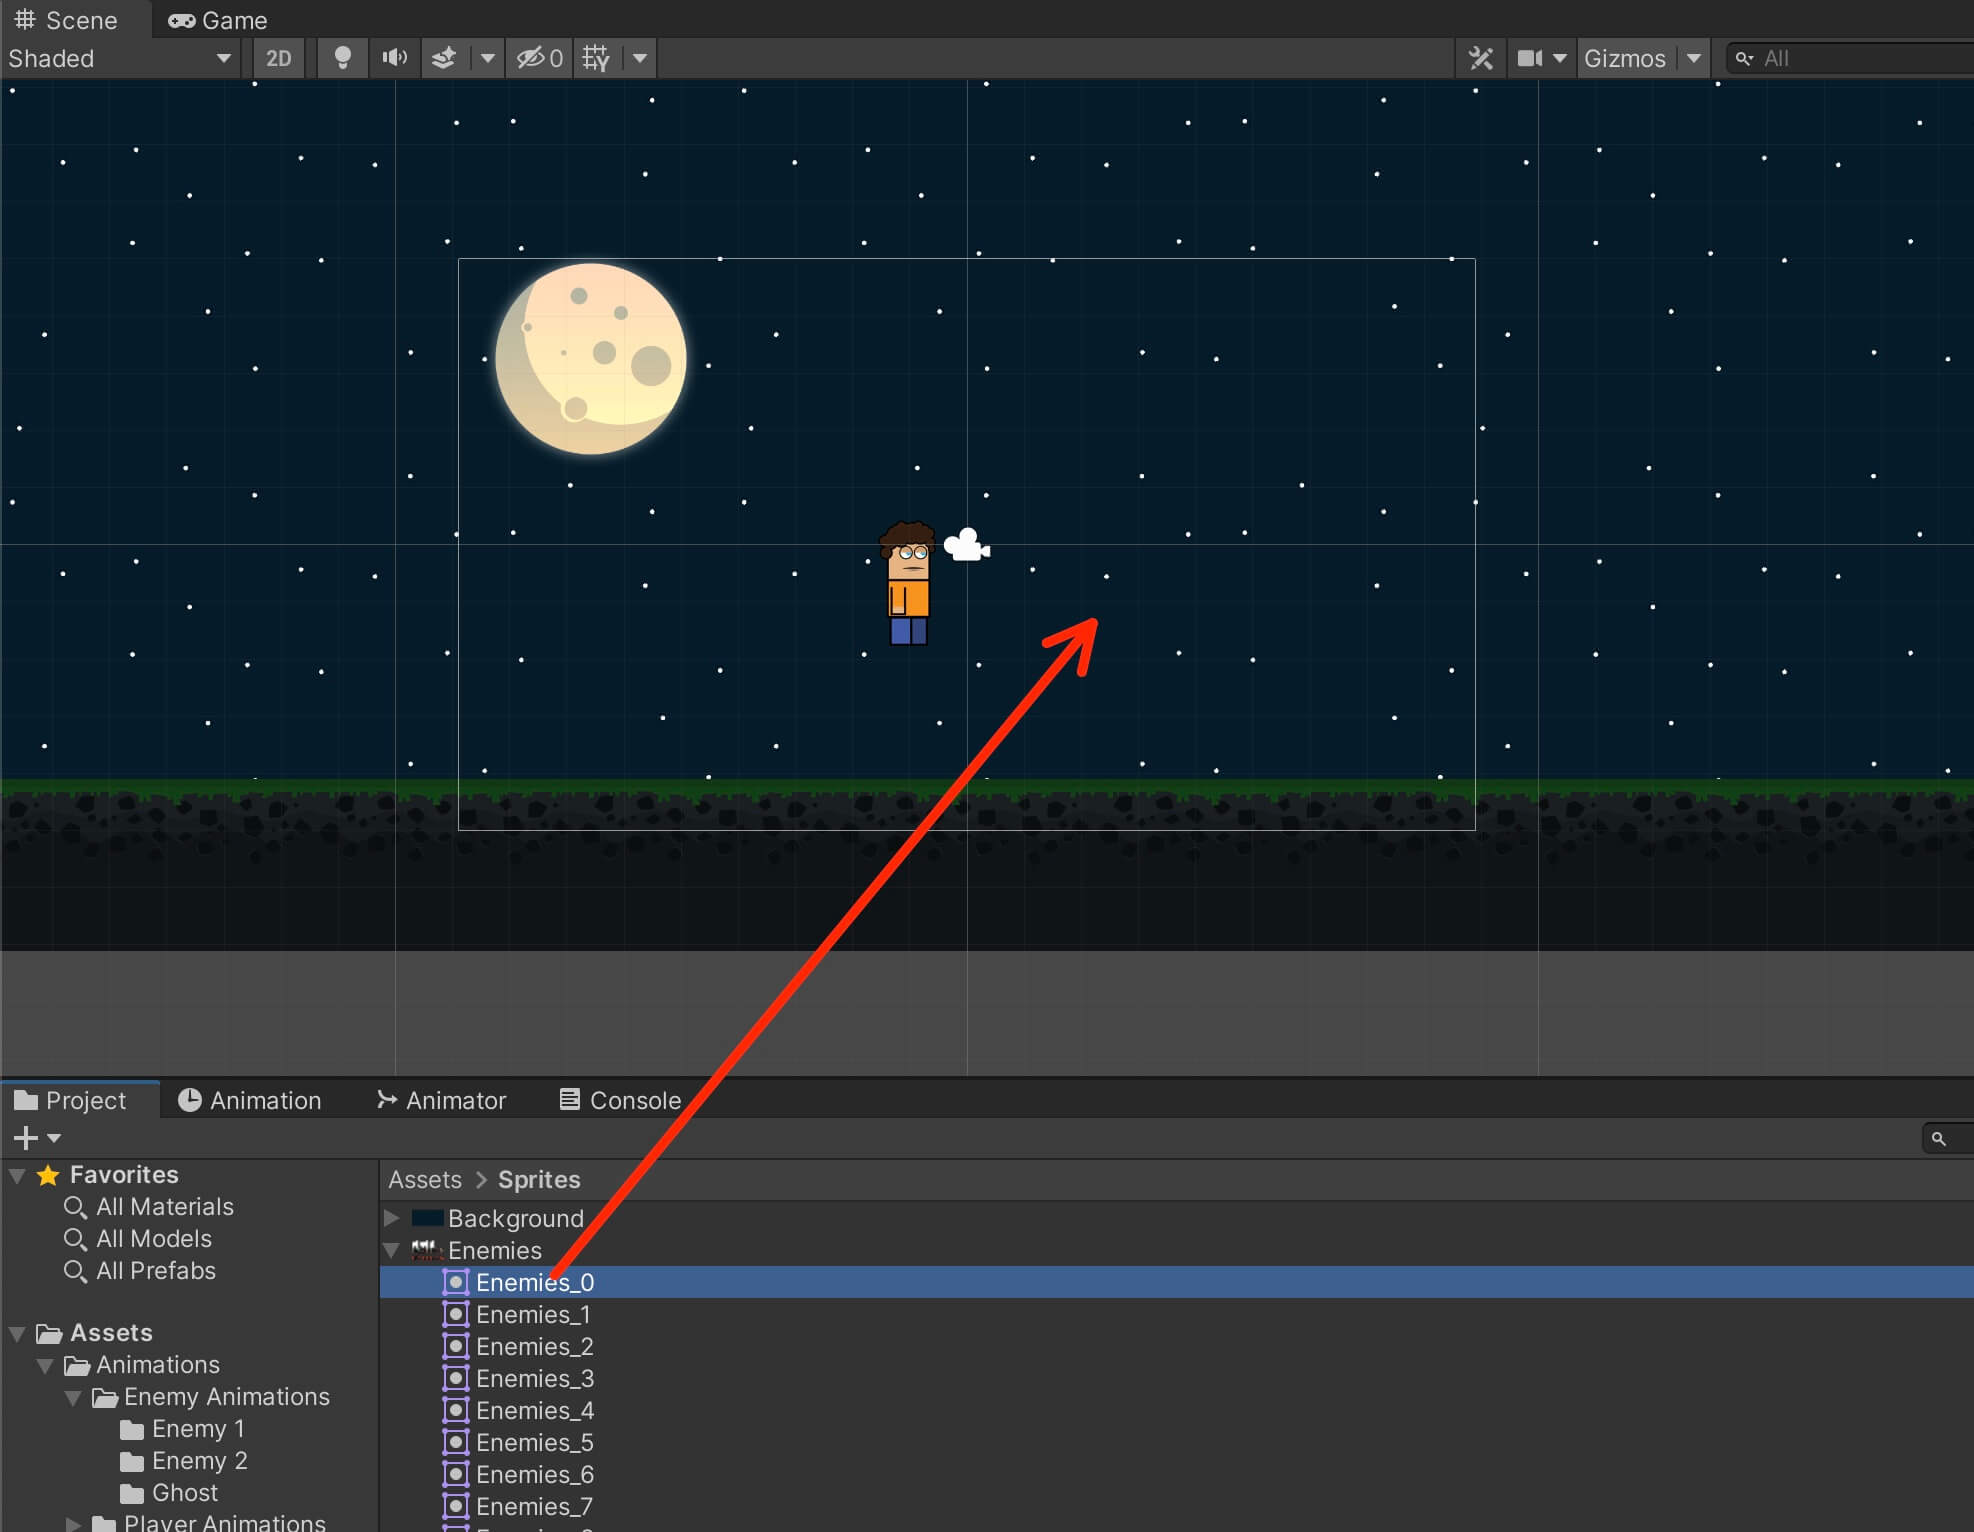
Drag one of the enemies from the sprite sheet in the Scene view:
 
Img 1

When you first drag the enemy in the Scene you will not see the enemy game object in the Scene view.

The reason for that is because we need to set the appropriate Sorting Layer for the enemy game object.

First I am going to rename the game object. Since I dragged the Ghost enemy I am going to rename the object to Ghost.

Next, I am going to set the Sorting Layer for the Ghost object to Enemy:
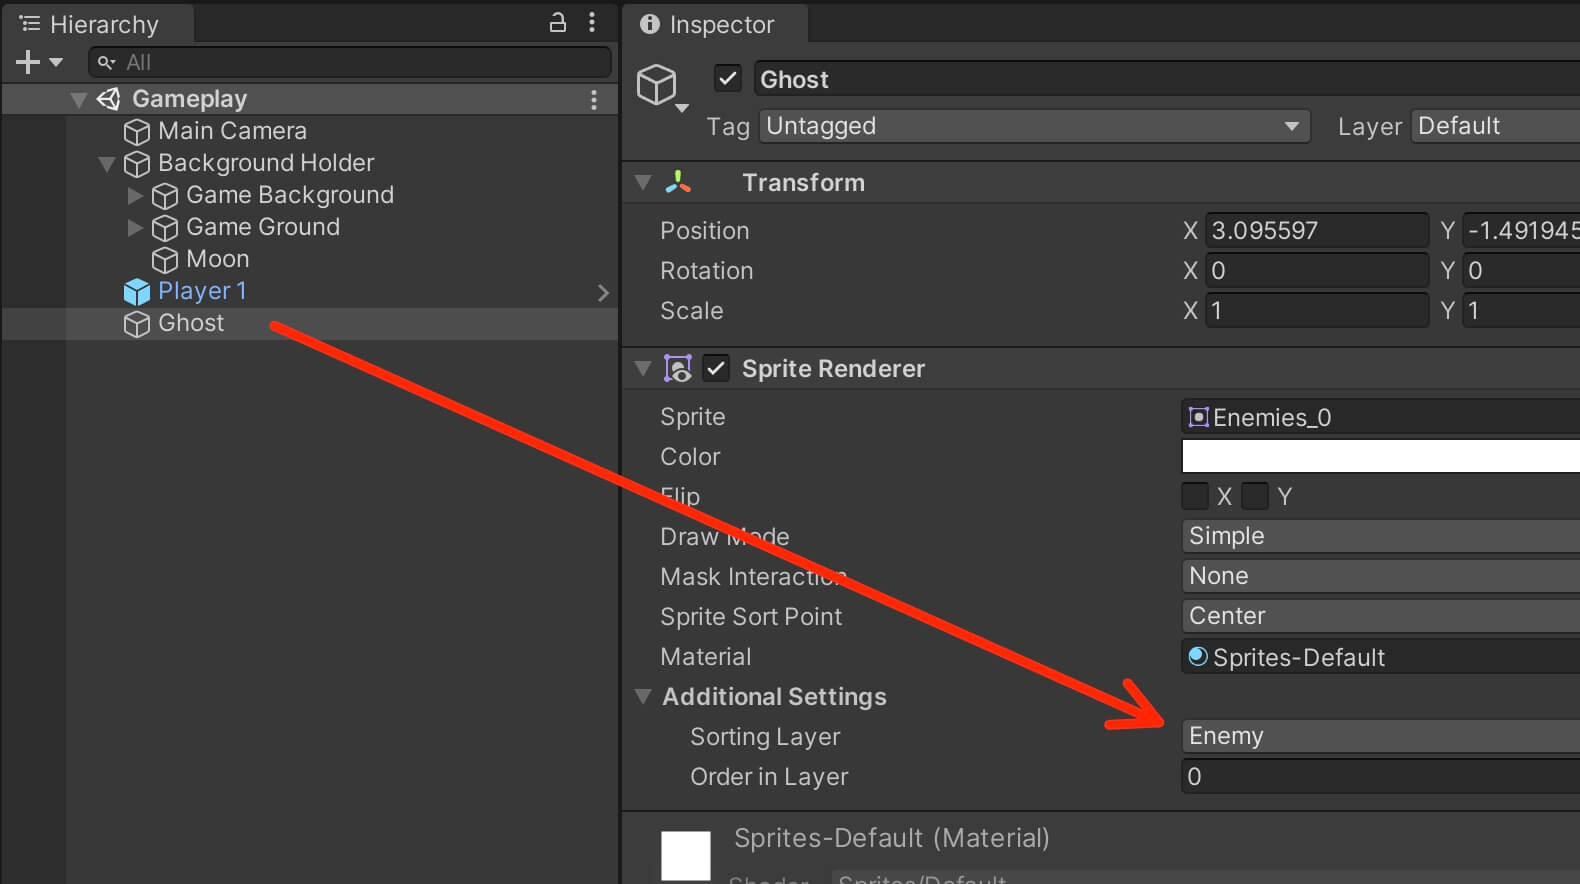
Img 2

Now we will be able to see the Ghost enemy in the Scene view:
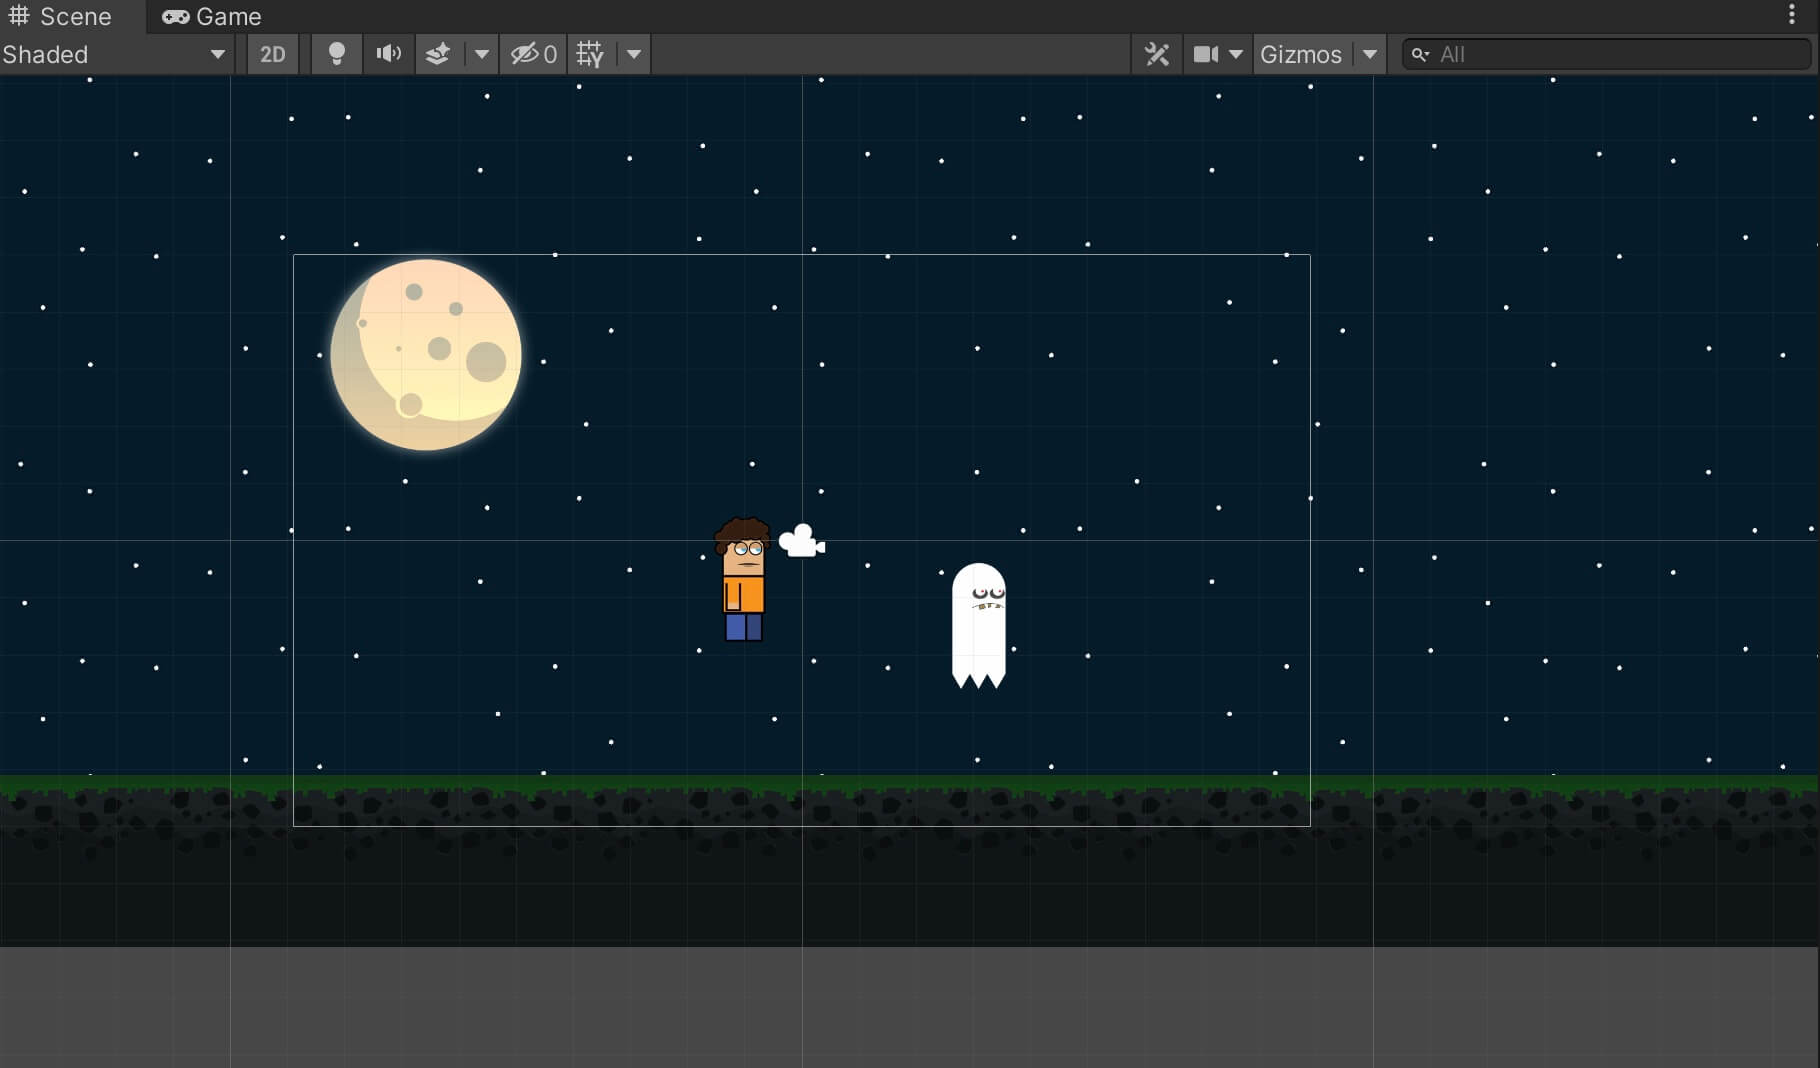
Img 3

In order to animate the ghost enemy attach the Animator component. Select the Ghost object and click on the Add Component button in the Inspector and filter for Animator and attach it:
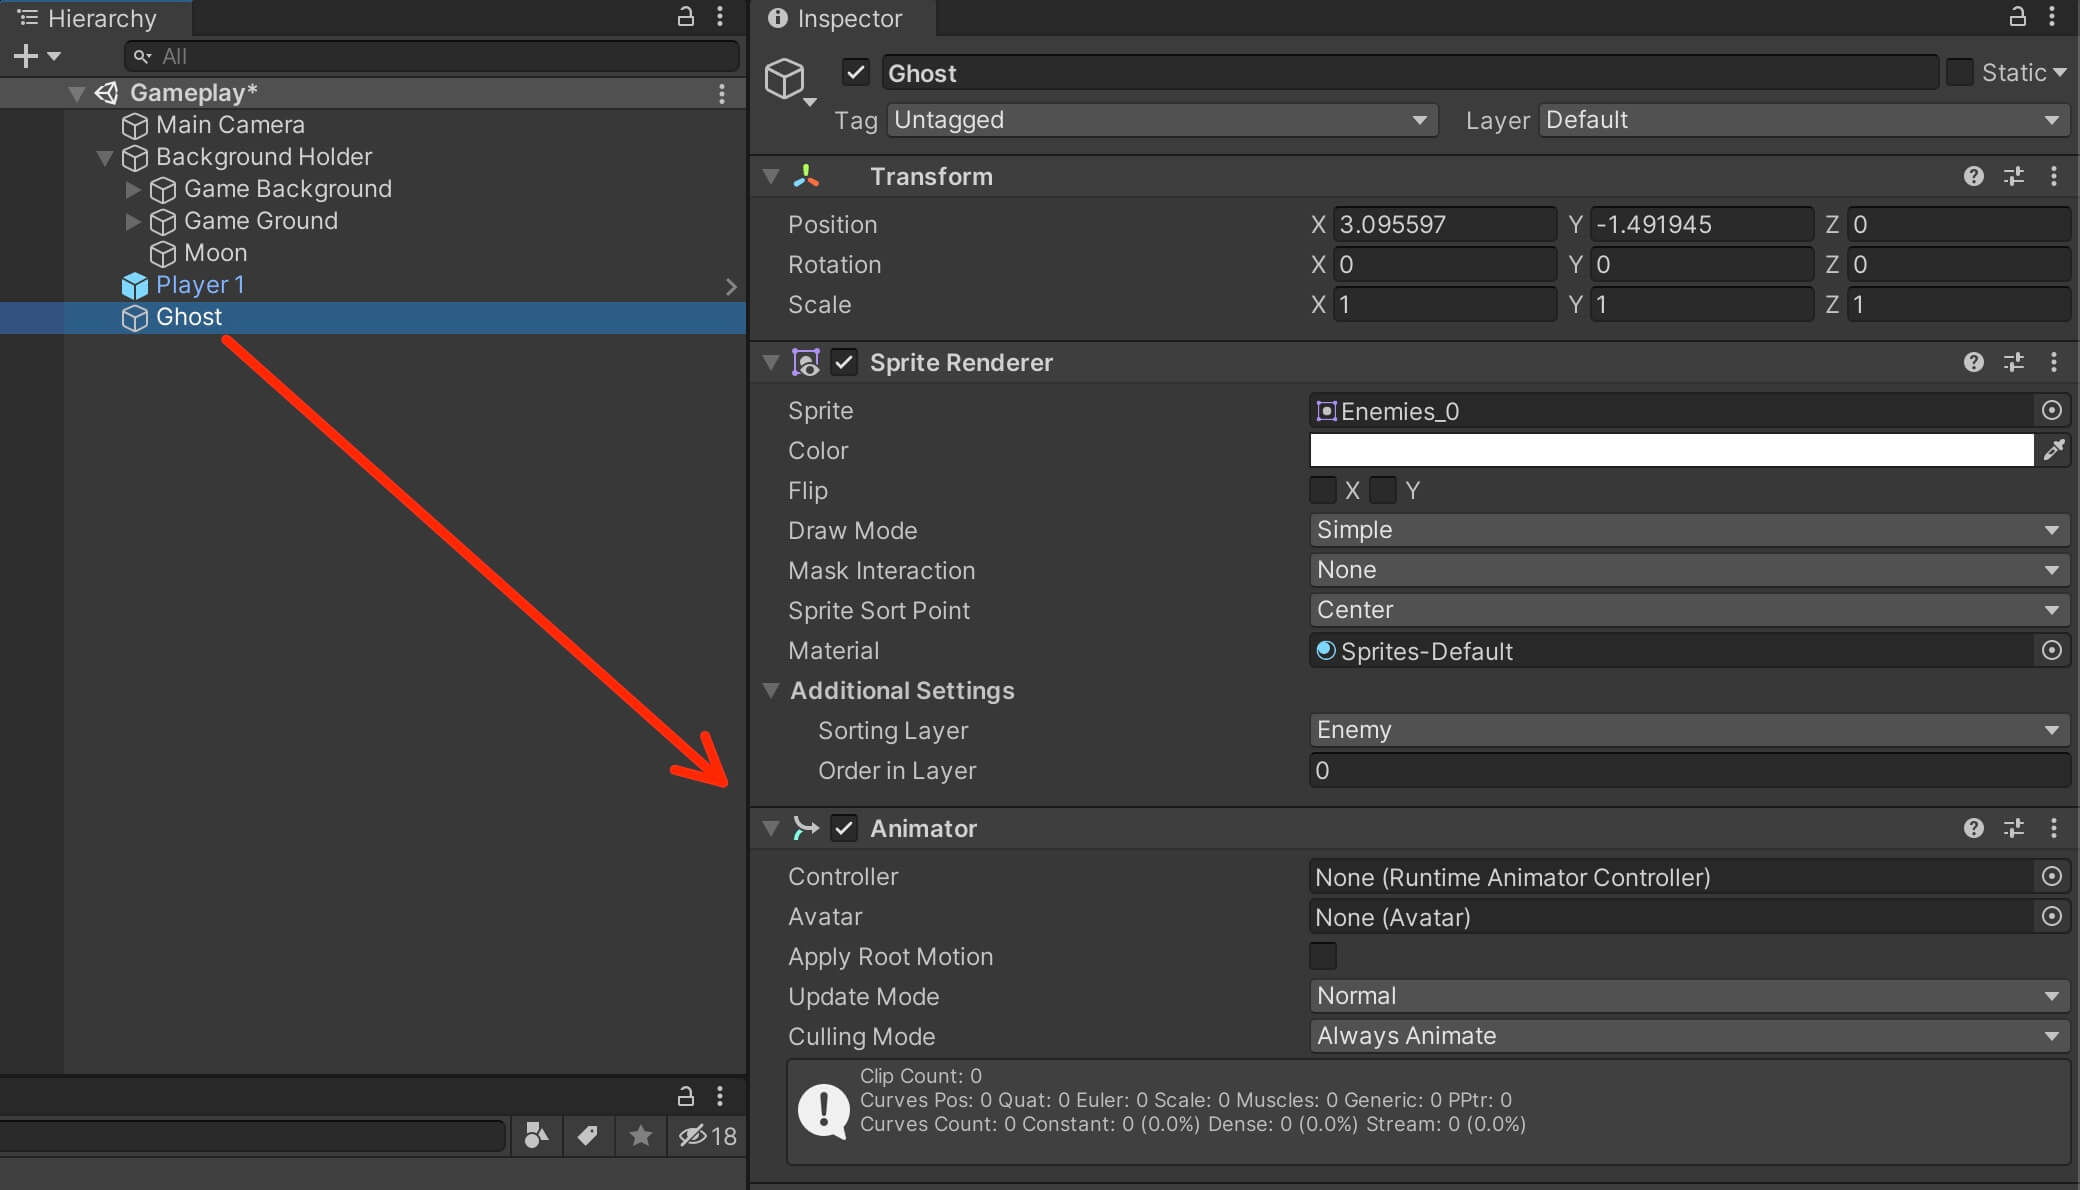
Img 4
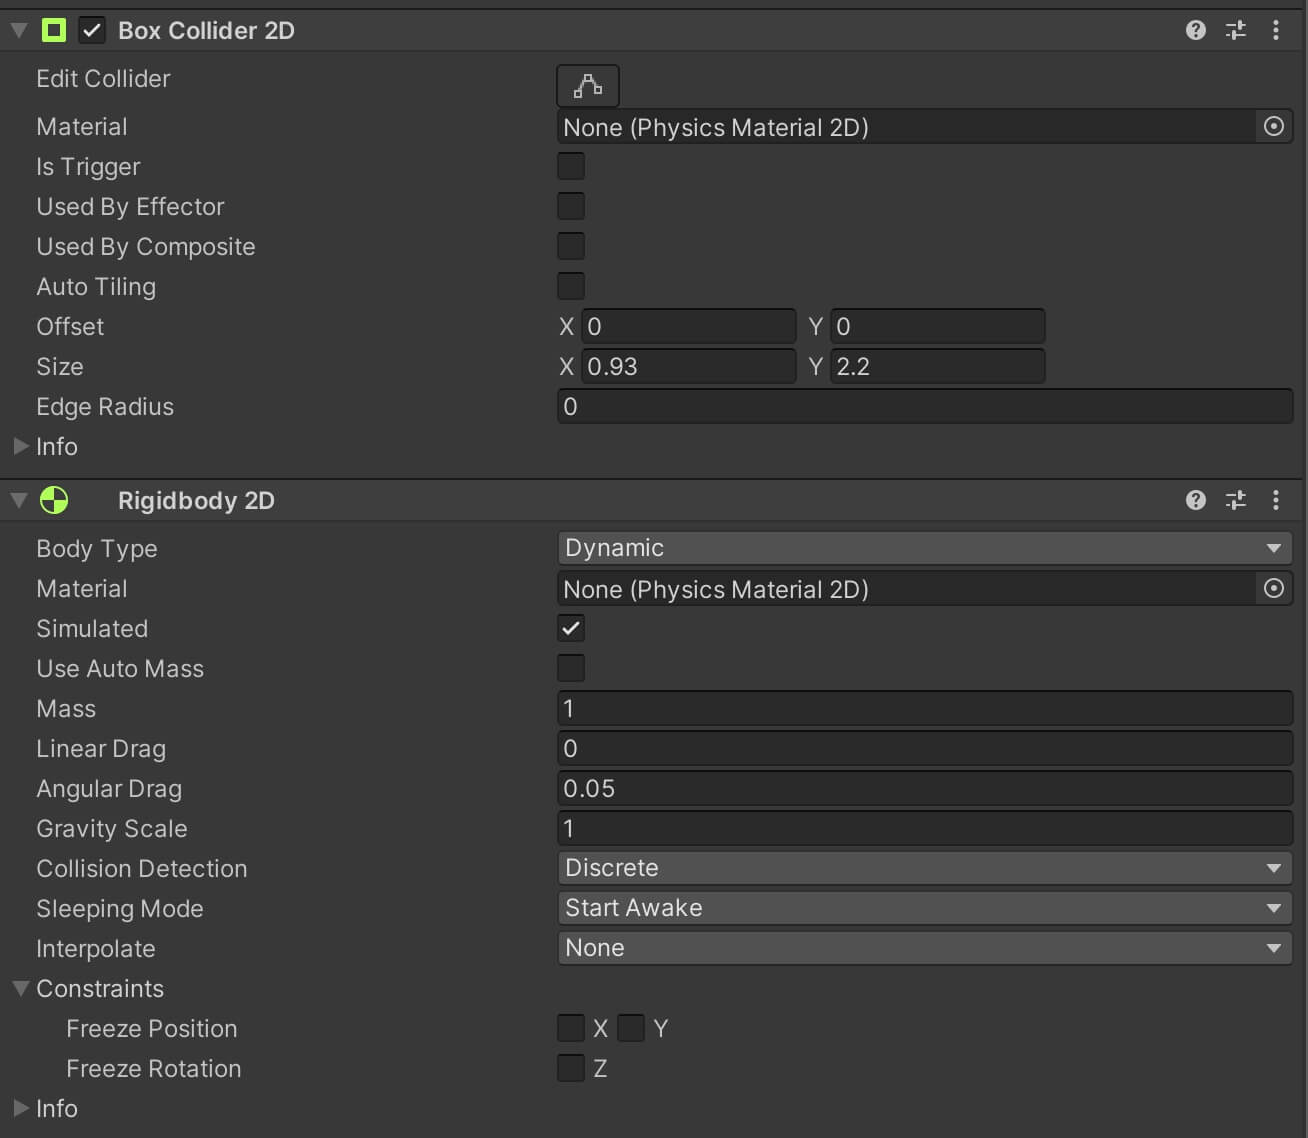
While we are at it, attach the Box Collider 2D and the Rigidbody 2D component on the Ghost object as well:
 
Img 5
Repeat these same steps to set up Enemy 1 and Enemy 2 as well because all enemies are going to have these 3 components: Animator, Box Collider 2D, and Rigibody 2D:
 
Img 6

Just make sure to resize the Box Collider 2D for the enemies where there is a need to resize it.
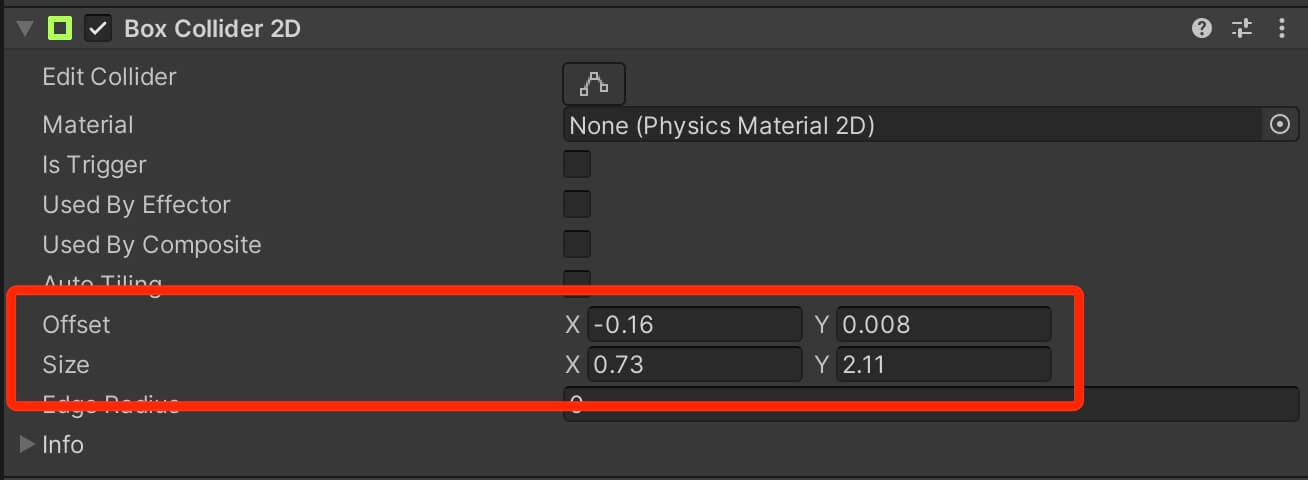
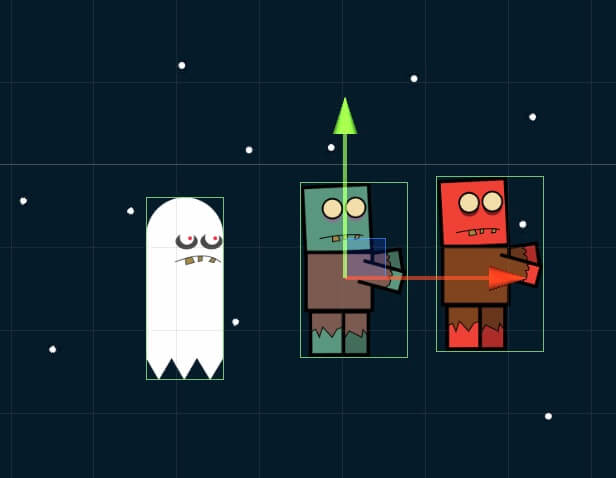
I said above where there is a need to resize it because depending how the image is drawn, or in our case how the individual sprite is sliced, the collider might go out of the bounds of the sprite which is the case for Enemy 1 and Enemy 2 game objects as you can see from the image above.
 
These are the values I’ve used for the size of the colliders for Enemy 1 and Enemy 2:
 
Img 7

You can follow this guide by clicking here to learn more about this issue.

Next, attach the appropriate Animator Controller that we already prepared, to the corresponding enemy’s Animator component:
 

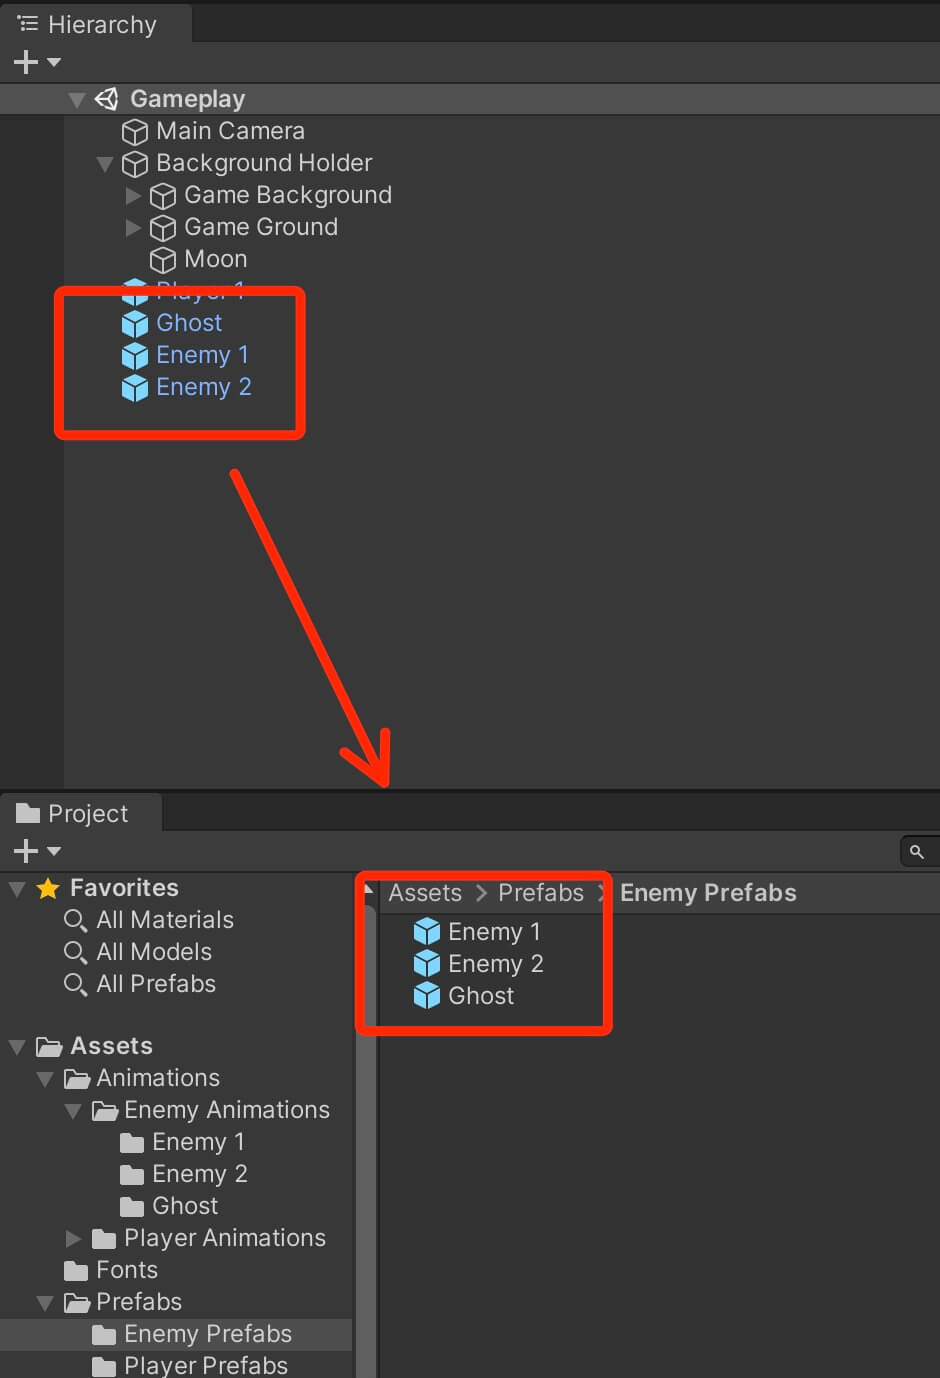
And the last step is to create prefabs out of our enemies. In the Assets -> Prefabs folder, Right Click -> Create -> Folder and name it Enemy Prefabs.

Now drag the enemies one by one, from the Hierarchy tab in the Enemy Prefabs folder to create prefabs out of them:
Img 8


Animating The Enemies

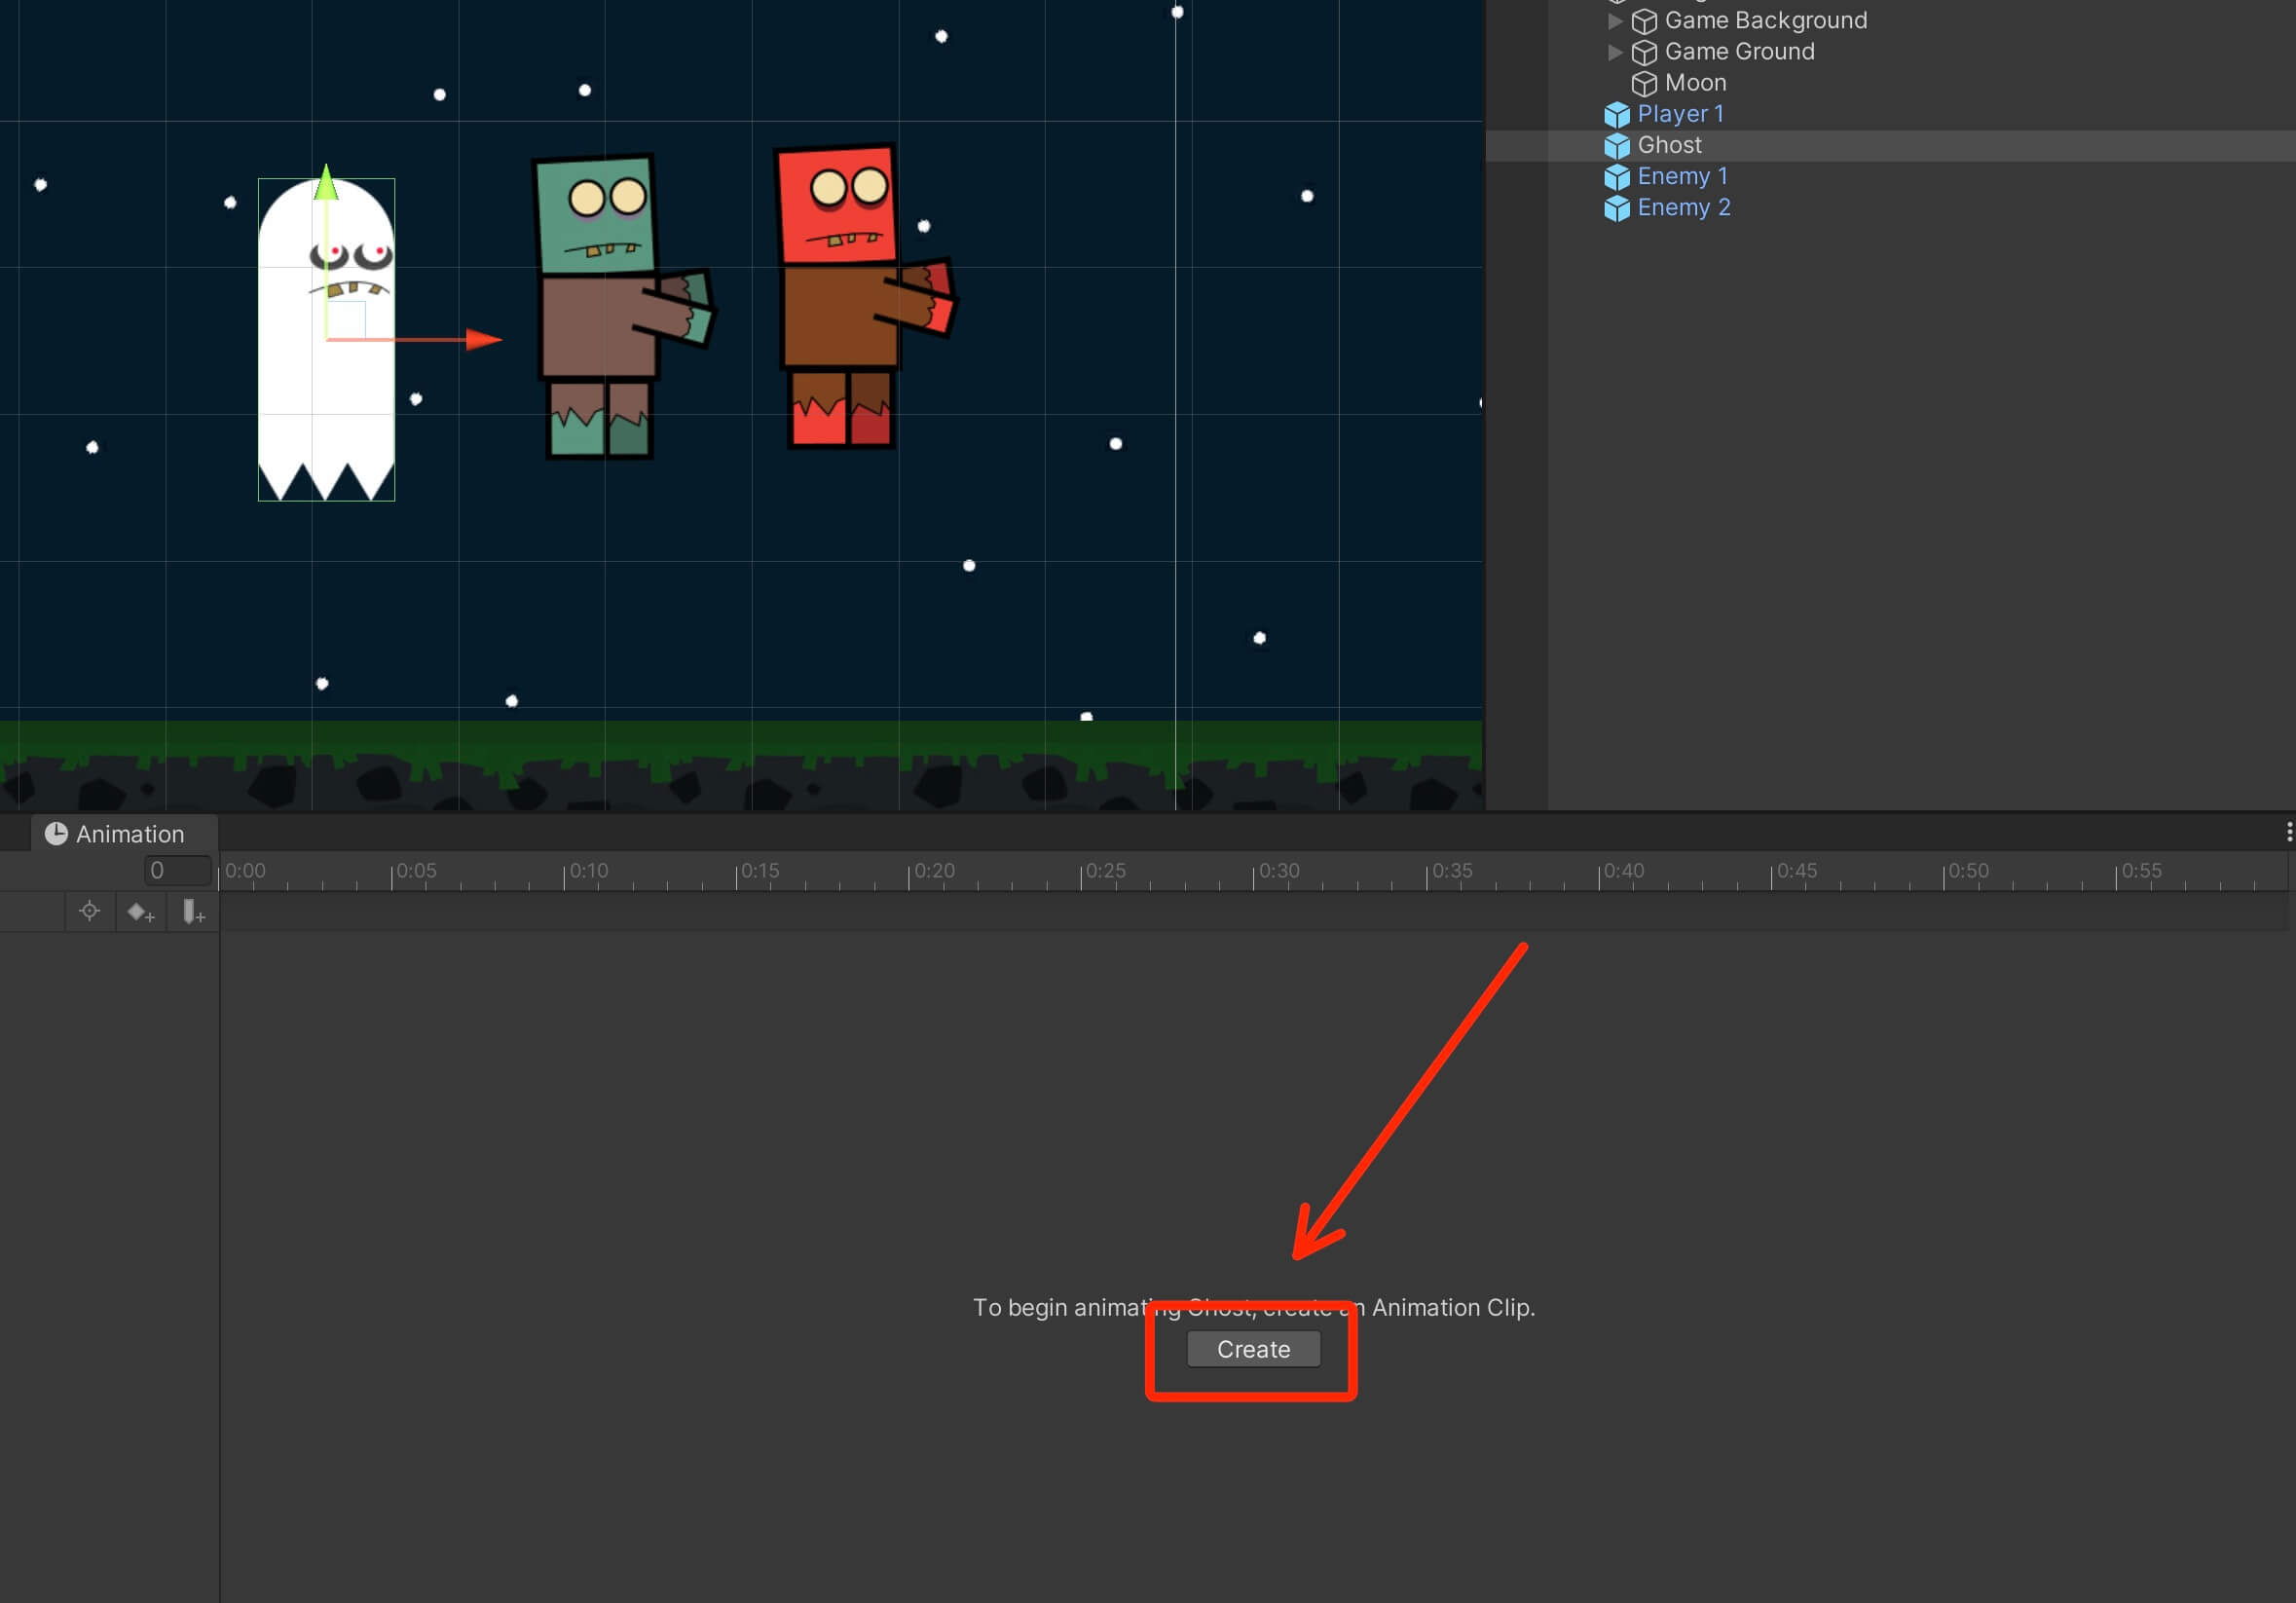
Now that the enemies are ready we can animate them one by one. Select any enemy in the Hierarchy tab, I am going to select the Ghost enemy, and from the Animation tab click the Create button:
 
Img 9

Name the animation Ghost Walk and make sure that you store it in the Assets -> Animations -> Enemy Animations -> Ghost folder.

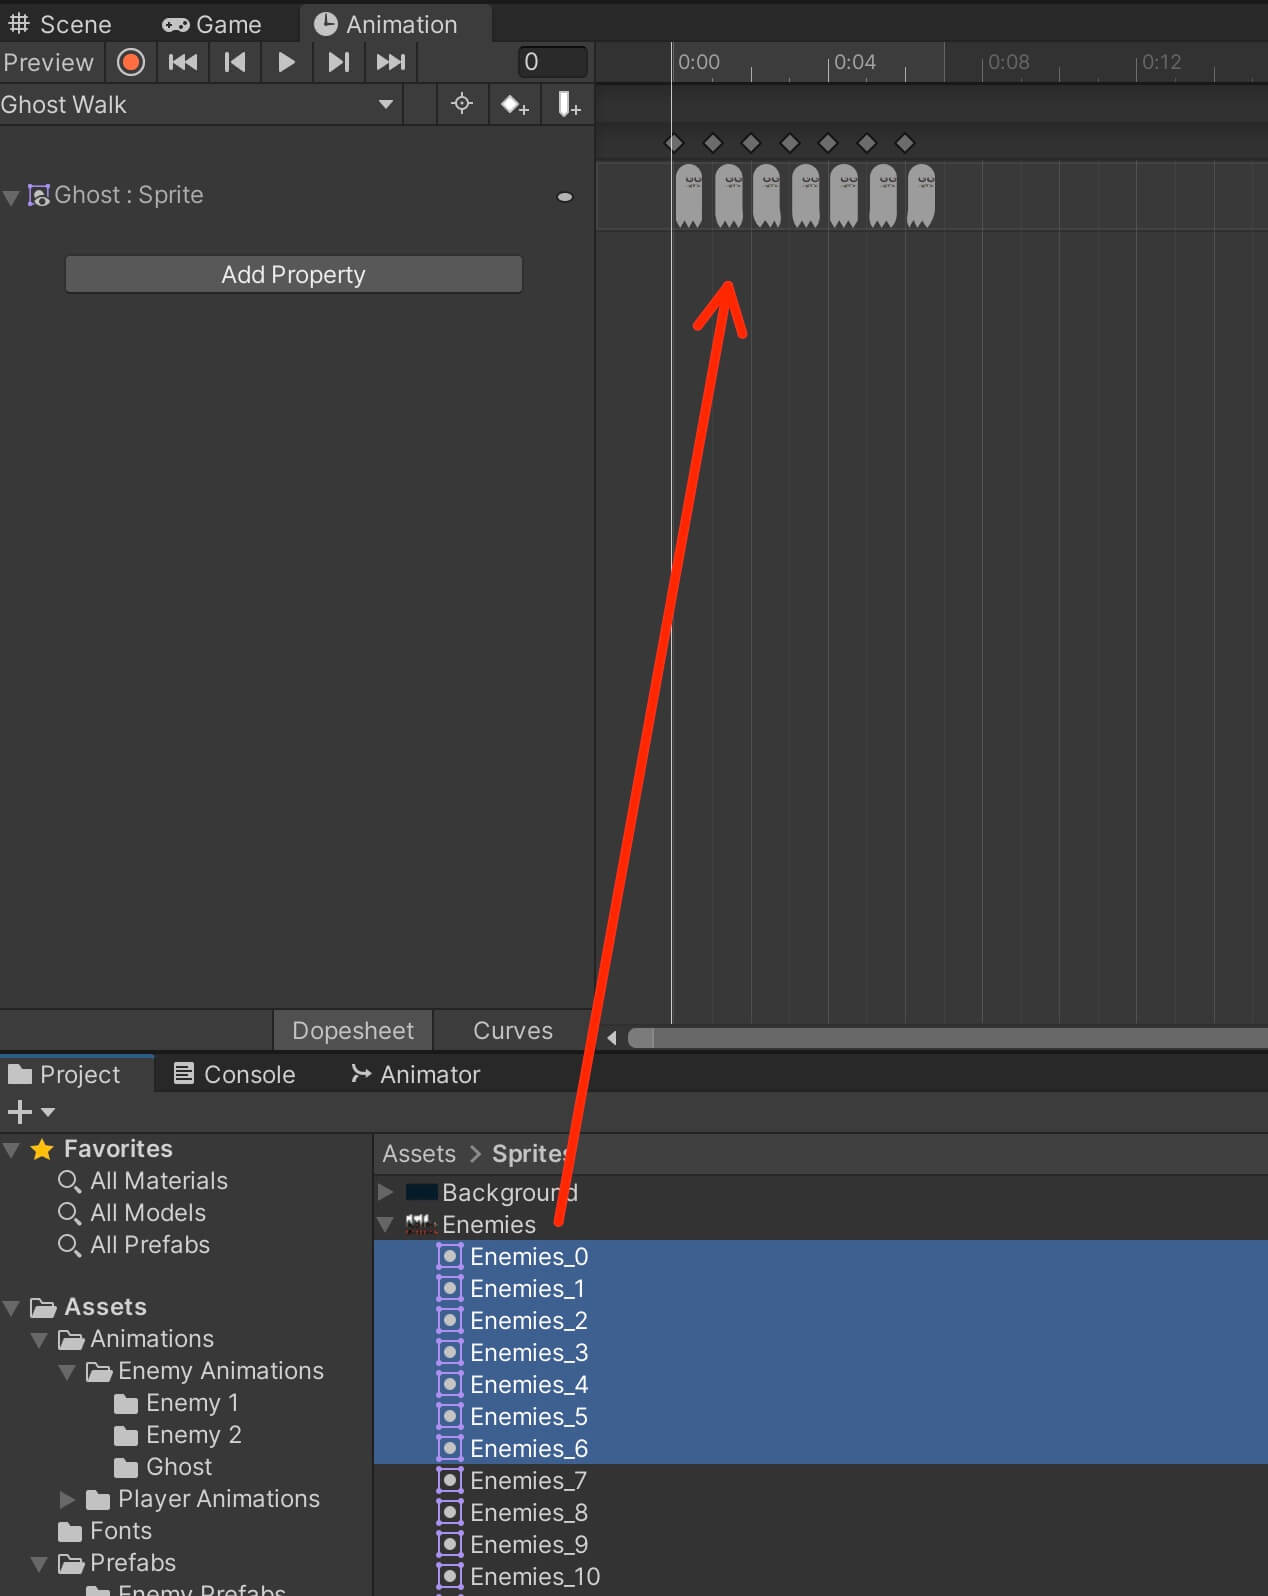
Now, from the Assets -> Sprites folder, take the appropriate frames from the Enemies sprite sheet that will form the Ghost walk animation and drag them in the Animation tab for the Ghost Walk animation:
Img 10 Fixed
Repeat the same process for the Enemy 1 and Enemy 2 game objects and make sure that you drag the appropriate images from the Enemies sprite sheet for the appropriate enemy to create the walk animations for that enemy.
 
Of course, name the animations appropriately depending on the enemy for which you creating it e.g. Enemy 1 Walk and Enemy 2 Walk.
 
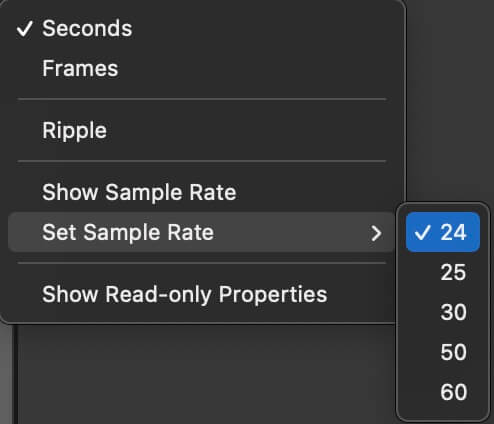
Don’t forget to preview the animation and see the speed by which it is played. You can always change the speed of the animation from the Animation tab and from the Animator tab.
 
In the Animation tab I’ve changed the Sample Rate for the animation of all 3 enemies to 24:
 
Img 11

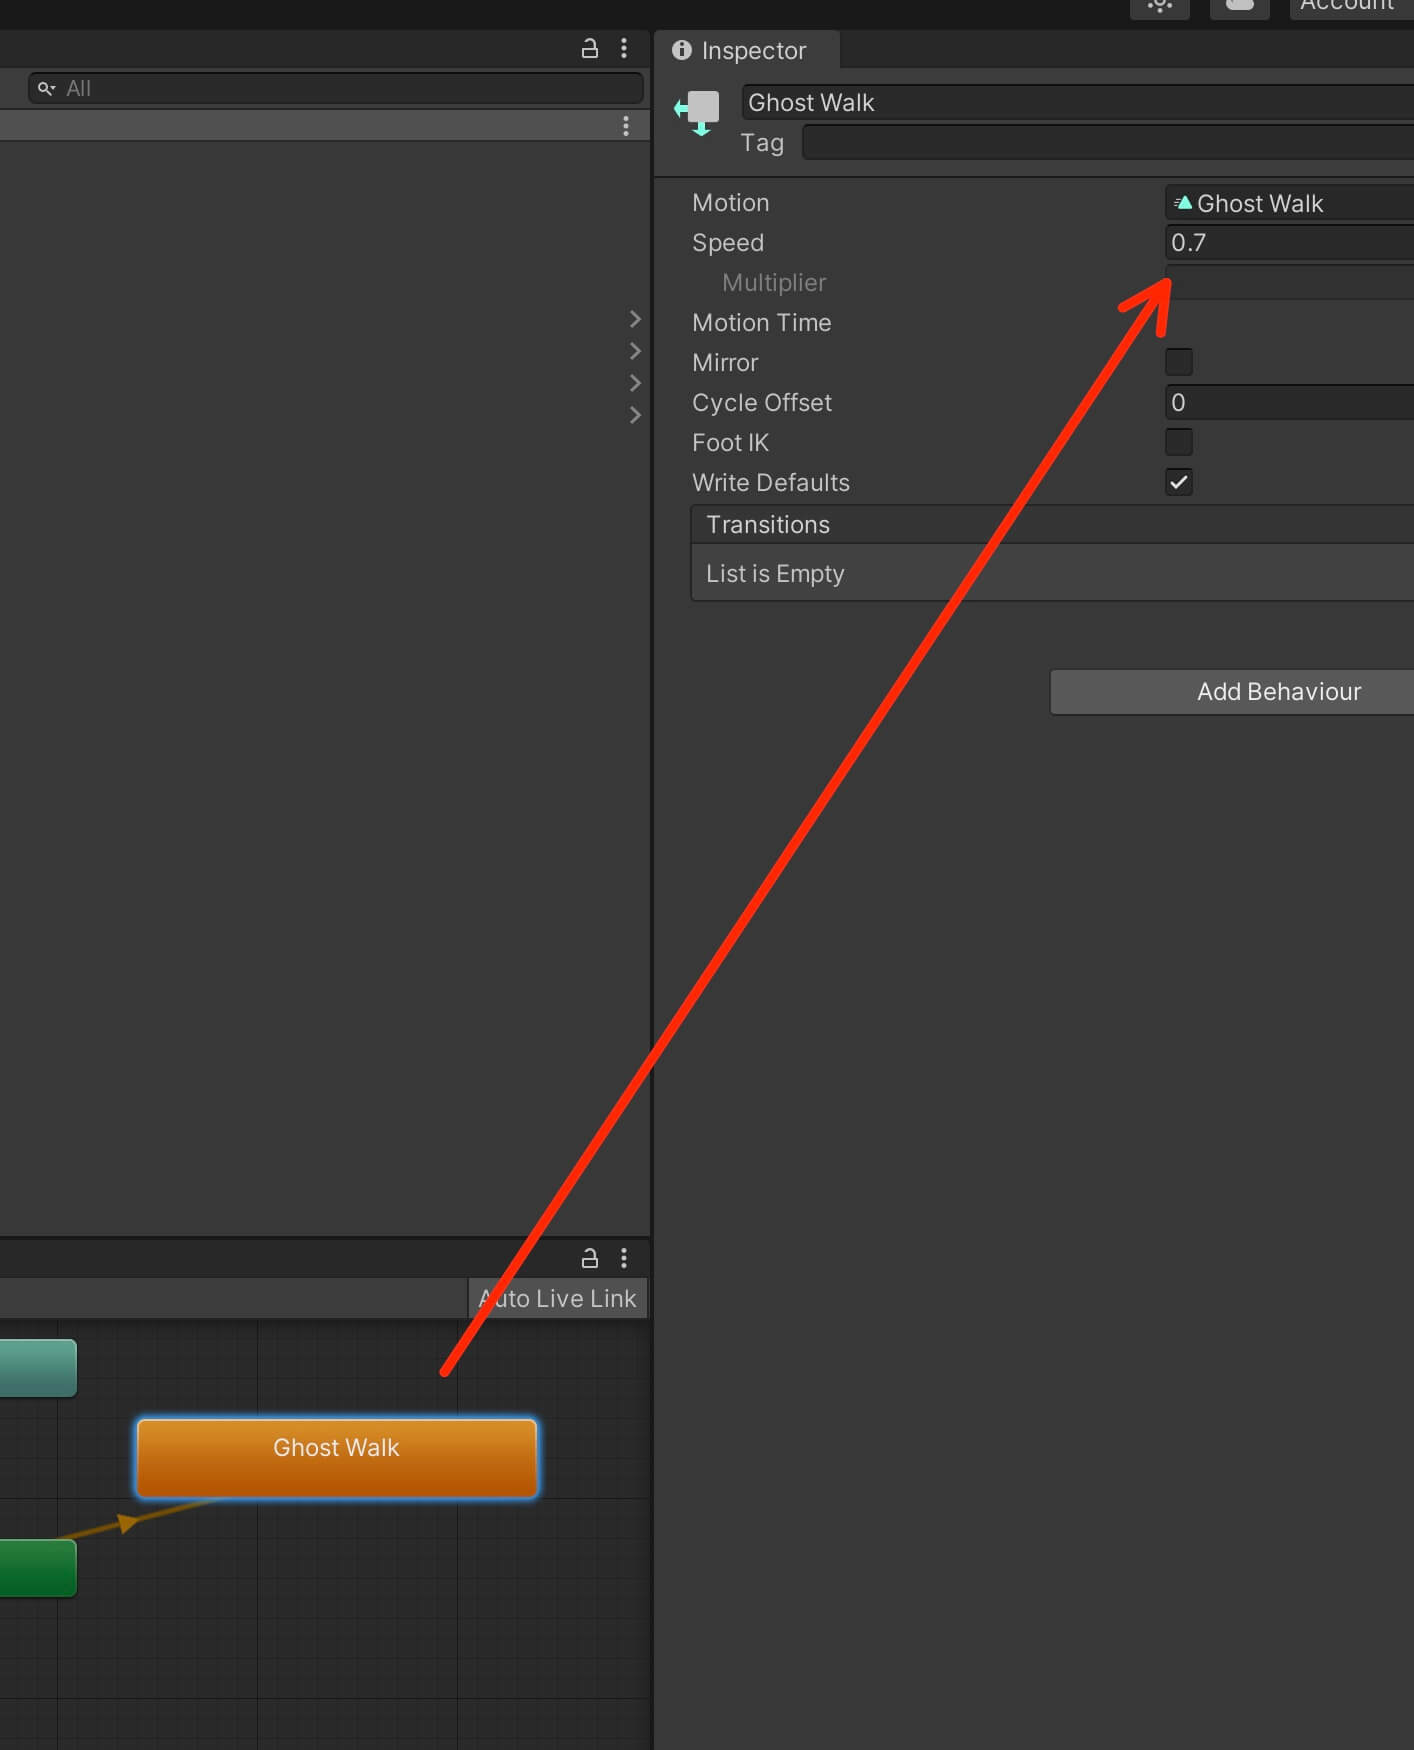
And I’ve changed the speed of the animations in the Animator tab for all 3 enemies. For the Ghost I’ve set the speed of the animation to 0.7 and for the Enemy 1 and Enemy 2 I’ve set the speed at 0.6:
Img 12


Turning Off Gravity In The Rigibody 2D Component

If you remember from the preview of the game, the Ghost enemy is floating i the air, which is not the case if we run the game now:

As you can see, when we run the game the Ghost enemy also falls down. And this is the normal effect that the Rigidbody 2D component has on game objects because it applies gravity on them.

To turn off gravity, we simply need to set the value of Gravity Scale to 0:
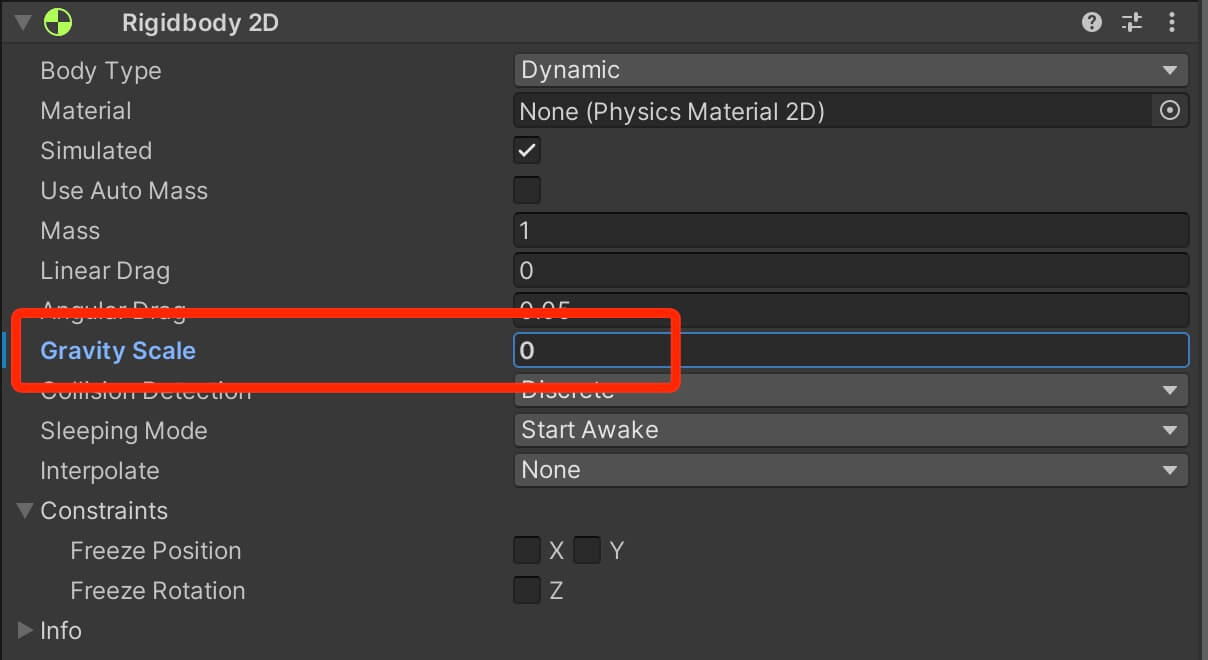
Img 13
This will turn off the gravity effect on the game object and as a result the Ghost enemy will now float in the air and not fall down:
 
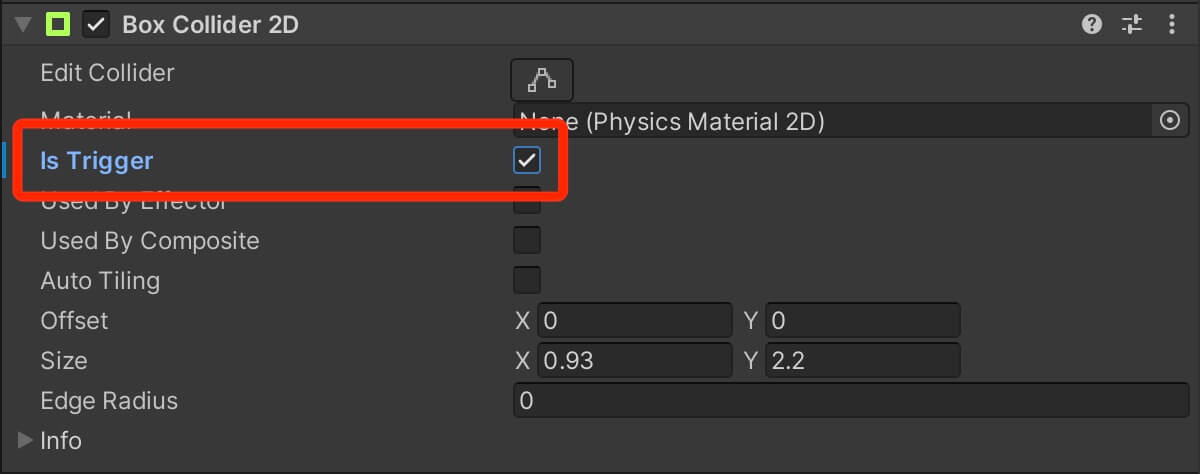
I am also going to set the Box Collider 2D for the Ghost enemy to be a trigger e.g. check the Is Trigger checkbox:
 
Img 14
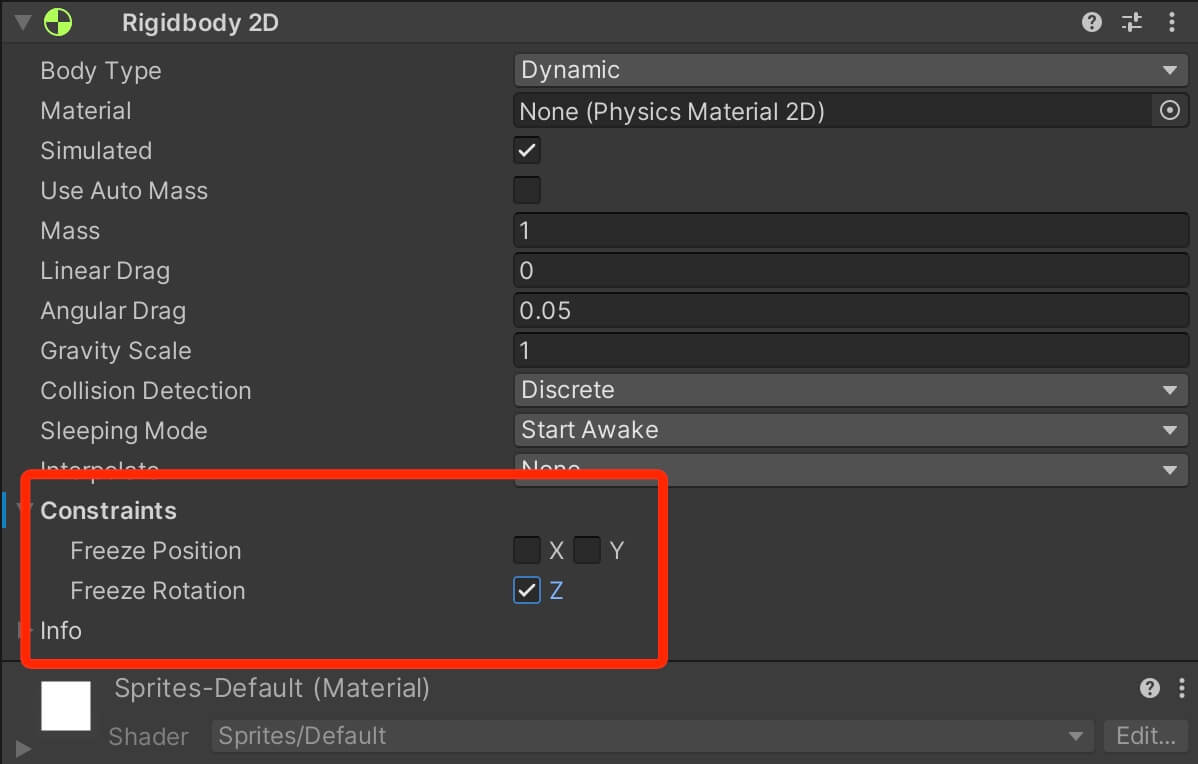
For the Enemy 1 and Enemy 2 we are going to freeze the Z rotation in the Constraints settings for the Rigidbody 2D component:
 
Img 15

The reason why we are freezing the Z rotation is to prevent the enemy objects from rolling over. We already did this for the player game object and this is something that you learn more about by clicking here.

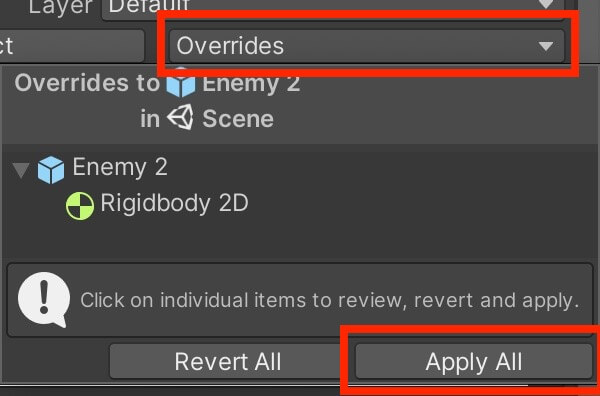
Make sure that you apply all these changes to all 3 enemy prefabs so that the changes will be made to the original prefabs as well:
Img 16 Fixed


Where To Go From Here

In this part of the tutorial we prepared and animated the enemy characters which we will use in the game.

In the next part titled Enemies, Spawners, And Gameplay Mechanism we are going to make the enemies move, spawn them in the game and create the gameplay mechanism.

1 thought on “Create A 2D Game With Unity Engine Part 4: Preparing And Animating The Enemies”

Leave a Comment