Create A 2D Game With Unity Engine Part 2: Creating The Game Level

Table of Contents

Create A 2D Game With Unity Engine Part 2: Creating The Game Level

Reading Time: 6 minutes
Level: Beginner
Version: Unity 2020.3.1 LTS

Help Others Learn Game Development

In part 1 of this tutorial series we created our game characters, animated them, and we created prefabs out of them.
 
In this part we will create the game level.
 

Setting Up The Game Background
Before we start moving our player characters through code, we are going to create the game background and ground so that the player character can stand and move in the level.
 
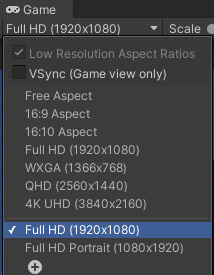
First, inside the Game tab I am going to set the reference resolution to full HD:
 
Img 1

If you don’t know how to change the reference resolution in the game tab, you can learn to do that here.

Next, I am going to create an empty game object in the Hierarchy tab and call it Background Holder. Inside of that game object I am going to create another empty game object and name it Game Background.

Make sure that you set the position values for both Background Holder and Game Background to 0 for X, Y, and Z:

Img 2
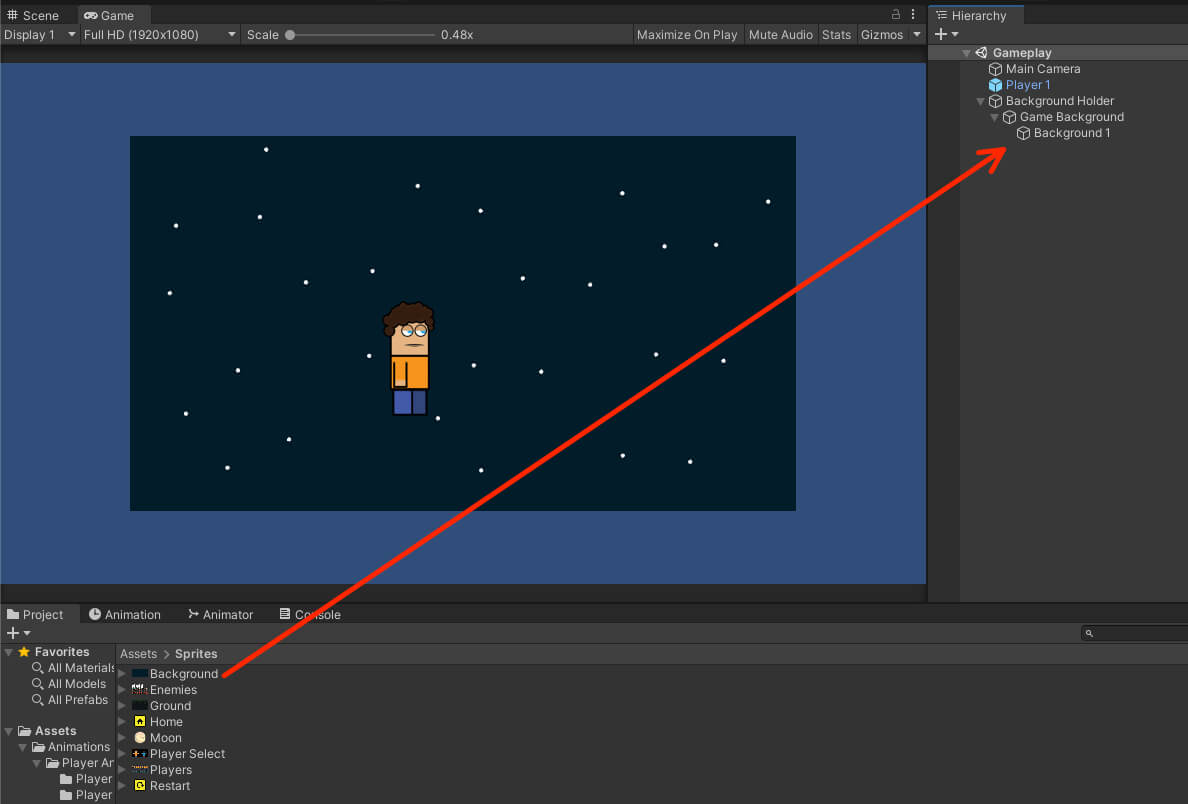
Now from the Assets -> Sprites drag the Background sprite as the child of the Game Background game object in the Hierarchy:


Img 3
Rename the Background object to Background 1 and set the position values to 0 for X, Y, and Z:
 
Img 4

Next, create a new empty game object as the child of the Background Holder, name it Game Ground and set the position values to 0 for all axis.

From the Assets -> Sprites folder, drag the Ground sprite as the child of the Game Ground game object and rename it to Ground 1:
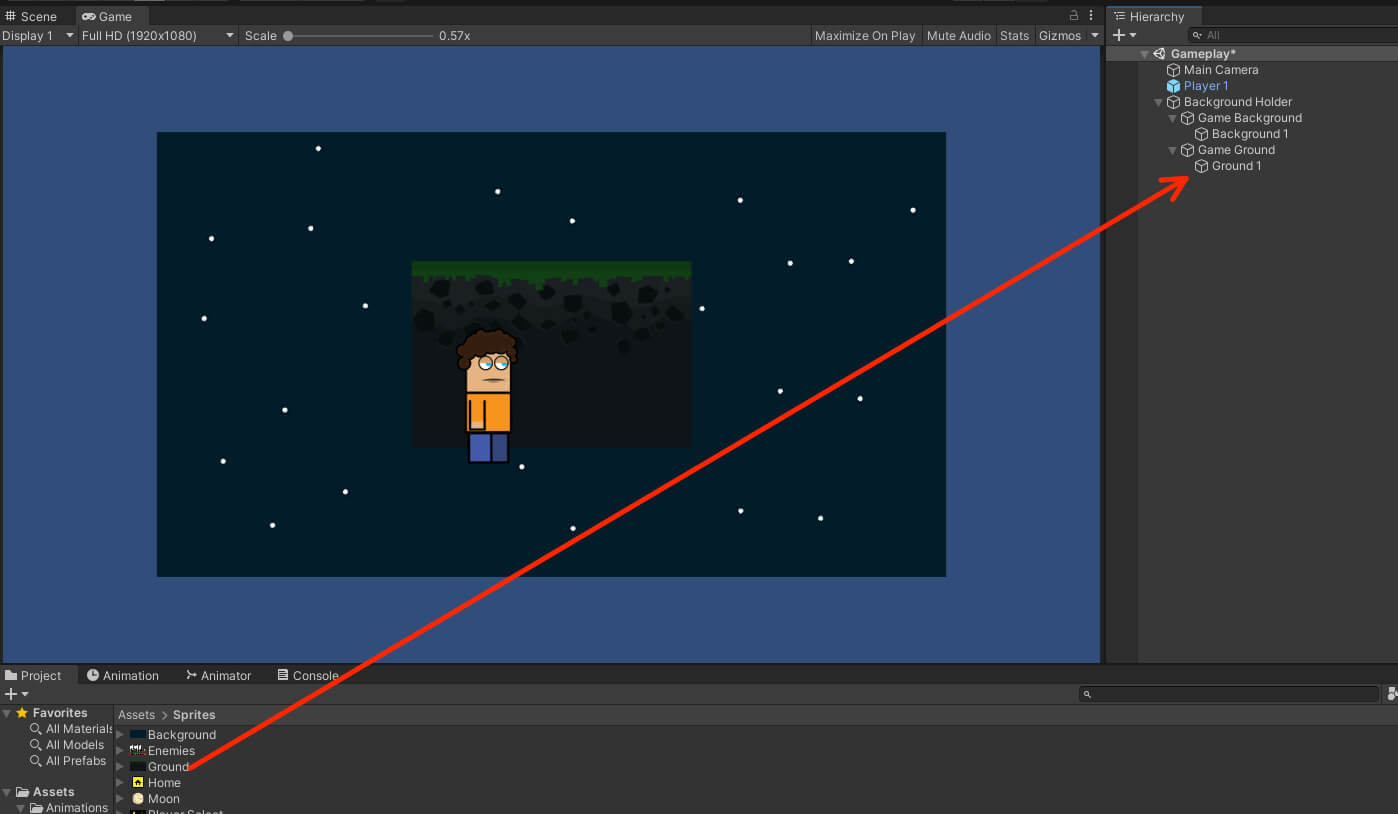
Img 5


Adding Sorting Layers For The Sprites

Before create the complete game field using the Background and Ground sprites, we are going to create sorting layers to determine the rendering order of our sprites.
 
If you don’t know what are sorting layers, make sure that you learn about them here.
 
Now select any game object in the Hierarchy that has a sprite renderer component(any game object with a sprite image) and from there open the Tags & Layers tab.
 
Under the Sorting Layers drop down list create 3 new Layers that we will use for the backgrounds, enemies and player characters:
 
Img 6
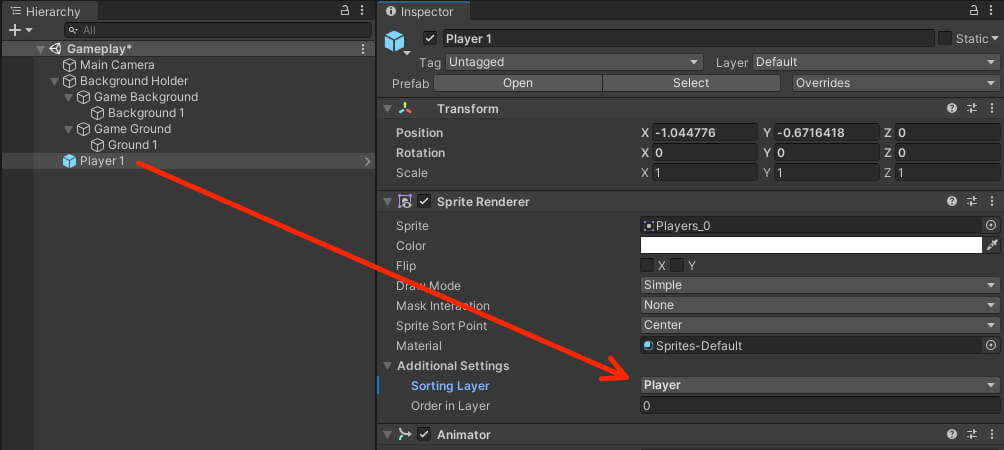
Now select the Player 1 game object and set his Sorting Layer to Player:
 
Img 7
Since the Player 1 game object is also a prefab, make sure that you override the new changes so that they apply to the original prefab:
 
Img 8

If you need to refresh your knowledge why we need to apply these changes to an instance of a prefab, click here.

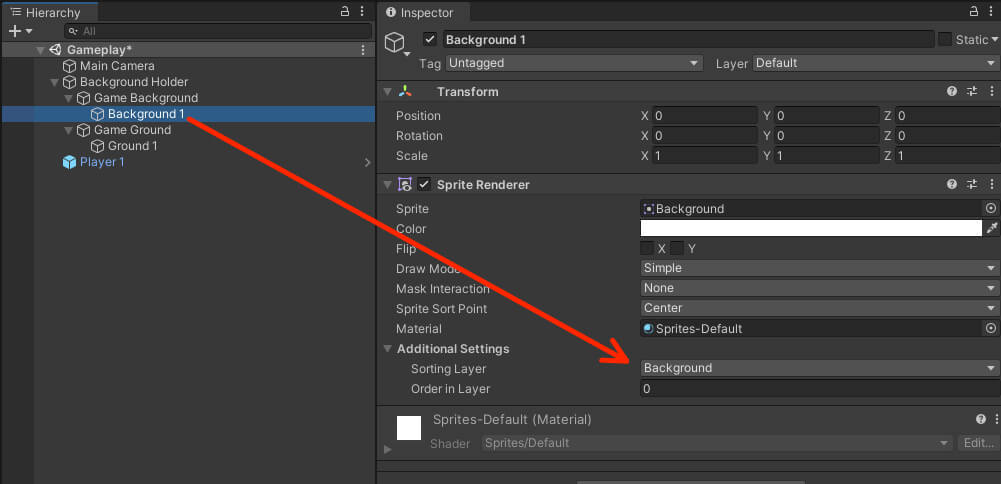
For the Background 1 game object set its Sorting Layer to Background:
Img 9
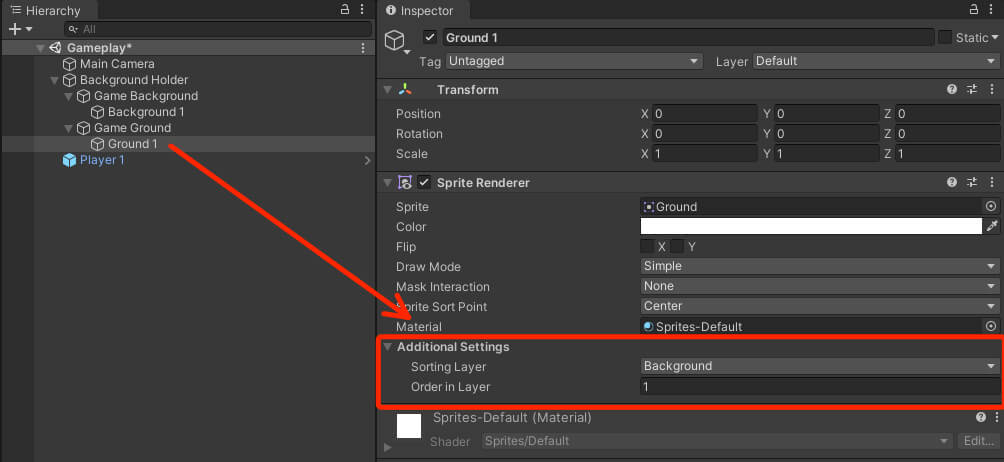
For the Ground 1 game object set the Sorting Layer to Background, but also set the Order in Layer to 1:
 
Img 10

Since the Background and the Ground game objects are both on the Background Sorting Layer, it can happen that the Background will be rendered on top of the Ground, which is not what we want.

When we set the Order in Layer to 1 for the Ground, then it will always be rendered on top of the Background.

You read more about that here.

Creating The Game Level Using The Snap Tool

Now that we have everything set up, we can create the level for our game. We are going to do it by duplicating the Background and the Ground game objects and repositioning them using the snap tool.

If you don’t know how to snap game objects together you can learn about it here.

You can start with the Ground or the Background game object, that is your preference:

You can create your level as large as you want it, that is up to you and it will not affect the outcome of the game.

Just make sure that you position the Background and Ground game objects so that there is no empty gap between them.

This is for the visual part of the game so that it doesn’t look weird, but it will not affect the outcome of the game.

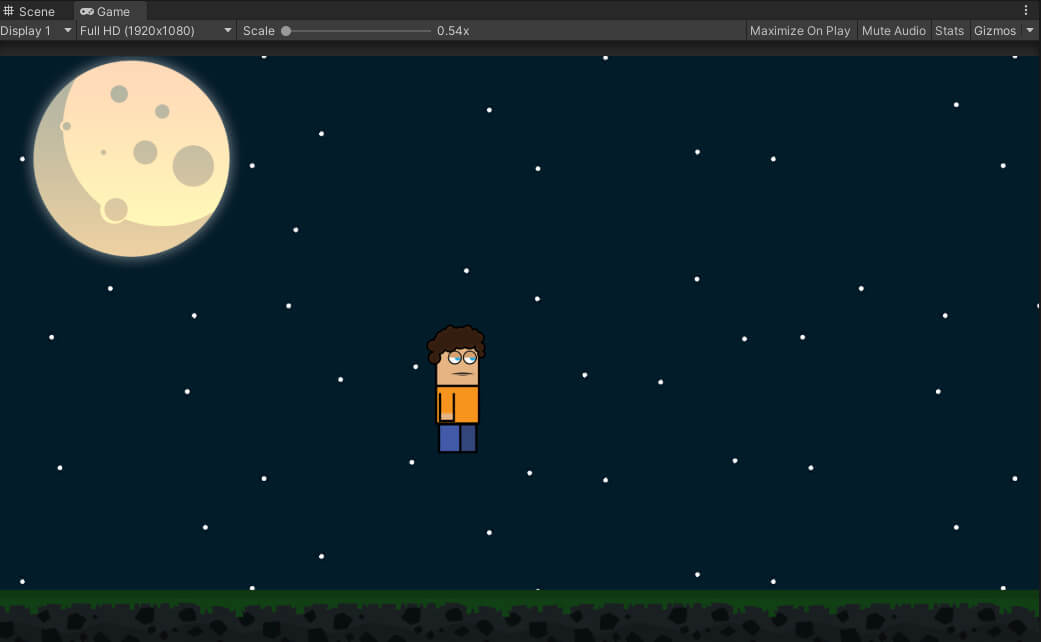
While we are talking about the game visuals, you can also add the Moon sprite in the game  and position it wherever you want, just make sure that you set him on the Background Sorting Layer and that the Order in Layer is greater than the one for the Background game objects:
Img 16


Adding Colliders To Game Objects

Now that we have the level ready let us add colliders to the Ground and the Player 1 game object so that we can create the player movement functionality.
 
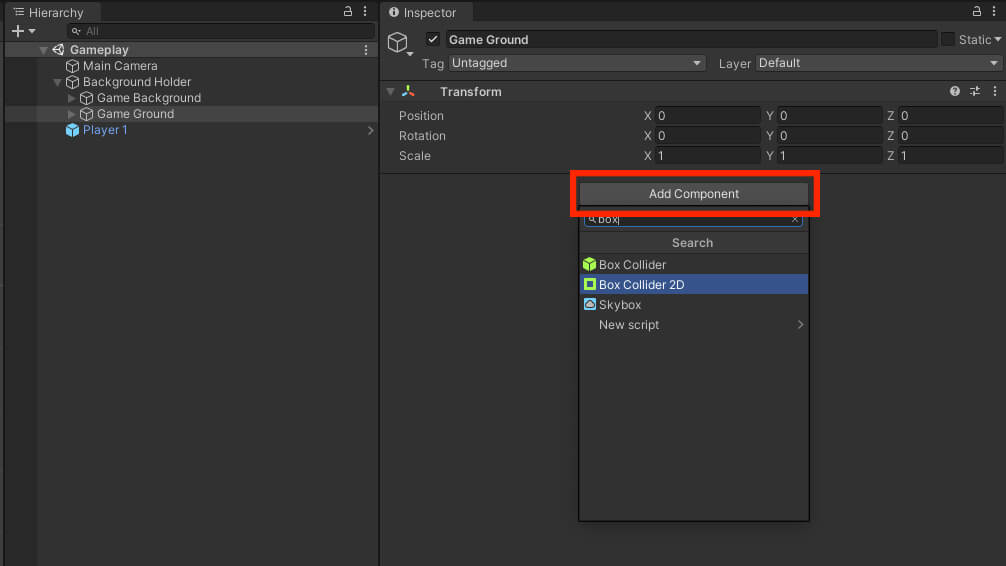
Starting with the Grounds, we are not going to add a collider to every copy of the Ground game object, instead we are going to attach the collider to the Game Ground parent game object and resize it so that it covers all Ground child objects.
 
Select the Game Ground game object in the Hierarchy, and filter for the box collider component. Make sure that you attach Box Collider 2D to the Game Ground object:
 
Img 11
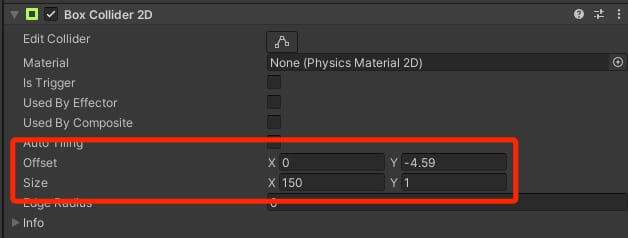
Of course, we need to resize the collider so that it covers all Ground child objects as we mentioned, so set the size of the Box Collider 2D for the Game Ground to the following values:
 
Img 12
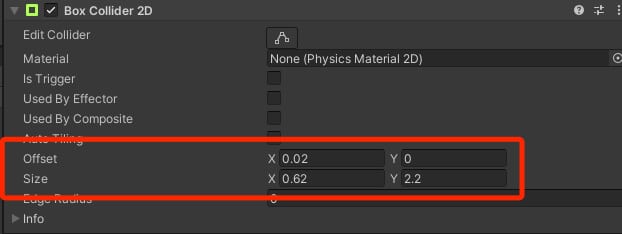
Now that we have that out of the way, we can add a collider to the Player 1 object. Make sure that is a Box Collider 2D and set the following values for the size:
 
Img 13

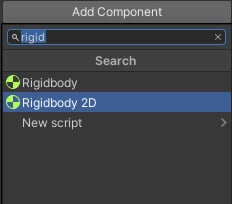
We are also going to attach a Rigidbody2D to the Player 1 object so that it applies gravity to the Player 1:
Img 14

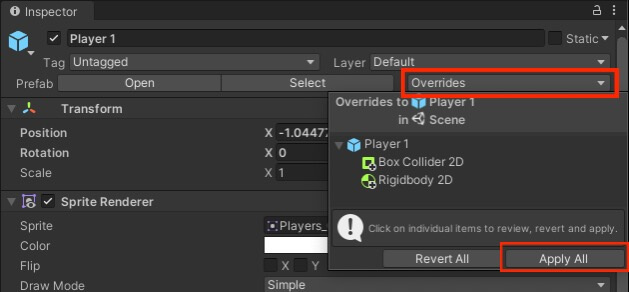
Don’t forget to apply all these changes to the original prefab by clicking the Apply All button:
Img 15

Also remember that all changes we make to Player 1 game object you should make the same changes to Player 2 game object so repeat the same steps above for Player 2 object.

Where To Go From Here

In this part of the tutorial we created the game level by duplicating the Background and Ground game objects and connecting them together using the snap tool.
 
We also attached the colliders to the Ground object and the player characters.
 
In the next tutorial titled Player Movement And Jump Functionality we are going to create the Player script that will make the player character move, jump, animate and we will create the camera follow script to make the Main Camera game object follow the player character in the game.
 

Leave a Comment