Create A 2D Game With Unity Engine Part 1: Animating The Player Characters And Creating Their Prefabs

Table of Contents

Create A 2D Game With Unity Engine Part 1: Animating The Player Characters And Creating Their Prefabs

Reading Time: 6 minutes
Level: Beginner
Version: Unity 2020.3.1 LTS

Help Others Learn Game Development

In this tutorial we are going to create a cool 2D game that I call Monster Chase. The game is simple yet it contains a lot of features such as main menus, selecting between two playable characters, surviving a wave of monsters and more.

Here is a short preview of the game that we will create:

Download Assets And Complete Project For This Tutorial

To follow along with this tutorial, please download the assets by clicking the green Download assets button above.

In the downloaded folder you will find the assets for the tutorial and the complete project that you can use as a reference to inspect the code.

Important Information Before We Start

I’ve labeled this tutorial as beginner, however, this is not a tutorial for complete beginners.
 
I expect you to know your way around Unity and its interface. I also expect that you know the basics and a little above basics of coding in C# and I expect that you already worked though any Unity tutorial and you created a few basic games.
 
If you this is not you, then please go through my C# tutorial series starting with variables and my Rainy Knifes tutorial before you start learning from this tutorial.
 
Now that we have that out of the way, we can start with our game.
 

Importing Assets

I’ve already created a new 2D project and named it Monster Chase Project.
 
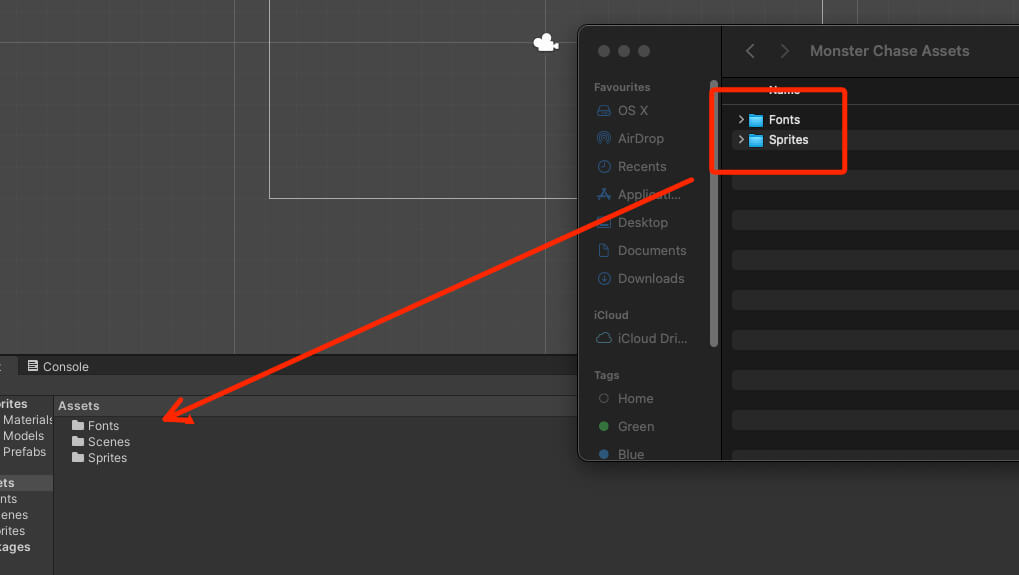
As always we will start by importing the assets in the project. From the downloaded file open the Monster Chase Assets folder and drag the folders you find inside in the project:
 
Img 1
If you followed any of my tutorials, videos or written, you know that I emphasize a lot on the fact that you should always organize your project in the best possible way.
 
The reason for this is simple, once your project gets to a larger stage it will be hard to navigate through all the folders and files when you are trying to locate something if you didn’t organize the project well.
 
But if you start organizing the project from the very start then you will not have any issues down the road when you project gets larger, so keep that in mind.
 

Preparing The Animator Controller For Player Character

In this game we will be able to choose between two playable characters. You can locate their sprite sheet in the Assets -> Sprites folder.

The name of the sprite sheet is Players. Select it and make sure that you slice all individual pieces of that sprite sheet.

If you don’t know how to do it, you can follow this tutorial that will show you step by step how to slice a sprite sheet in Unity by clicking here.

Now that we have the sprite sheets, in the Project tab create a new folder and give it a name Animations. Inside of that folder create a new folder and give it a name Player Animations.

And inside of that folder create two more folders and name them Player 1 Animations and Player 2 Animations.

I know, I know it’s a lot of folders, but again, this is how you organize your project so that later you know exactly where every file is located.

Inside the Player 1 Animations Right Click -> Create -> Animator Controller to create a new Animator Controller that will be used to control the animations of player 1 and give that Animator Controller name Player 1 Controller:
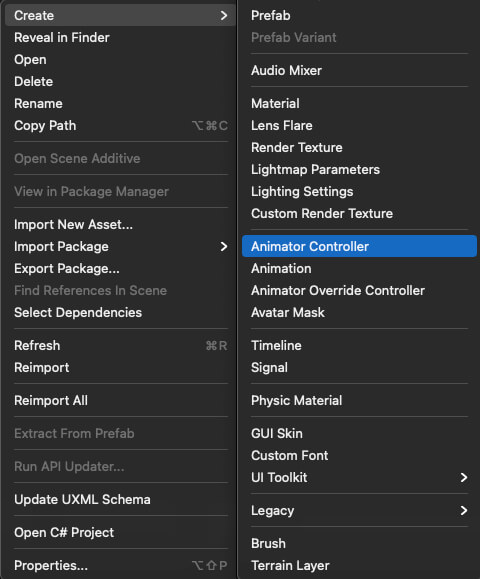
Img 5

Next, from the Players sprite sheet, drag the first frame of the first player inside the Scene tab:
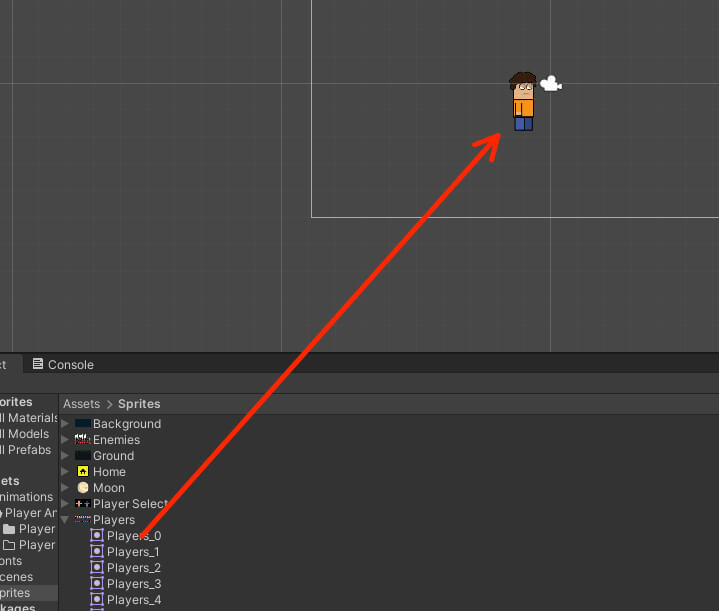
Img 2

Select the new player game object in the Hierarchy tab and rename it to Player 1.

Next, attach an Animator component on him by clicking on the Add Component button in the Inspector tab and filter for animator:
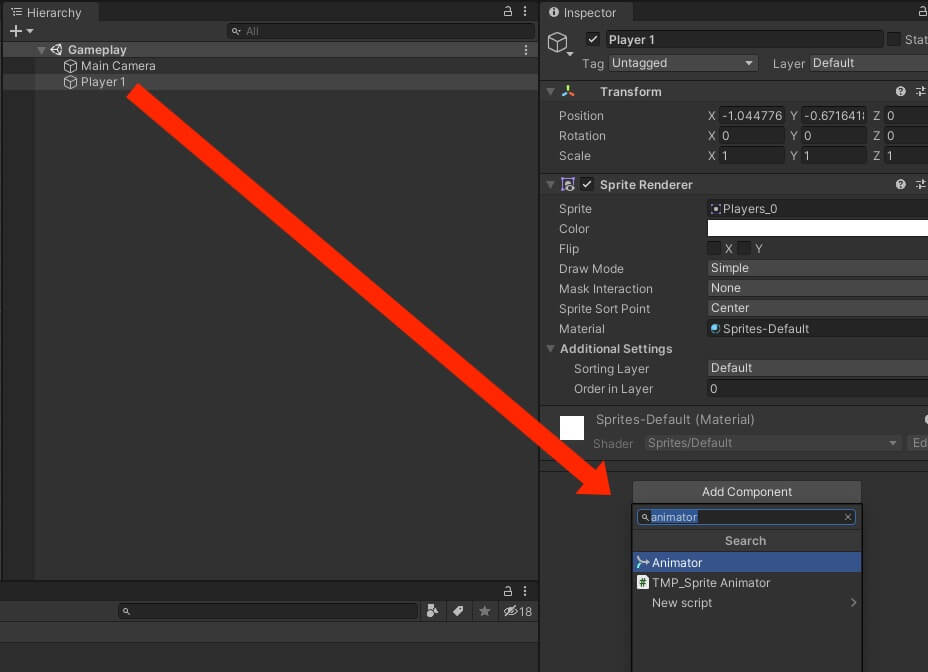
Img 3
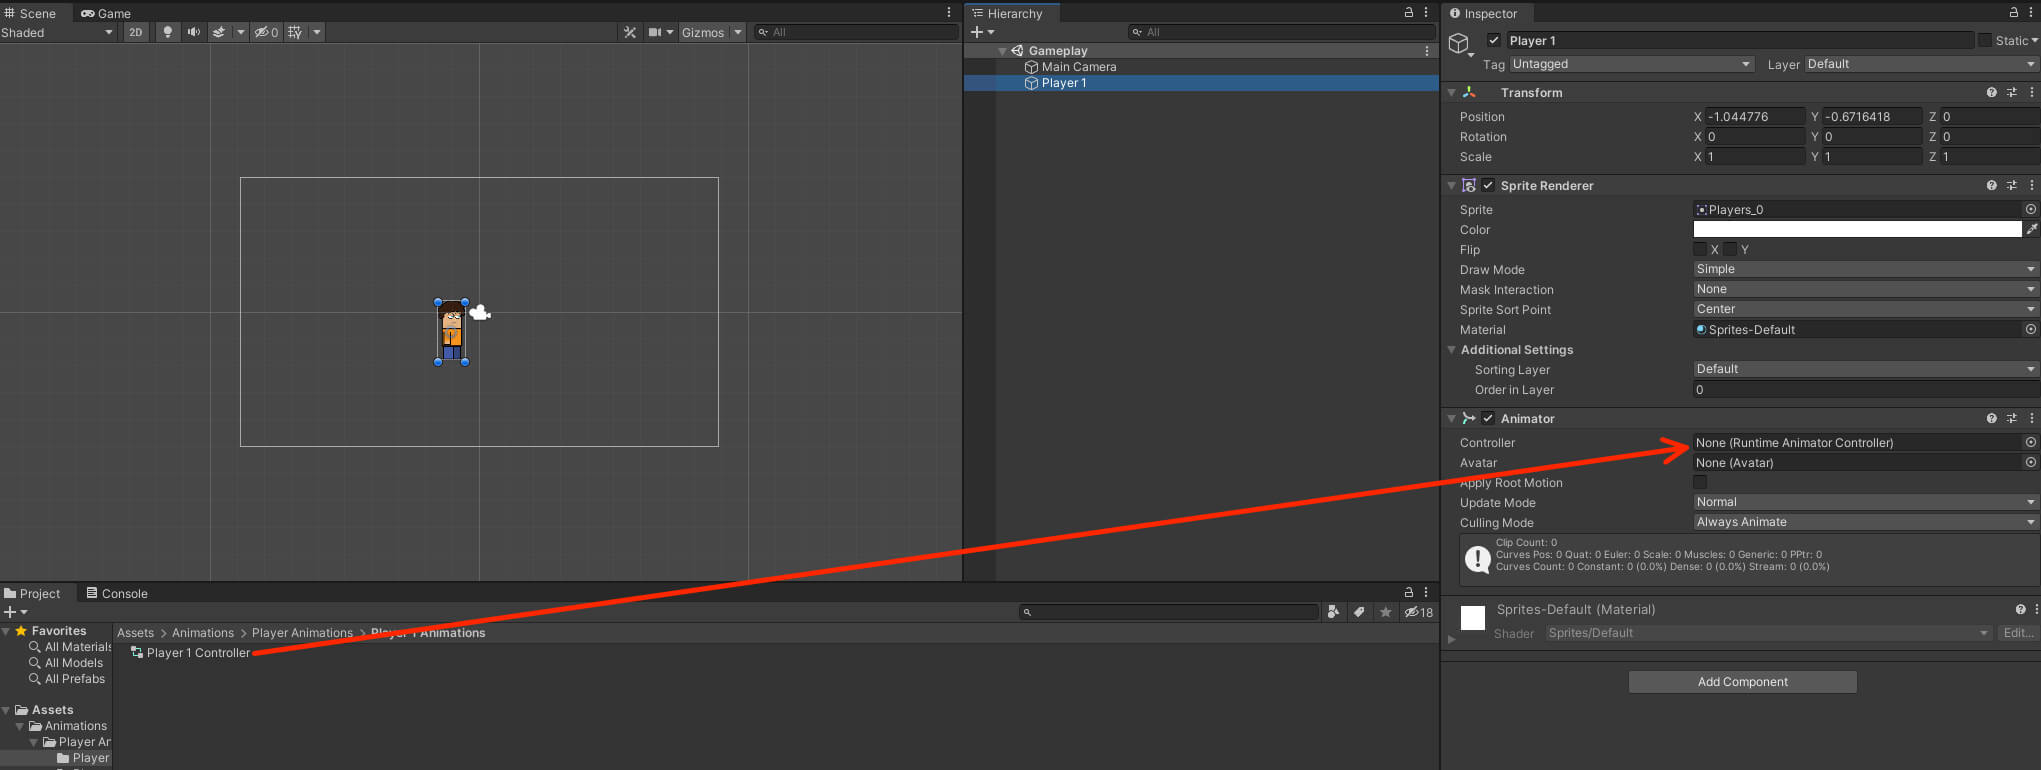
Now drag the Player 1 Controller that we created in the Controller field for the Animator component for our Player 1 game object:
 
Img 4


Animating The Player Character

To create the animations for the player character we need the Animation and Animator tabs.

You can follow this guide if you need to refresh your knowledge about how to animate sprites in Unity by clicking here.

Our player character is going to have two animation clips, Idle and Walk, so make sure you create them:

Img 6

Also make sure that you save those animation clips inside the Assets -> Animations -> Player Animations -> Player 1 Animations folder. You can do all that by following the guide link above.

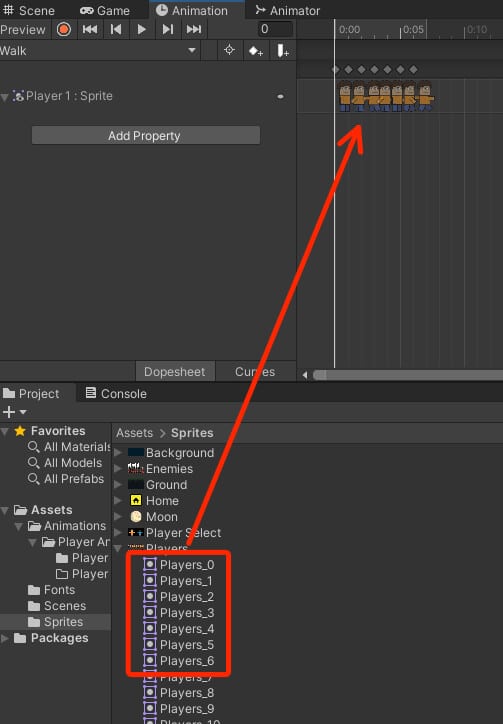
Now that we have the animation clips, let us add frames that will form the player animation. For the Idle clip drag the first frame from the Players sprite sheet:
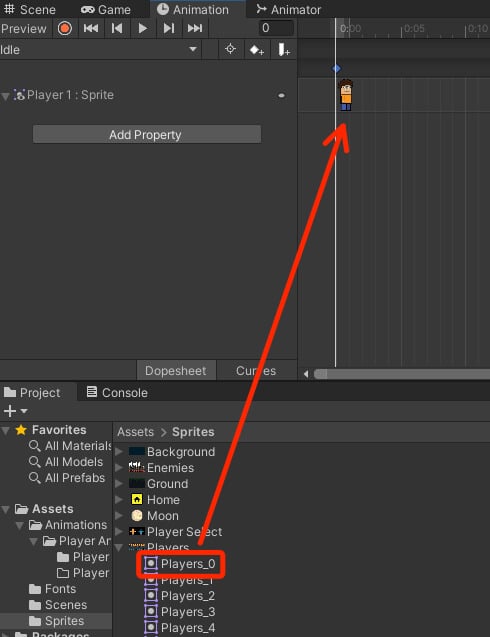
Img 7
And for the Walk clip drag the first 7 frames from the Players sprite sheet:
 
Img 8


Creating Transitions For Player Character Animations
The animation transitions are used to create conditions when specific animations will be played.
 
If you need to refresh your knowledge about animation transitions and everything that goes with them, click here.
 
When we are standing still, player’s idle animation will be played. But when we start moving, then the walk animation will be played.
 
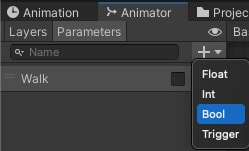
To achieve this effect we first need to create a bool parameter inside the Animator tab:
 
Img 9 FIXED
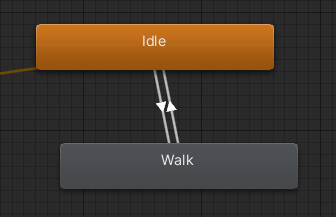
Next, we are going to create two transitions for the animations. One is going to be from Idle to Walk, and the other is going to be from Walk to Idle:
 
Img 10
The bool Walk parameter is going to be the condition for both transitions, but the value is going to be different.
 
For the transition from Idle to Walk the value is going to be true:
 
Img 11
And for the transition from Walk to Idle it is going to be false:
 
Img 12


Creating Player Character Prefabs

Now that we have the initial set up for the player’s animations, we can create a prefab out of the player character.

If you don’t know what is a prefab and what is the purpose of a prefab then make sure that you learn that by clicking here.

In the Project tab inside the Assets top folder, Right Click -> Create -> Folder. Give that folder name Prefabs and inside create a new folder and name it Player Prefabs.

And now, drag the Player 1 game object from the Hierarchy tab inside the Player Prefabs folder:

Img 13
We will need both player characters as prefabs because we want to create a system where the user can choose if he wants to player the game with Player 1 or Player 2, and based on his selection we will spawn either Player 1 or Player 2 in the game.
 

#1 Assignment For The Tutorial

Speaking of Player 2 we didn’t create any animations for him nor did we create the Player 2 game object.
 
Your assignment is to create the Player 2 character and animate him the same way we did with Player 1 and when you are finished create a prefab out of the Player 2 game object.
 
Practicing on your own is the best way to learn, and this is what I incorporate in my tutorials. I always give assignments to test your knowledge or to make sure you really learned the topic at hand.
 
If you need any help, you can just follow the same steps we did in this tutorial only this time use the second player character instead of the first one.
 

Where To Go From Here

In this part of the tutorial we created our player characters, animated them, and we created prefabs out of them.
 
In the next tutorial Creating The Game Level we are going to create the game level using the snap tool.
 

Leave a Comment