In part 1 of this tutorial series we created the RunnerCharacter C++ class and we created the movement behaviour for our player actor.
We also created the BP_RunnerCharacter blueprint out of the RunnerCharacter class and we created a game mode blueprint which allowed us to set the Default Pawn Class to BP_RunnerCharacter.
In this part, we are going to create the Spike and BaseLevel classes and use them to create obstacles and level parts for our game.
Creating The Spike Class
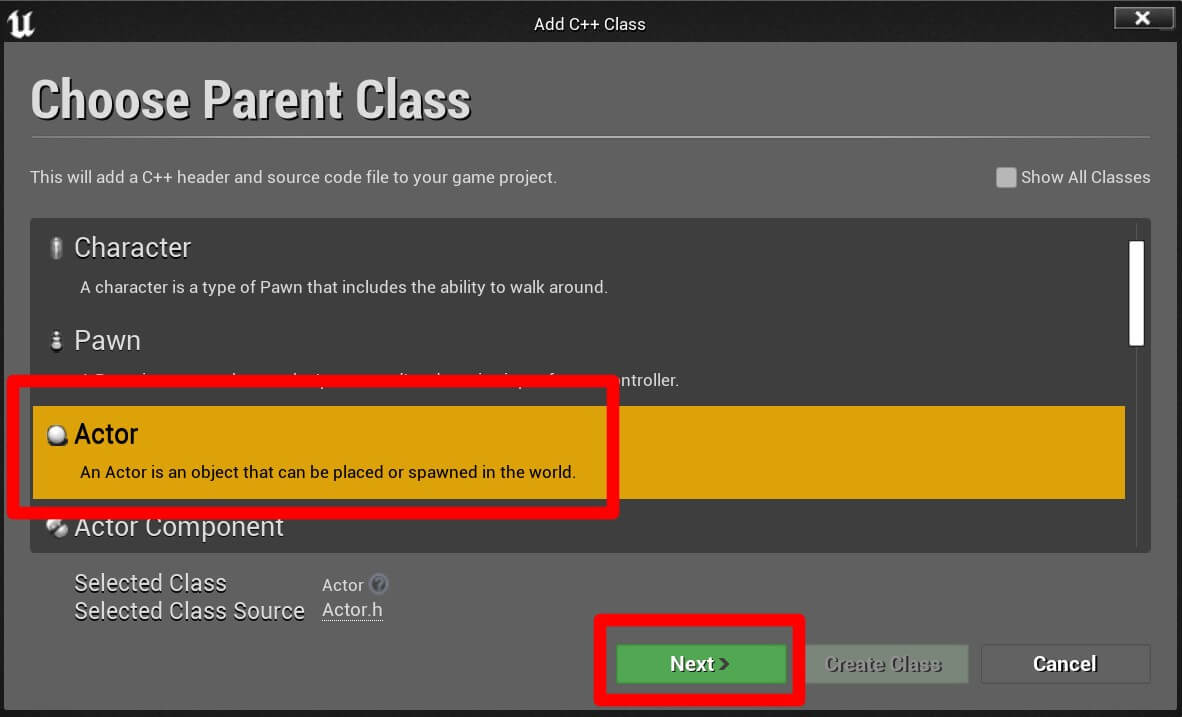
In the C++ Classes-> SideRunner folder, Right Click -> New C++ Class. From the pop up window select the Actor as the parent class and click on Next:
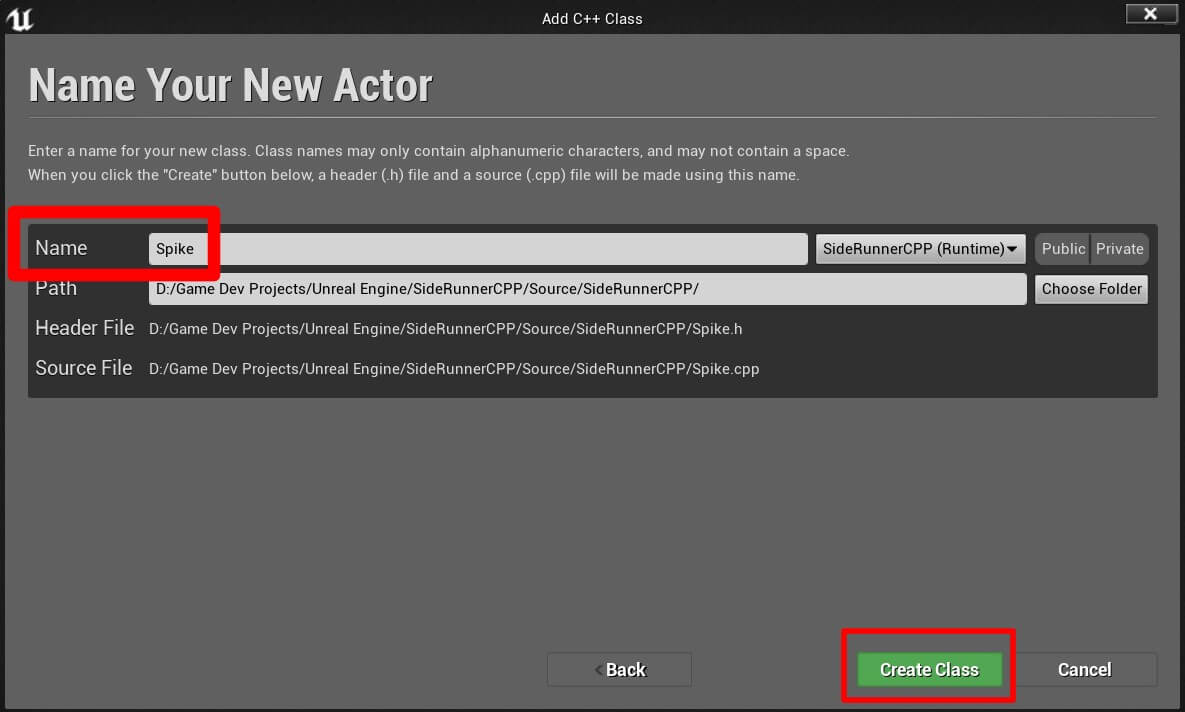
Name the new class Spike and click on Create Class button:
Creating Spike Obstacle Blueprint
Now that we have the class for the spike obstacle, we can create blueprints out of it. In the Content -> Blueprints folder, Right Click -> New Folder and name the new folder Obstacles.
Inside the Obstacles folder create a blueprint and name it BP_Spike, make sure that you inherit the Spike class that we just created.
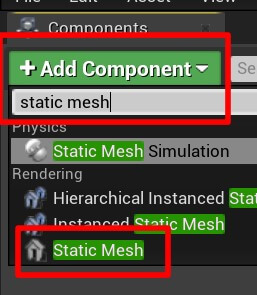
Open the BP_Spike blueprint in the editor and in the Components tab click on the Add Component button and search for static mesh:
Change the name of the Static Mesh component to Spike, and in the Details tab for the Static Mesh settings, click on the drop down list and filter for Shape_QuadPyramid model and select it:

In the Material settings, which is under the Static Mesh Settings, click on the drop down list and filter for M_Brick_Clay_New material and apply it to the pyramid model:

In the Transform settings set the Z value of the Location property to -50:

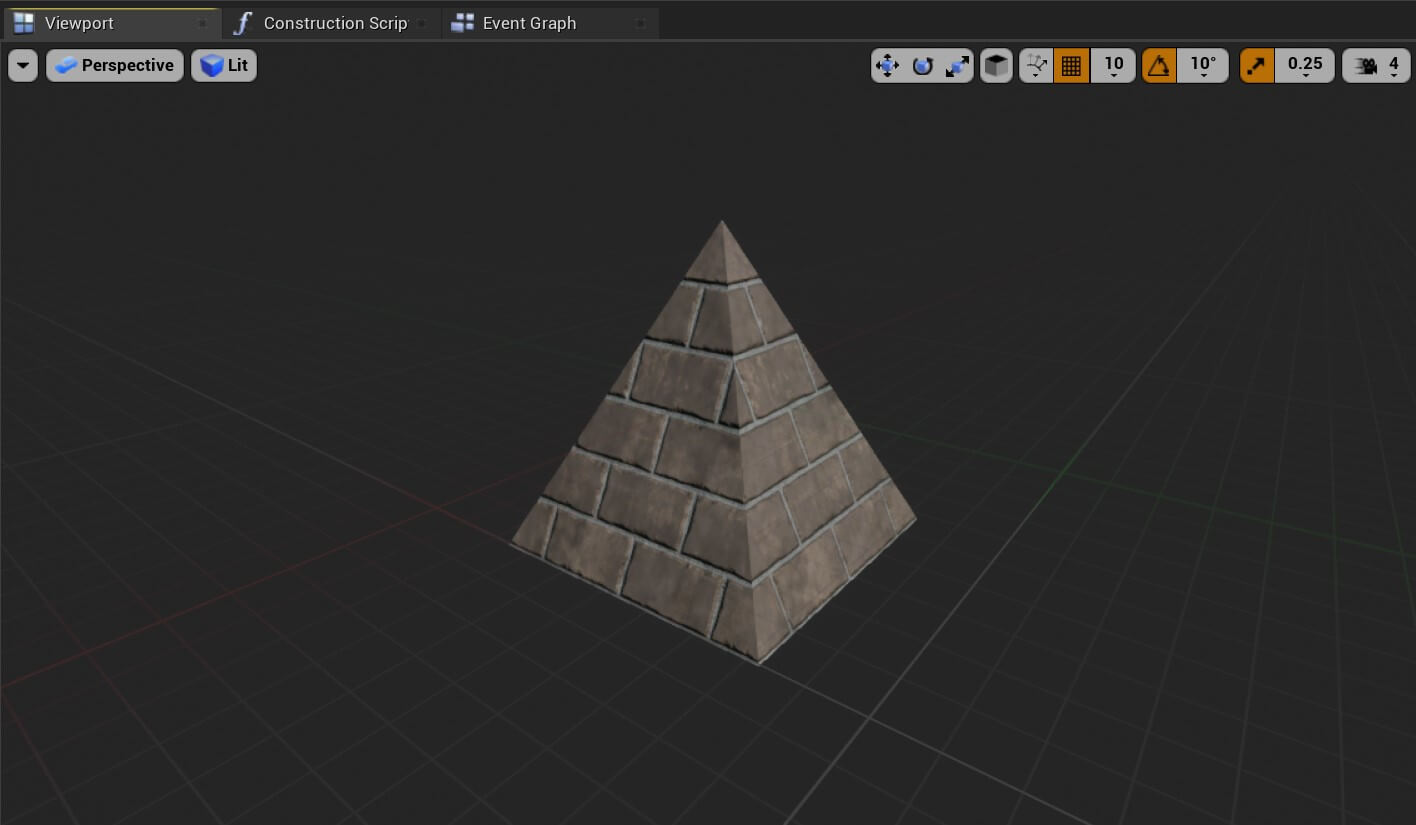
Don’t forget to press Compile and Save. This is how the spike looks like when we are finished:
Creating Custom Collision Presets
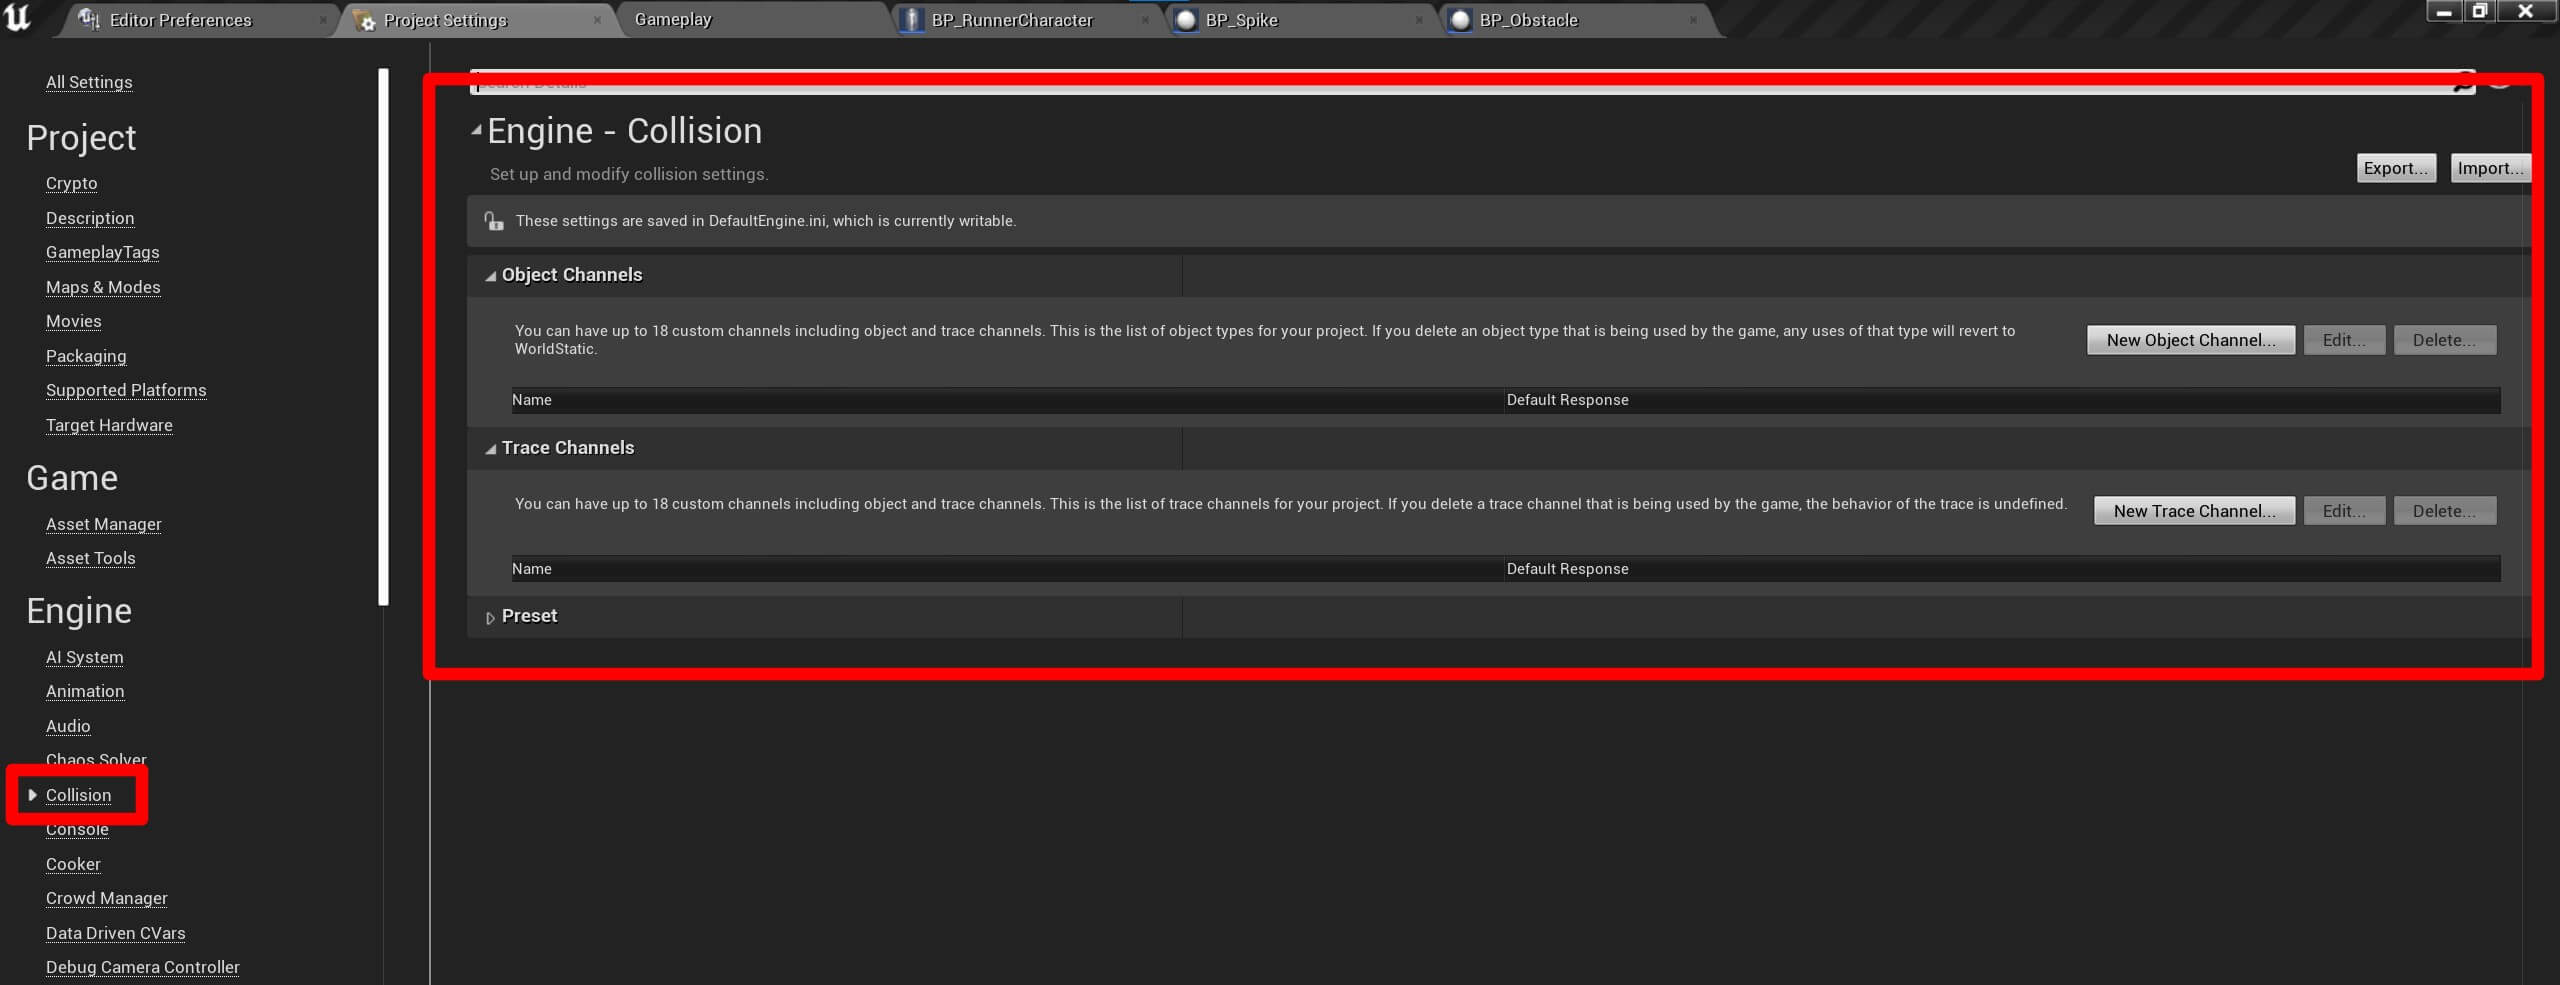
Under Object Channels, click on New Object Channel button:

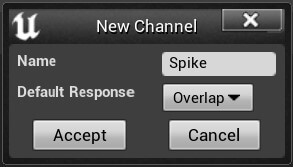
In the New Channel window, set the name for the channel to Spike and Default Response to Overlap:
Actors And Custom Object Channels
Open the BP_Spike blueprint in the editor, select the Spike Static Mesh component in the Components window and under Details tab locate the Collision settings:
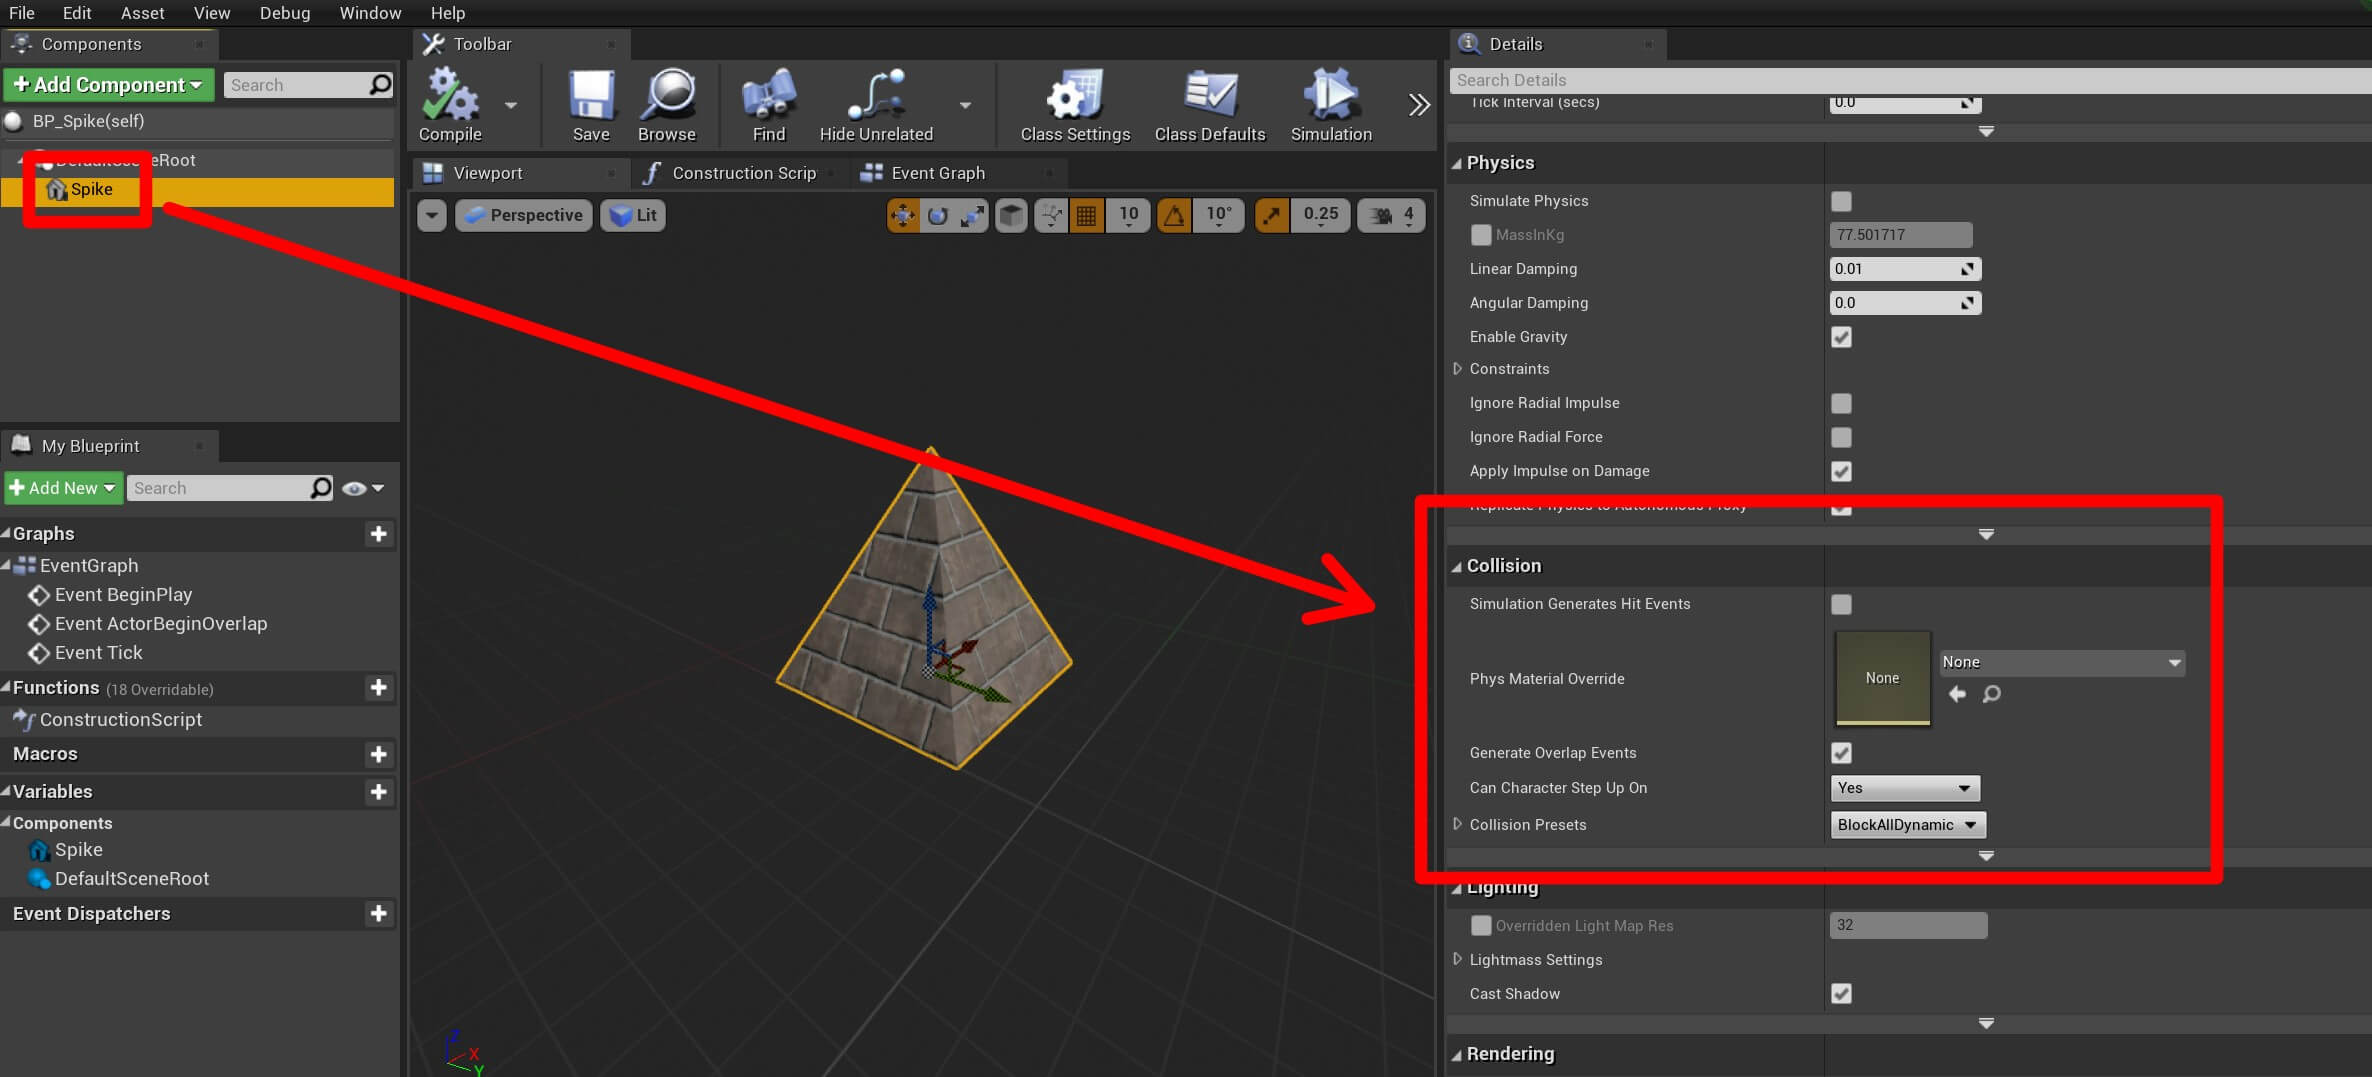
Click on the drop down list for the Collision Presets and select Custom from the list.
For the Collision Enabled list, select Query Only (No Physics Collision) and for the Object Type list, select Spike:
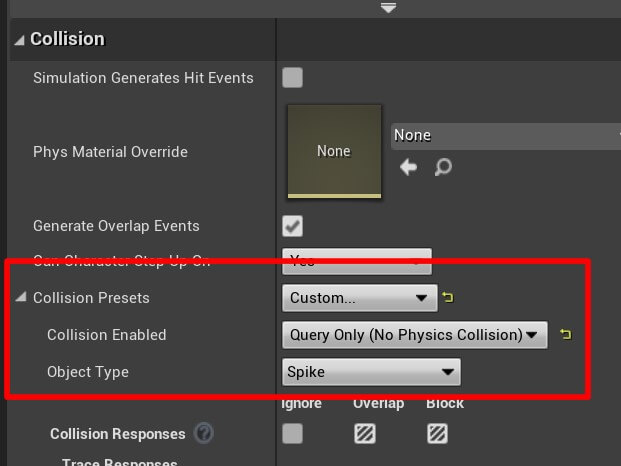
The Collision Enabled option allows us to specify if the actor will be able to collide and register the collision with other actors.
For the Spike obstacle we specified that we only want to register the collision but we don’t want the physics collision to happen e.g. the Spike will not be counted as a solid body.
For the Collision Responses we are going to make the Spike overlap everything except for the Camera where we are going to set Ignore:
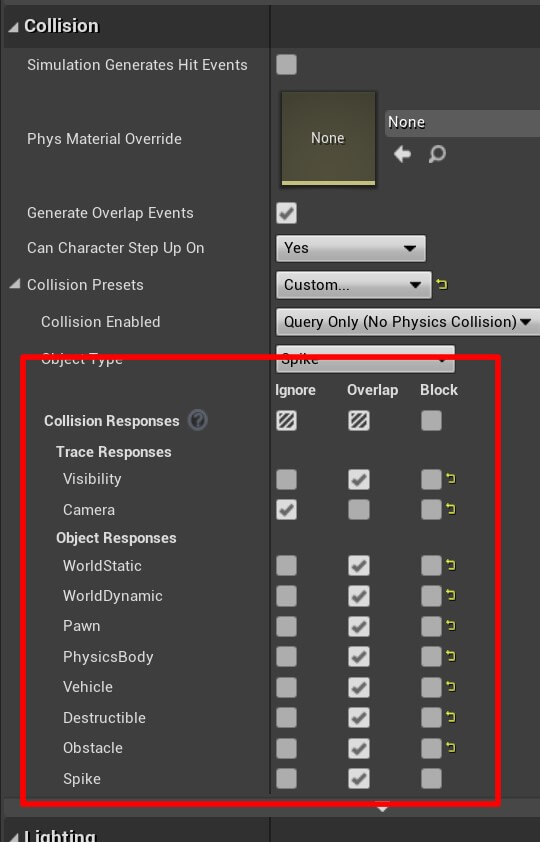
This will make the Spike blueprint overlap with blueprints that are using the specified Collision Presets, except for the Camera as it will ignore the collision with the camera actor.
Don’t forget to press Compile and Save so that the changes we made to BP_Spike will take effect on the blueprint.
Base Level Class
The next step is to create the level parts that will be spawned using a method called procedural level generation.
We will start with creating a new class. In the C++ Classes -> SideRunner folder, Right Click -> New C++ Class.
Select Actor as the parent class and click on Next:
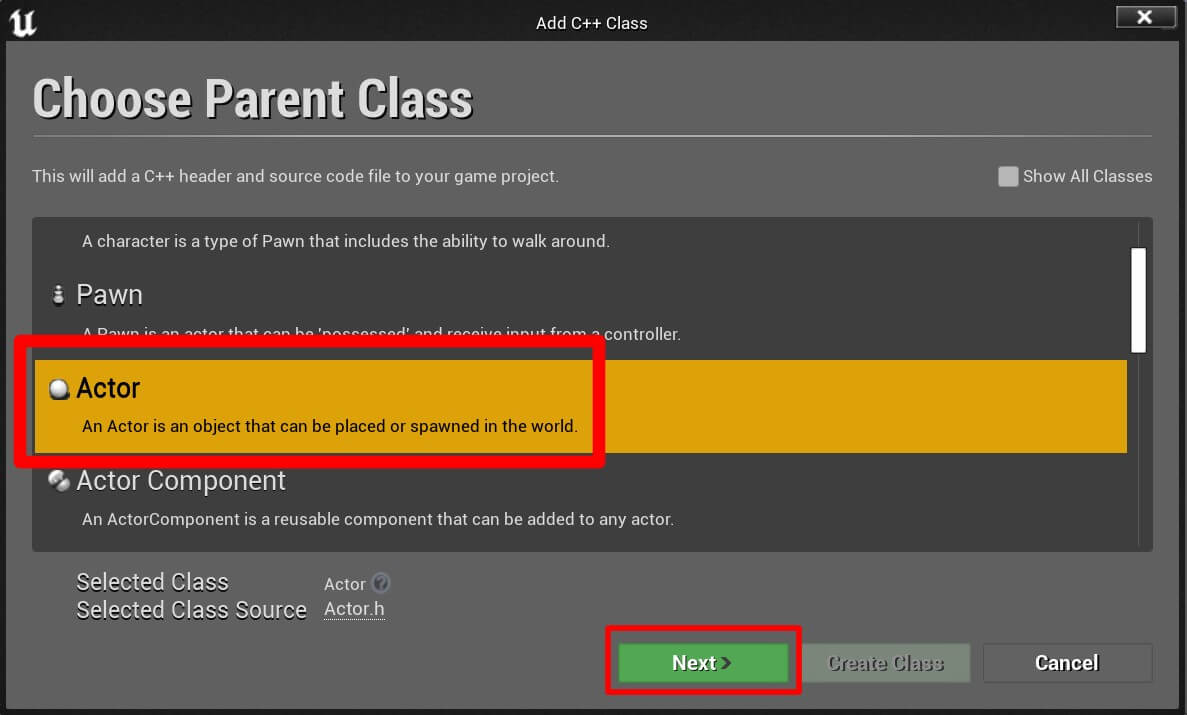
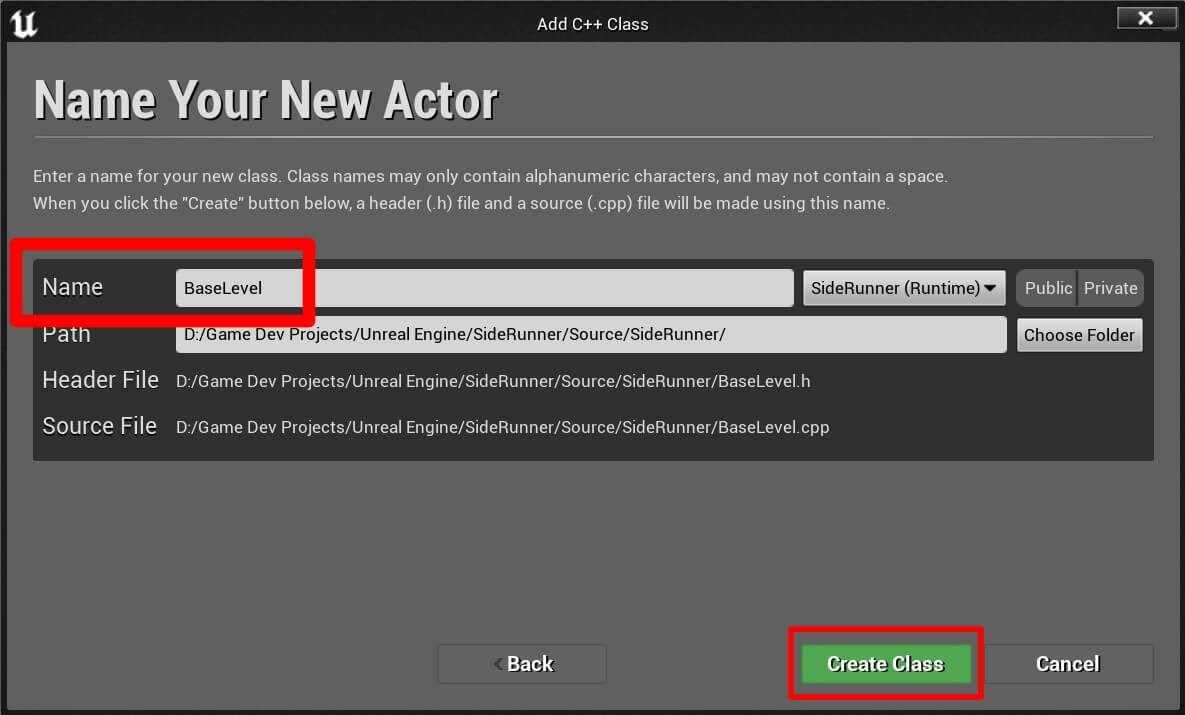
In the next window, name the class BaseLevel and click on Create Class button:
class UBoxComponent;
					protected:

	UPROPERTY(BlueprintReadWrite, EditAnywhere, Category = "My Triggers")
		UBoxComponent* Trigger;

	UPROPERTY(BlueprintReadWrite, EditAnywhere, Category = "My Triggers")
		UBoxComponent* SpawnLocation;
We created two UBoxComponents variables with Trigger and SpawnLocation as their names.
We will use the Trigger UBoxComponent to detect when the player actor collides with the BaseLevel actor and then we will spawn a new level part, and we will use the SpawnLocation UBoxComponent and access its world location, and use that value as the spawn location for the new level part.
This will be more clear when we create the level and you see where we will position the Trigger, and where we will position the SpawnLocation UBoxComponent.
In the previous part of this tutorial series, we introduced the UPROPERTY C++ macro and we said that it helps expose variables in the blueprint instance.
The BlueprintReadWrite parameter, will allow us to read e.g. get the value of this variable in the blueprint, and it will allow us to write e.g. change the value of this variable in the blueprint.
Basically it will allow us to access and manipulate this variable in the blueprint of this class and in other blueprints.
The EditAnywhere parameter indicates that this property can be edited by property windows, basically it will allow us to edit the value of this variable directly in the Details tab in the blueprint editor.
					public:

	UBoxComponent* GetTrigger();
	UBoxComponent* GetSpawnLocation();
Before we proceed to the BaseLevel.cpp file, I am going to leave the full BaseLevel.h file class below as a reference in case you want to copy paste it in your project:
					#pragma once

#include "CoreMinimal.h"
#include "GameFramework/Actor.h"
#include "BaseLevel.generated.h"

class UBoxComponent;

UCLASS()
class SIDERUNNER_API ABaseLevel : public AActor
{
	GENERATED_BODY()

public:
	// Sets default values for this actor's properties
	ABaseLevel();

protected:
	// Called when the game starts or when spawned
	virtual void BeginPlay() override;

public:
	// Called every frame
	virtual void Tick(float DeltaTime) override;

protected:

	UPROPERTY(BlueprintReadWrite, EditAnywhere, Category = "My Triggers")
		UBoxComponent* Trigger;

	UPROPERTY(BlueprintReadWrite, EditAnywhere, Category = "My Triggers")
		UBoxComponent* SpawnLocation;

public:

	UBoxComponent* GetTrigger();
	UBoxComponent* GetSpawnLocation();

};
#include "Components/BoxComponent.h"
As we already mentioned, we use forward declaration in the .h file and then we use the #include to include the class we want to use.
At the bottom of the file, add the following lines of code:
					UBoxComponent* ABaseLevel::GetTrigger()
{
	return Trigger;
}

UBoxComponent* ABaseLevel::GetSpawnLocation()
{
	return SpawnLocation;
}
These lines are going to implement the two functions we declared in the .h file, you can also implement the functions by Right Click -> Quick Actions And Refactorings -> Create Declaration / Definition on the function name.
The GetTrigger function will return the Trigger variable and the GetSpawnLocation will return the SpawnLocation variable that we declared.
Make sure that you compile the code by holding CTRL + SHIFT + B or going to Build -> Build Solution, or you can do it from Unreal Engine editor as well.
					#include "BaseLevel.h"

#include "Components/BoxComponent.h"

// Sets default values
ABaseLevel::ABaseLevel()
{
 	// Set this actor to call Tick() every frame.  You can turn this off to improve performance if you don't need it.
	PrimaryActorTick.bCanEverTick = true;

}

// Called when the game starts or when spawned
void ABaseLevel::BeginPlay()
{
	Super::BeginPlay();

}

// Called every frame
void ABaseLevel::Tick(float DeltaTime)
{
	Super::Tick(DeltaTime);

}

UBoxComponent* ABaseLevel::GetTrigger()
{
	return Trigger;
}

UBoxComponent* ABaseLevel::GetSpawnLocation()
{
	return SpawnLocation;
}
Creating The Base Level Blueprint
In the Content -> Blueprints folder, Right Click -> New Folder and name it Levels. In the Levels folder Right Click -> Blueprint Class.
From the search bar for all classes filter for base level and select it as the parent class:
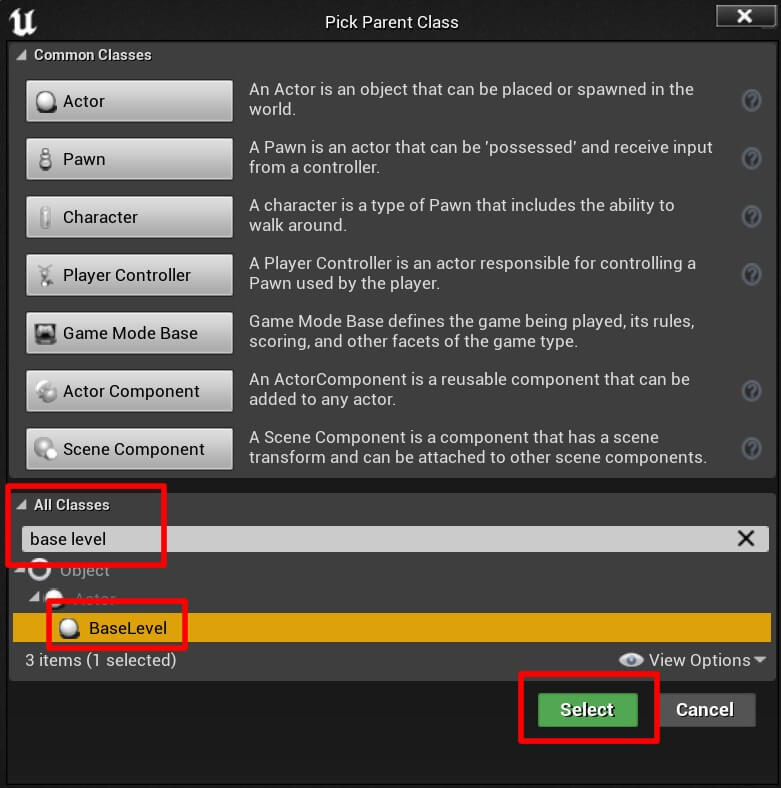
Name the blueprint BP_Level1. As you can already assume because of the number, we are going to have multiple level parts, from 1 to 10 to be more precise, and the one we just created is the first level part.
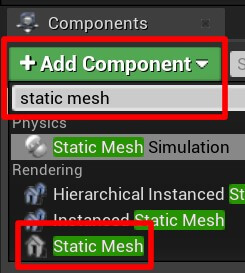
First, we are going to add a Static Mesh component. In the Components tab click on the Add Component button and filter for static mesh:
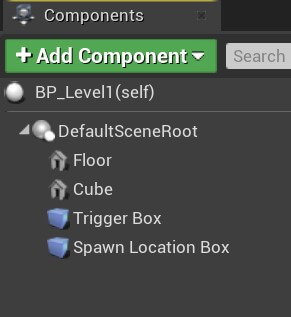
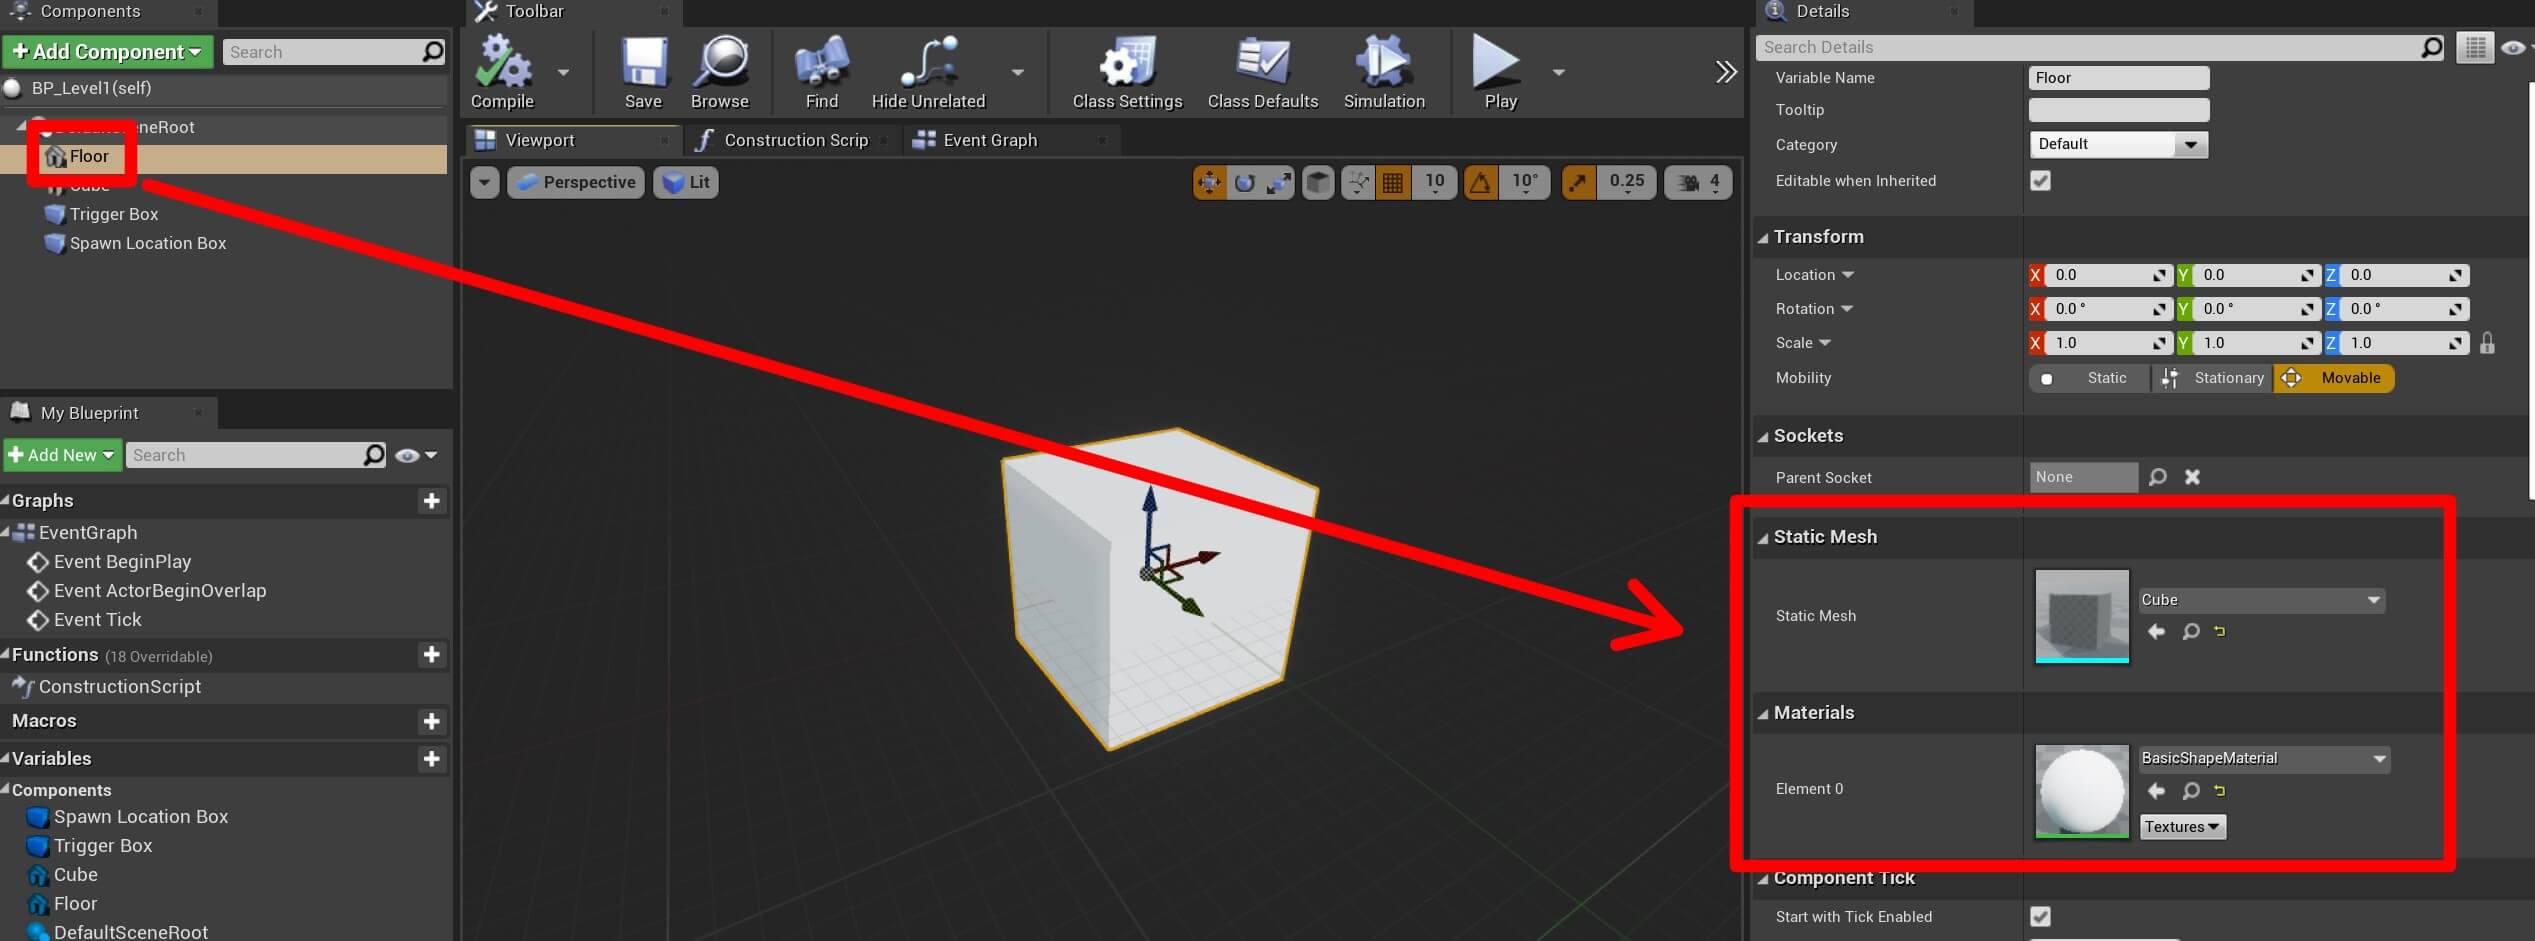
Next, we are going to resize the Floor mesh by changing its scale. Make sure that you unlock the Lock icon on the right side of the scale values before you change them, because the values are going to be different for all 3 axis:

If you are wondering why we need to make sure that the Lock icon is unlocked when we are changing the scale values of an actor, then click here.
Now select the Cube Static Mesh, and in the Details tab under Static Mesh and Materials select the same Cube model and the same BasicShapeMaterial as we did for the Floor mesh.
We are not going to change the scale values for the Cube mesh but we are going to change the Z Location to 90:

Moving on the Box Collision components, select the Trigger Box component and set the following values for its Location and Scale in the Transform property:


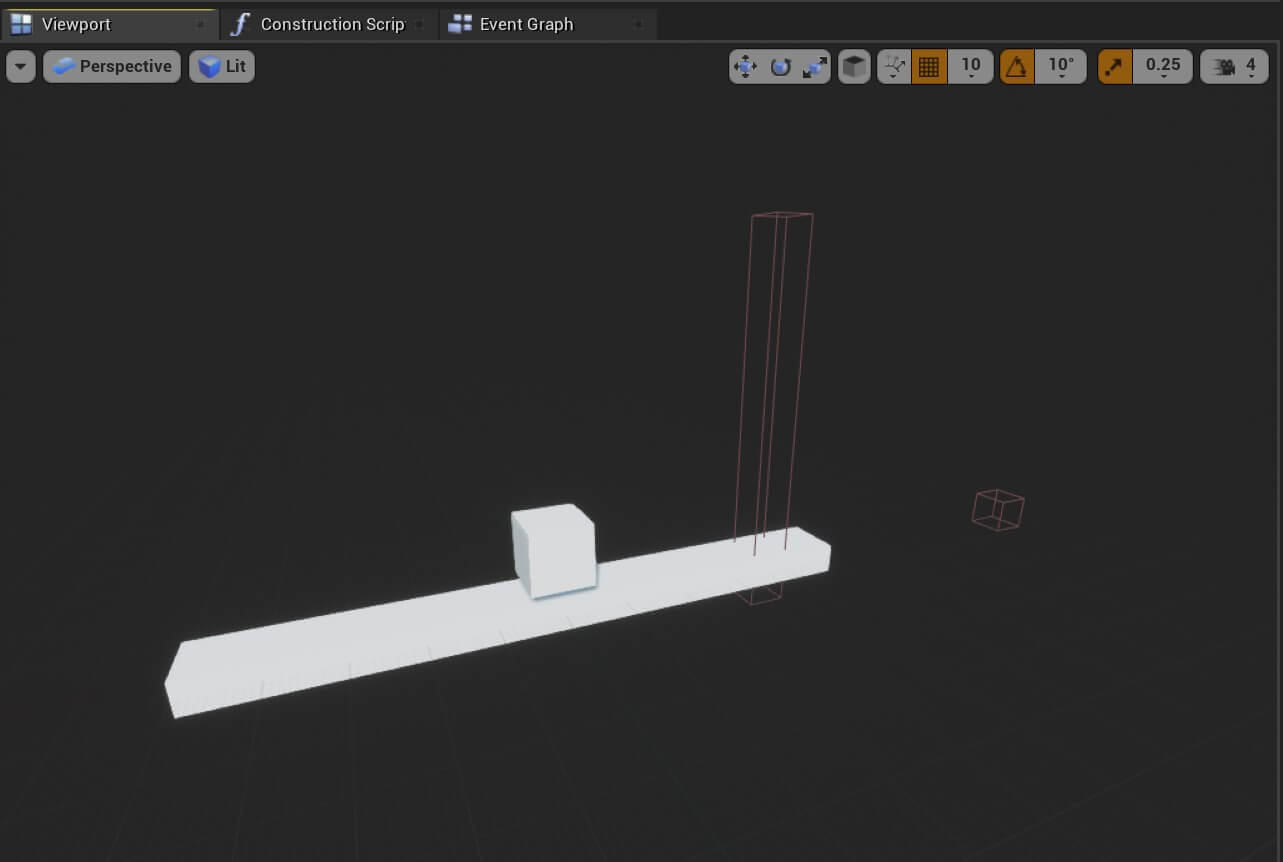
As I already mentioned, we are going to use the Trigger Box component to detect when the player actor collides with it, when that happens, we will spawn a new level actor using the Spawn Location Box as the position where the new level actor will be spawned.
Setting The Class Variable Values In The Blueprint Editor
Before we proceed to create more level parts, we need to set the values for the Trigger and SpawnLocation variables that we declared in BaseLevel.h.
To do this, go in the Event Graph tab in the BP_Level1 blueprint, and Right Click in the graph and search for spawn location:
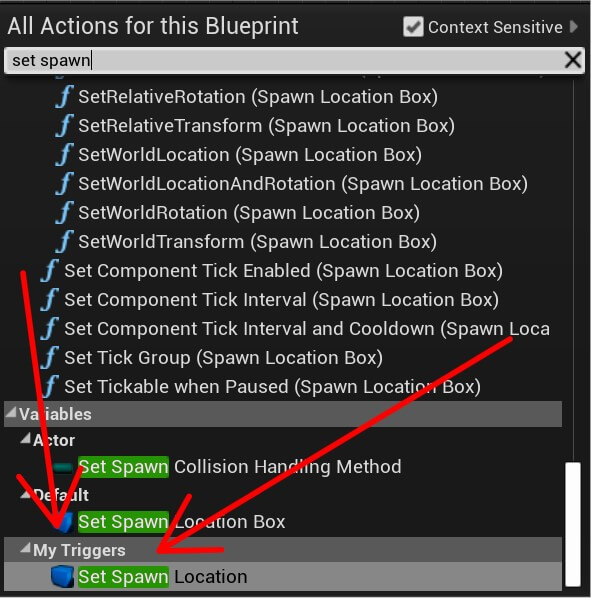
You will notice that the category under which you can find Set Spawn Location is called My Triggers, does this sound familiar?
We declared that in the UPROPERTY when we declared the SpawnLocation variable:
					UPROPERTY(BlueprintReadWrite, EditAnywhere, Category = "My Triggers")
		UBoxComponent* SpawnLocation;
The last parameter in UPROPERTY is the Category which takes a string value and we set that value to My Triggers, and we just saw where does this reflect.
You can always use the Category property to define a category for a specific variable(s) and then you will be able to locate that variable(s) under the specified category when you are searching for it in the blueprint editor.
Speaking of UPROPERTY parameters, we are only able to access the SpawnLocation variable in the blueprint editor because we added the BlueprintReadWrite parameter in UPROPERTY.
If you remove BlueprintReadWrite from UPROPERTY you will not be able to locate the SpawnLocation variable. So, if you want to expose the variables you declare in a C++ class, use the UPROPERTY macro and add BlueprintReadWrite parameter inside.
Now to set the Spawn Location variable, drag the Spawn Location Box collision from the Components tab in the graph and connect it to the Set Spawn Location value:
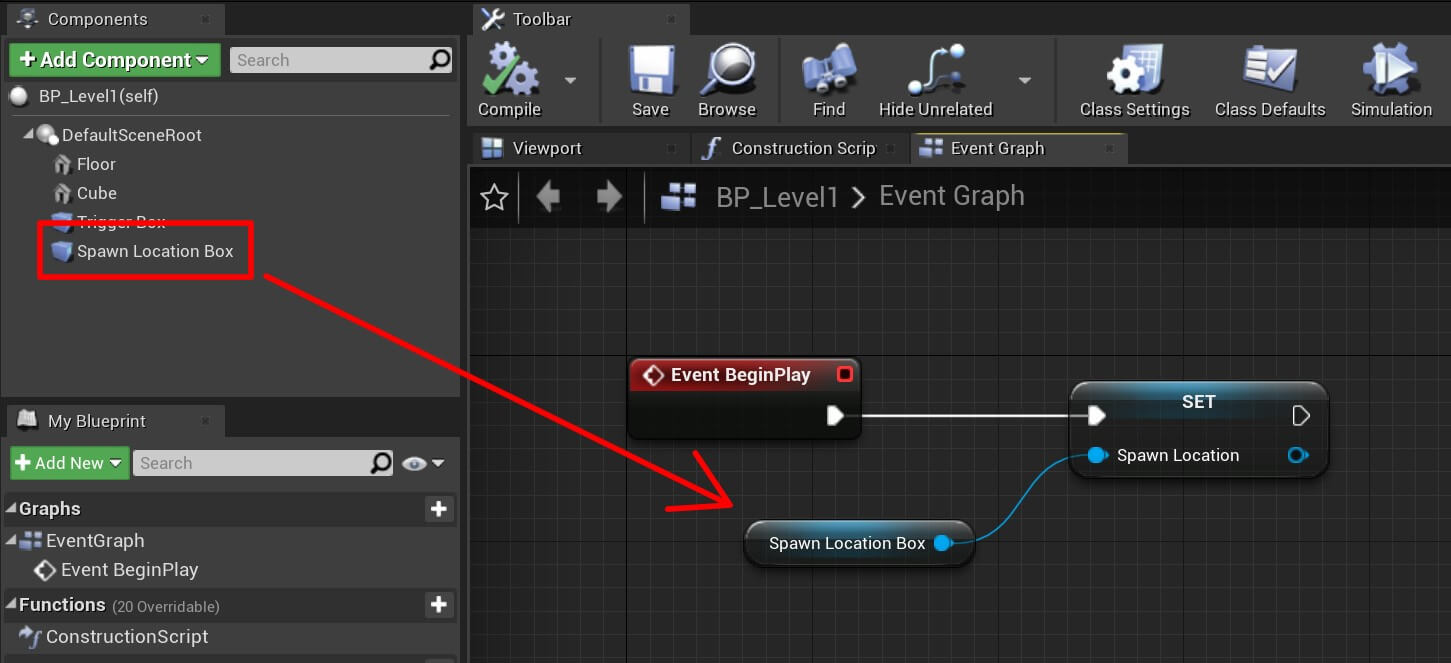
Repeat the same process but this time set the Trigger variable that we declared in the BaseLevel.h file. You can locate the Set Trigger node in My Triggers category, the same category where Set Spawn Location node is located:

Creating More Level Parts
Moving forward, we are going to create more level parts. Inside the Content -> Blueprints -> Levels, Right Click -> New Blueprint class.
This time we are not going to inherit from the BaseClass, instead we are going to inherit from the BP_Level1 blueprint that we created:
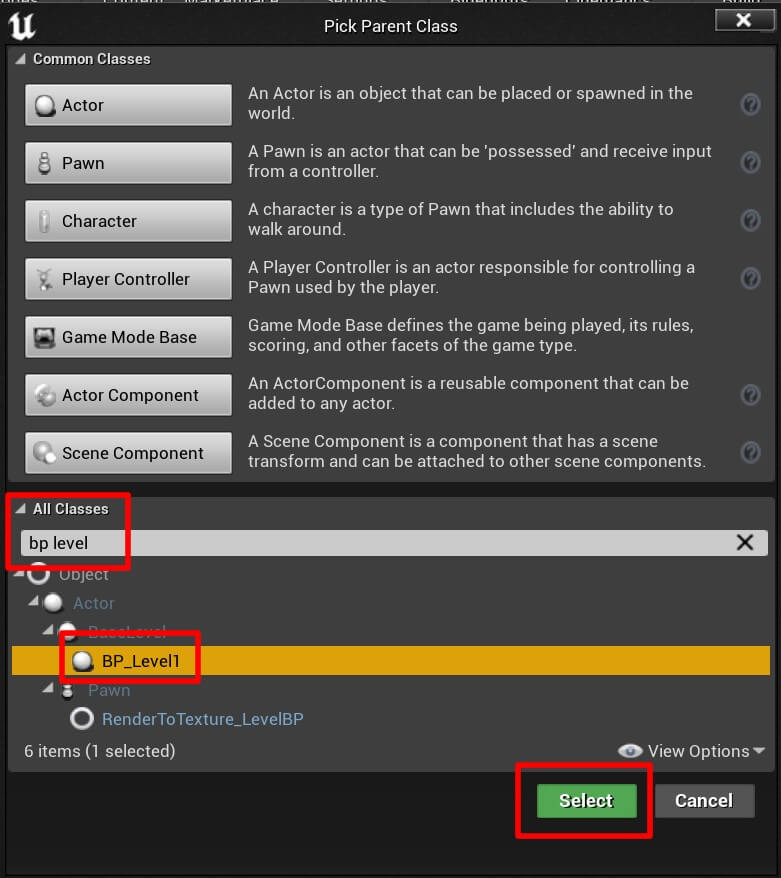
Name the new blueprint BP_Level2 and open it in the editor. You will notice that BP_Level2 looks exactly like BP_Level1:
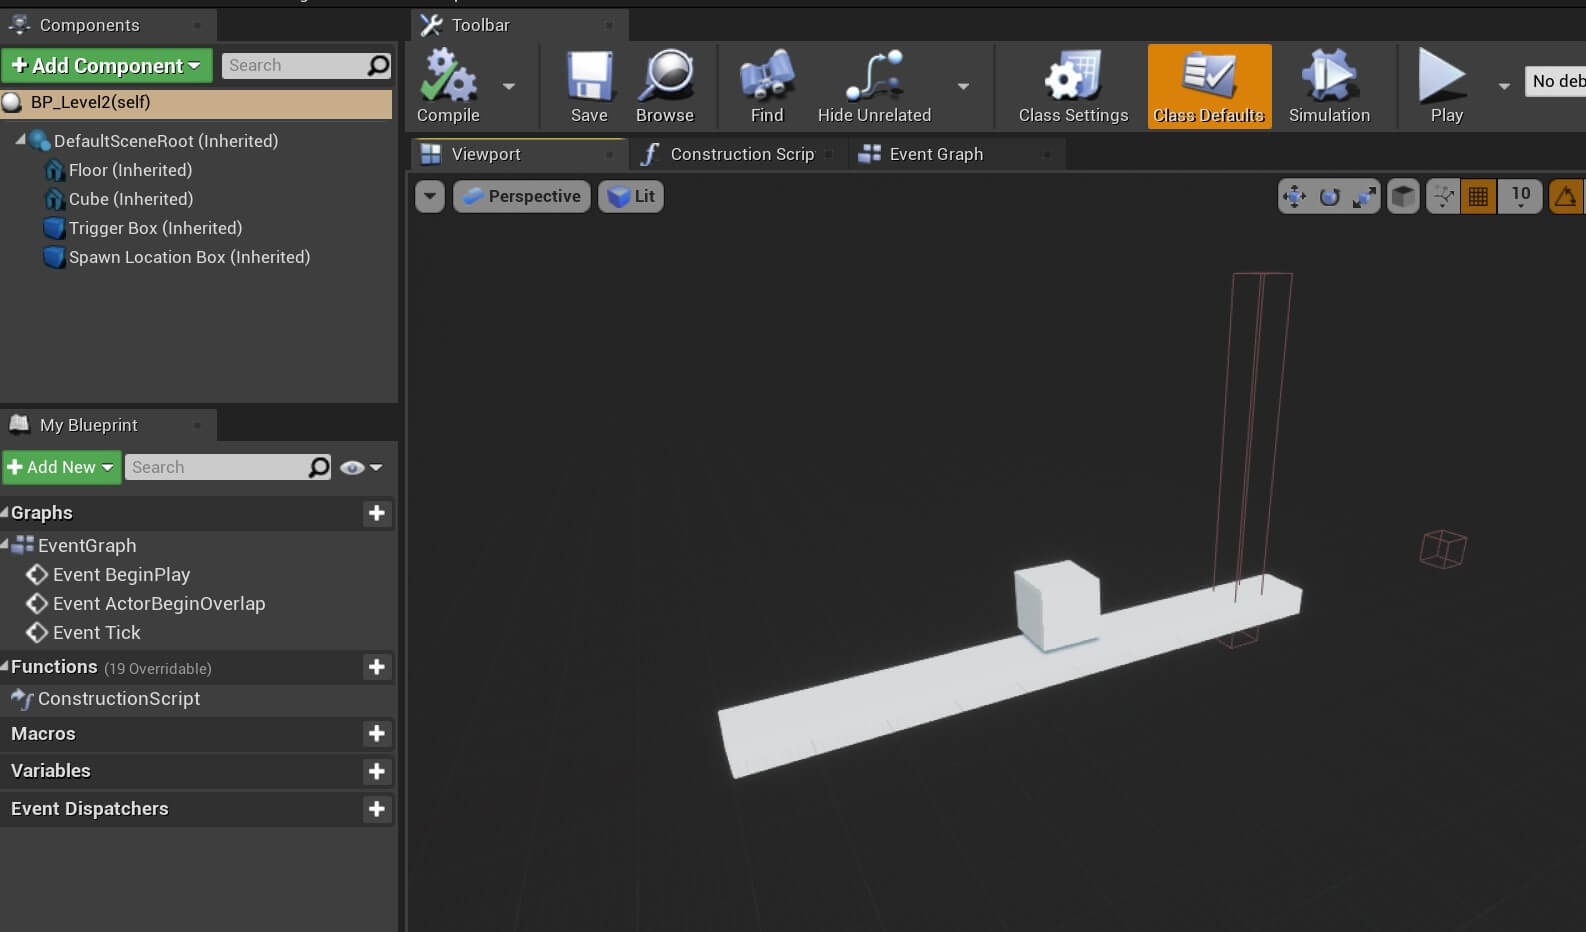
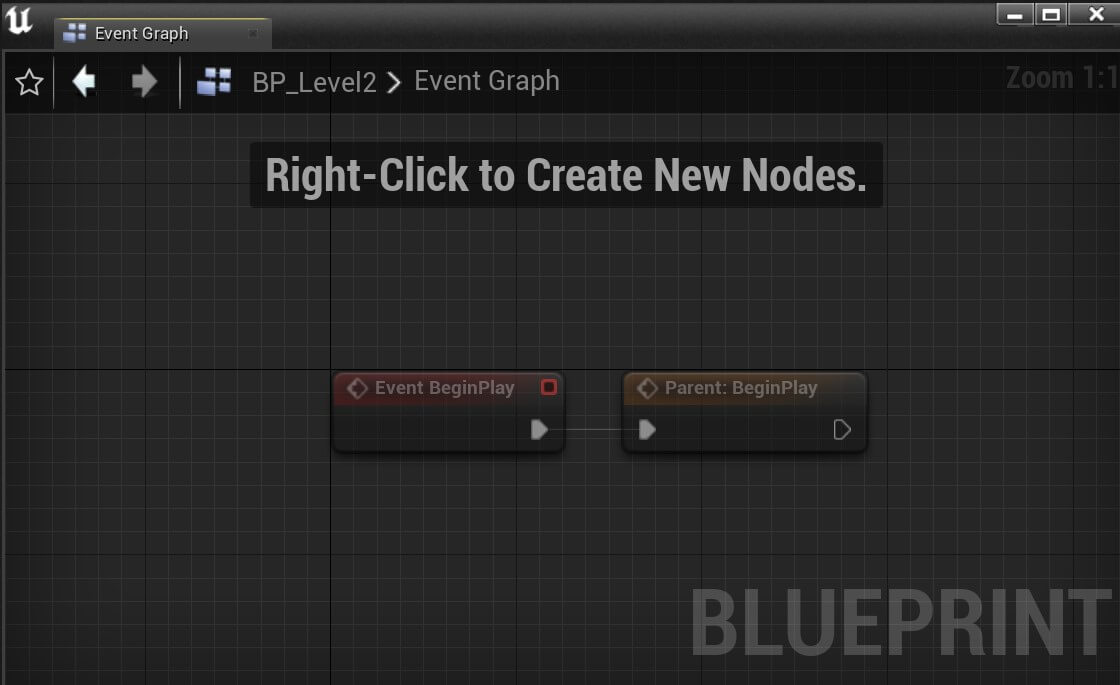
This is because we have inherited BP_Level1 which means we inherit all of its variables and components and any code that we wrote in the Event Graph as well.
You can easily see this by going in the Event Graph window:

We can also duplicate the Cube Mesh component, rename the duplicate to Cube 2 and we can change its location and scale values:
Now duplicate Cube 2, rename it to Cube 3 and set the following values in the Transform property:

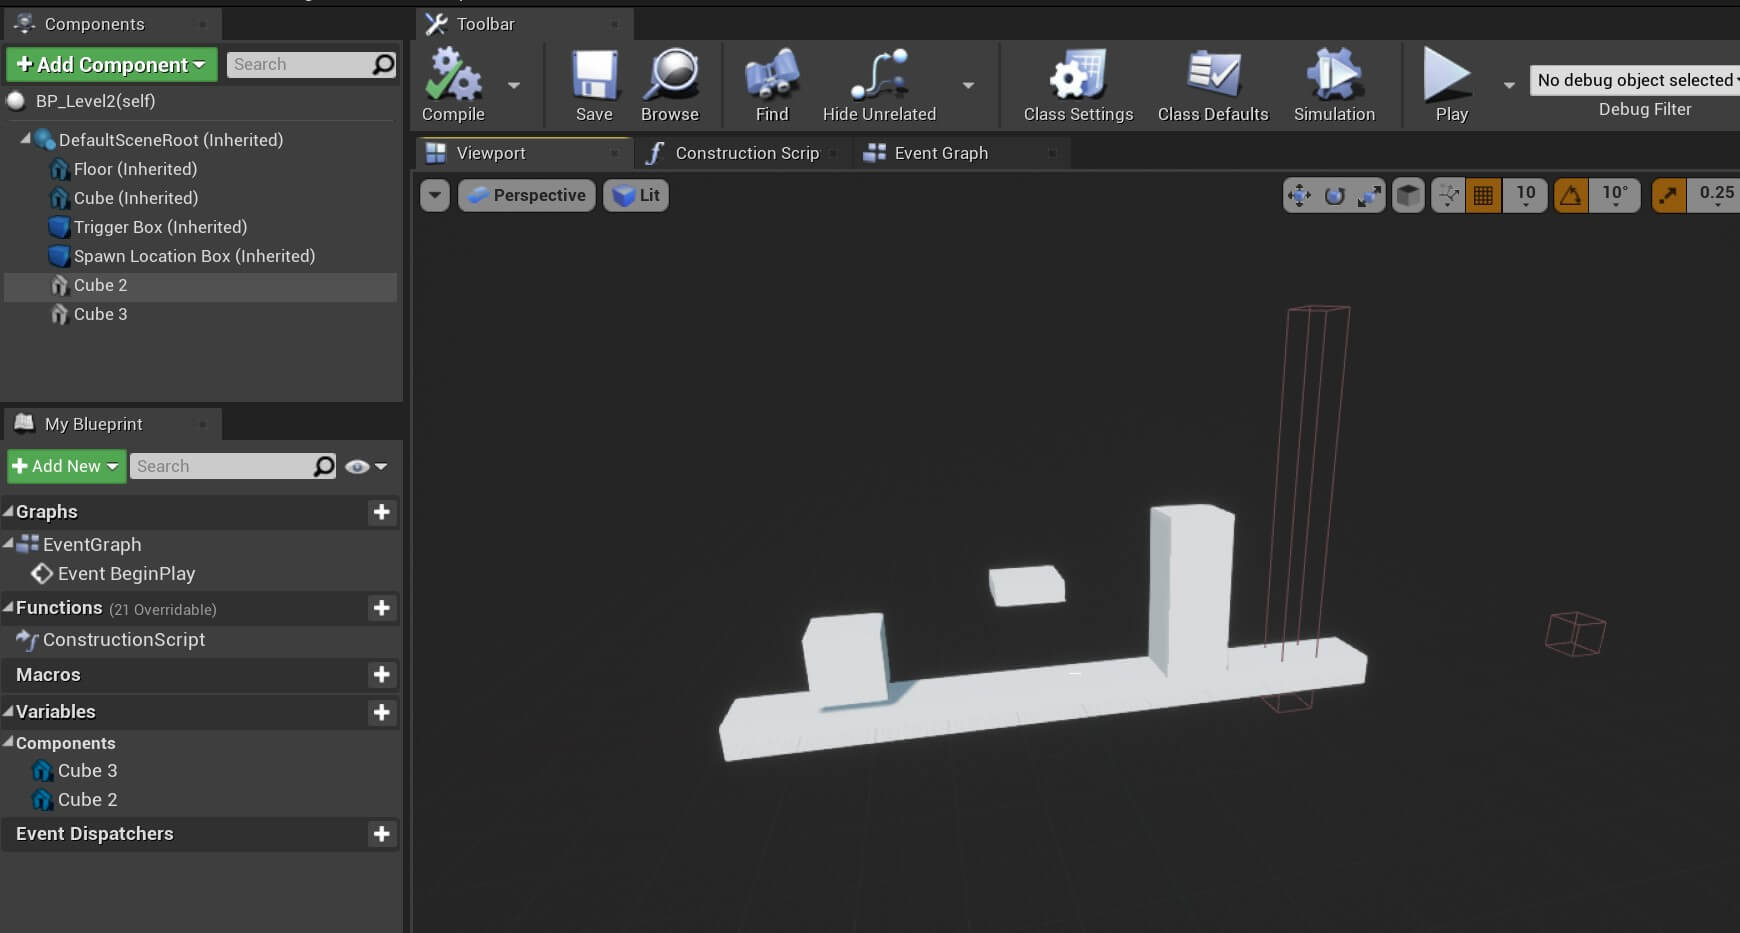
This is how we are going to create all other level parts that will go up to 10. So the next blueprint that you will create will be BP_Level3, and you will inherit from BP_Level1 again, and then add modifications to create a new level part and you will repeat this process until you have 10 level part blueprints.
I am not going to put a guide here to do that because its basically the same what we did for BP_Level2, it’s just duplicating components, renaming them and changing their values in the Transform component.
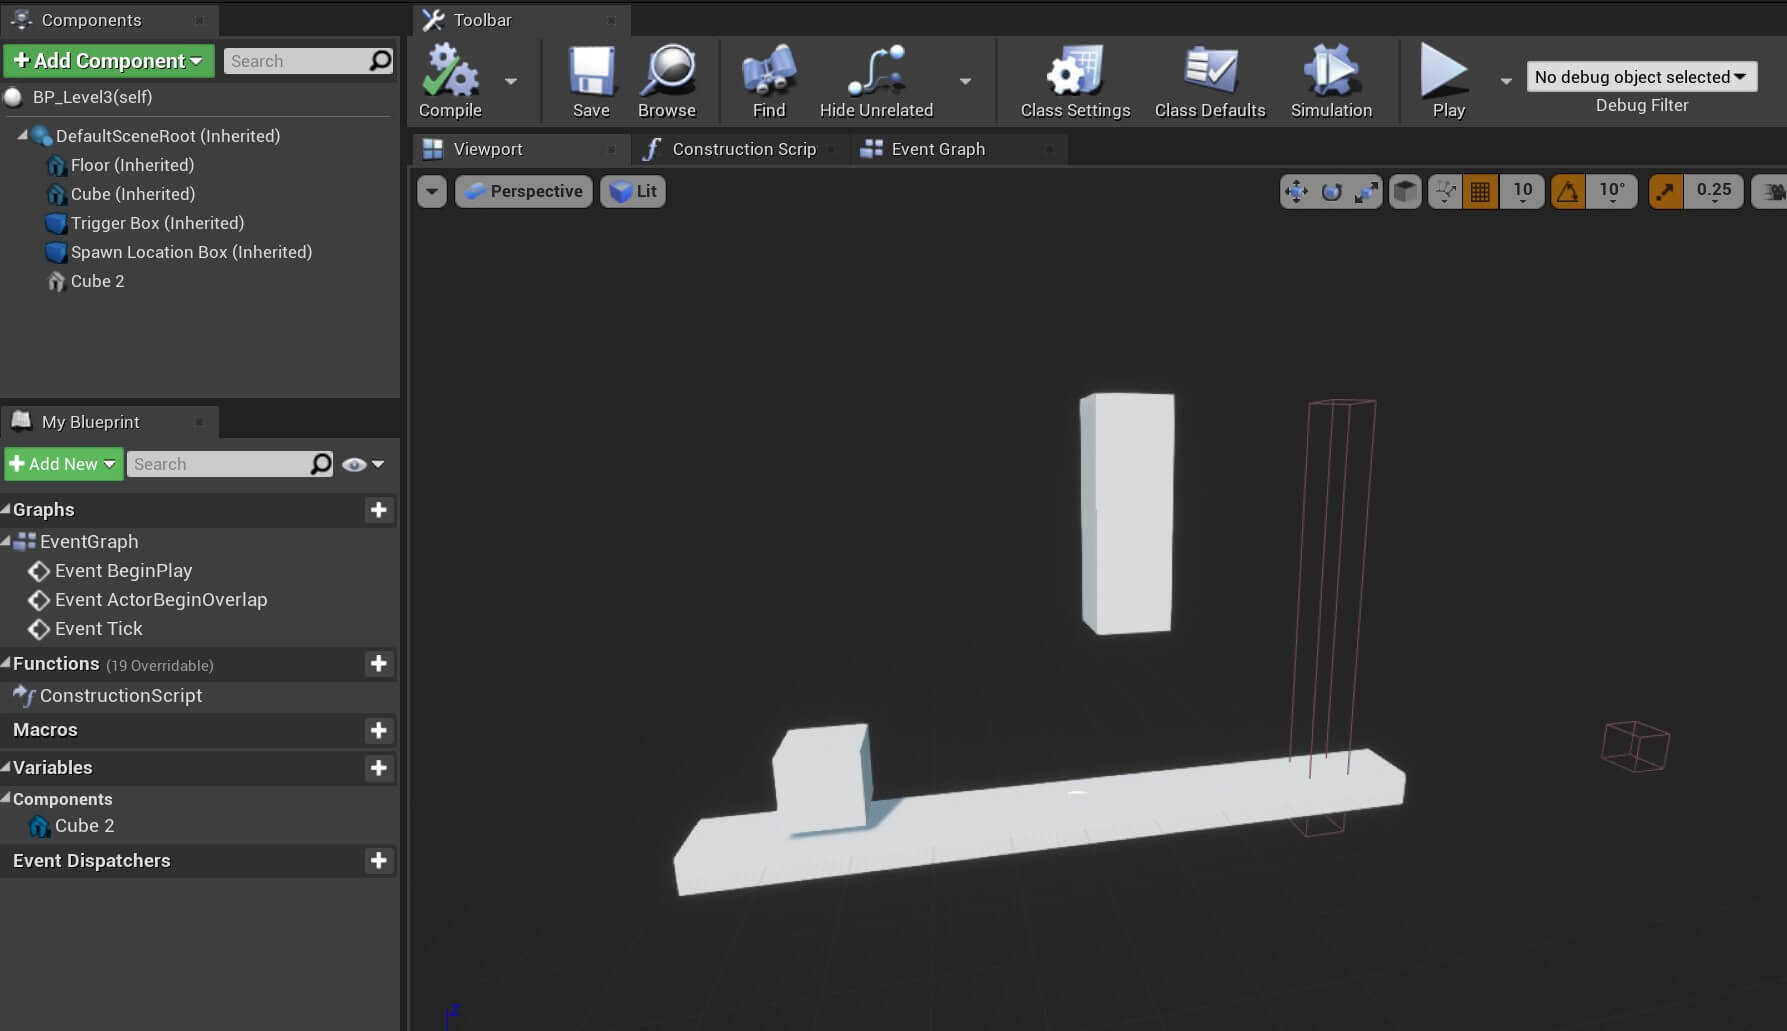
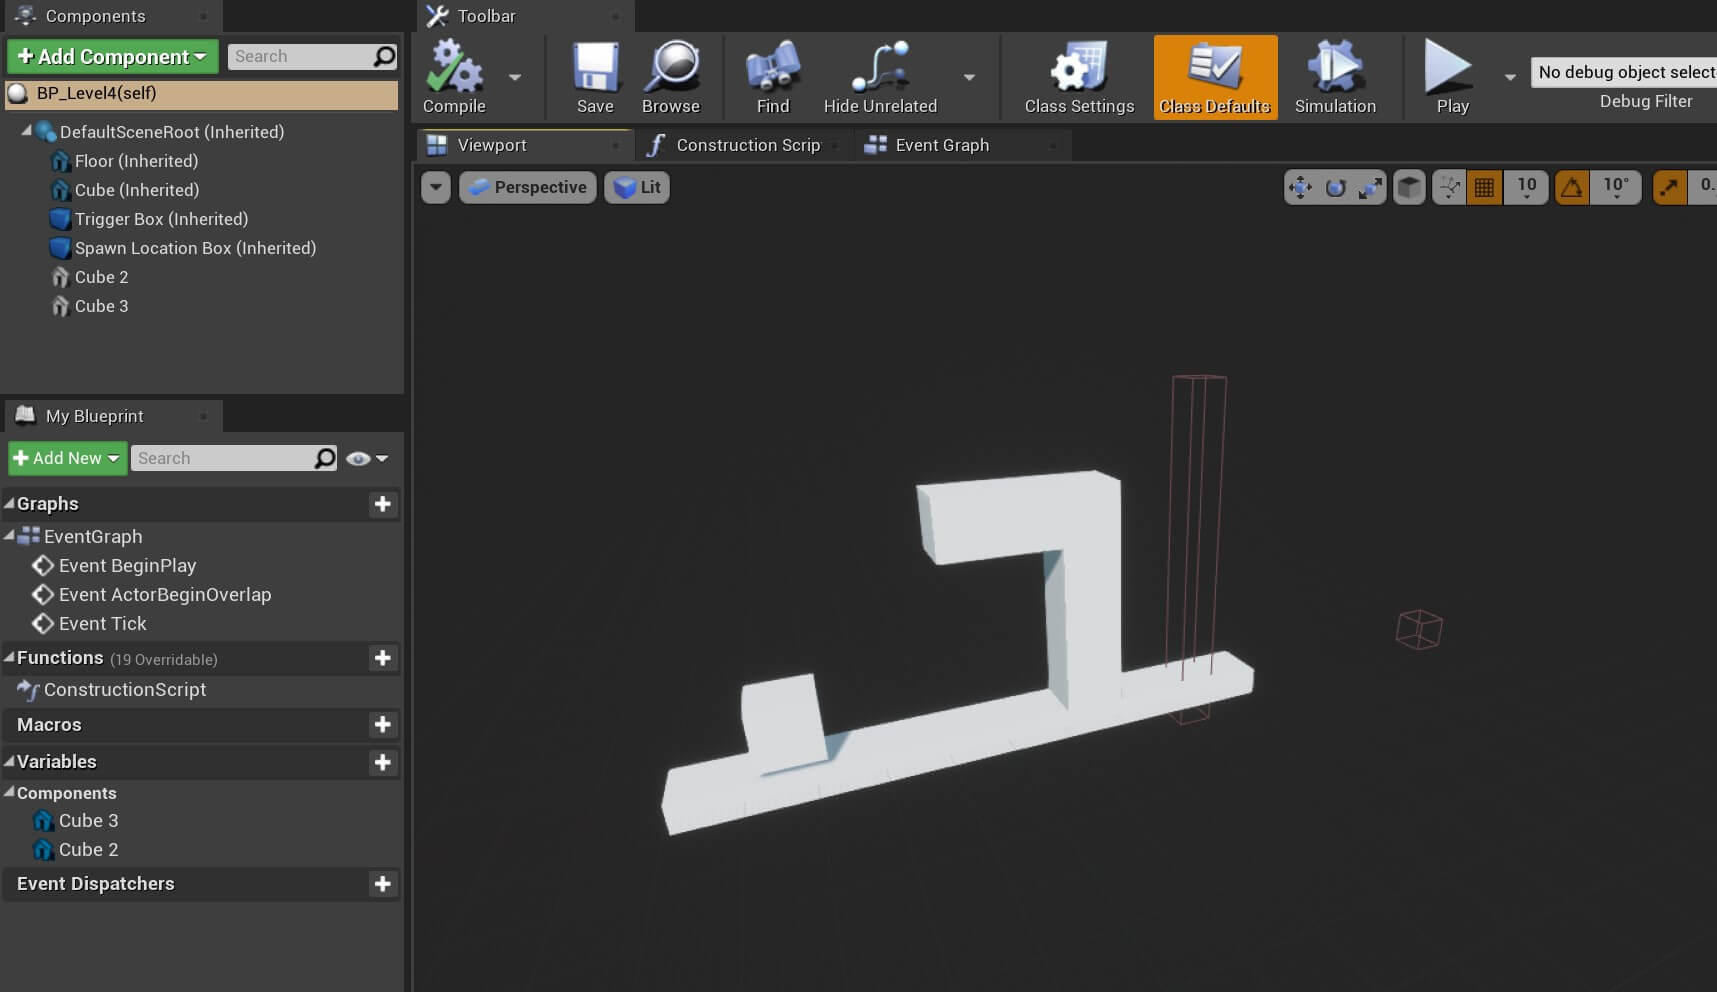
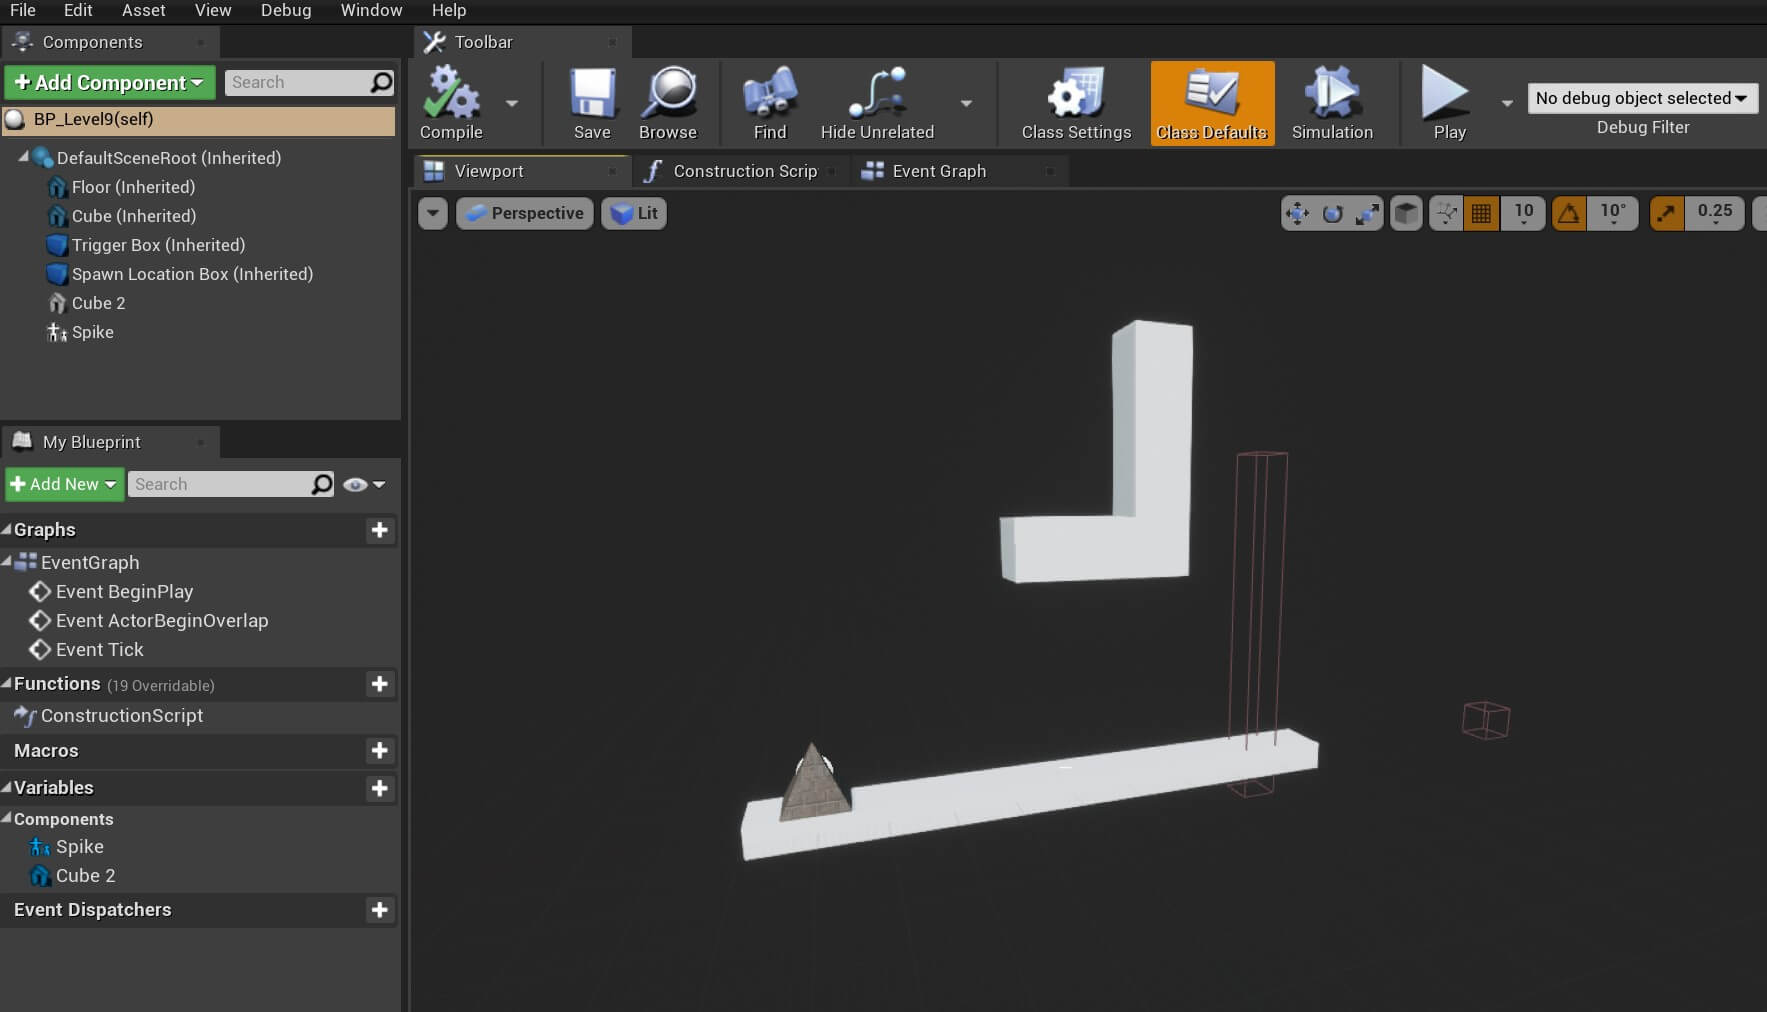
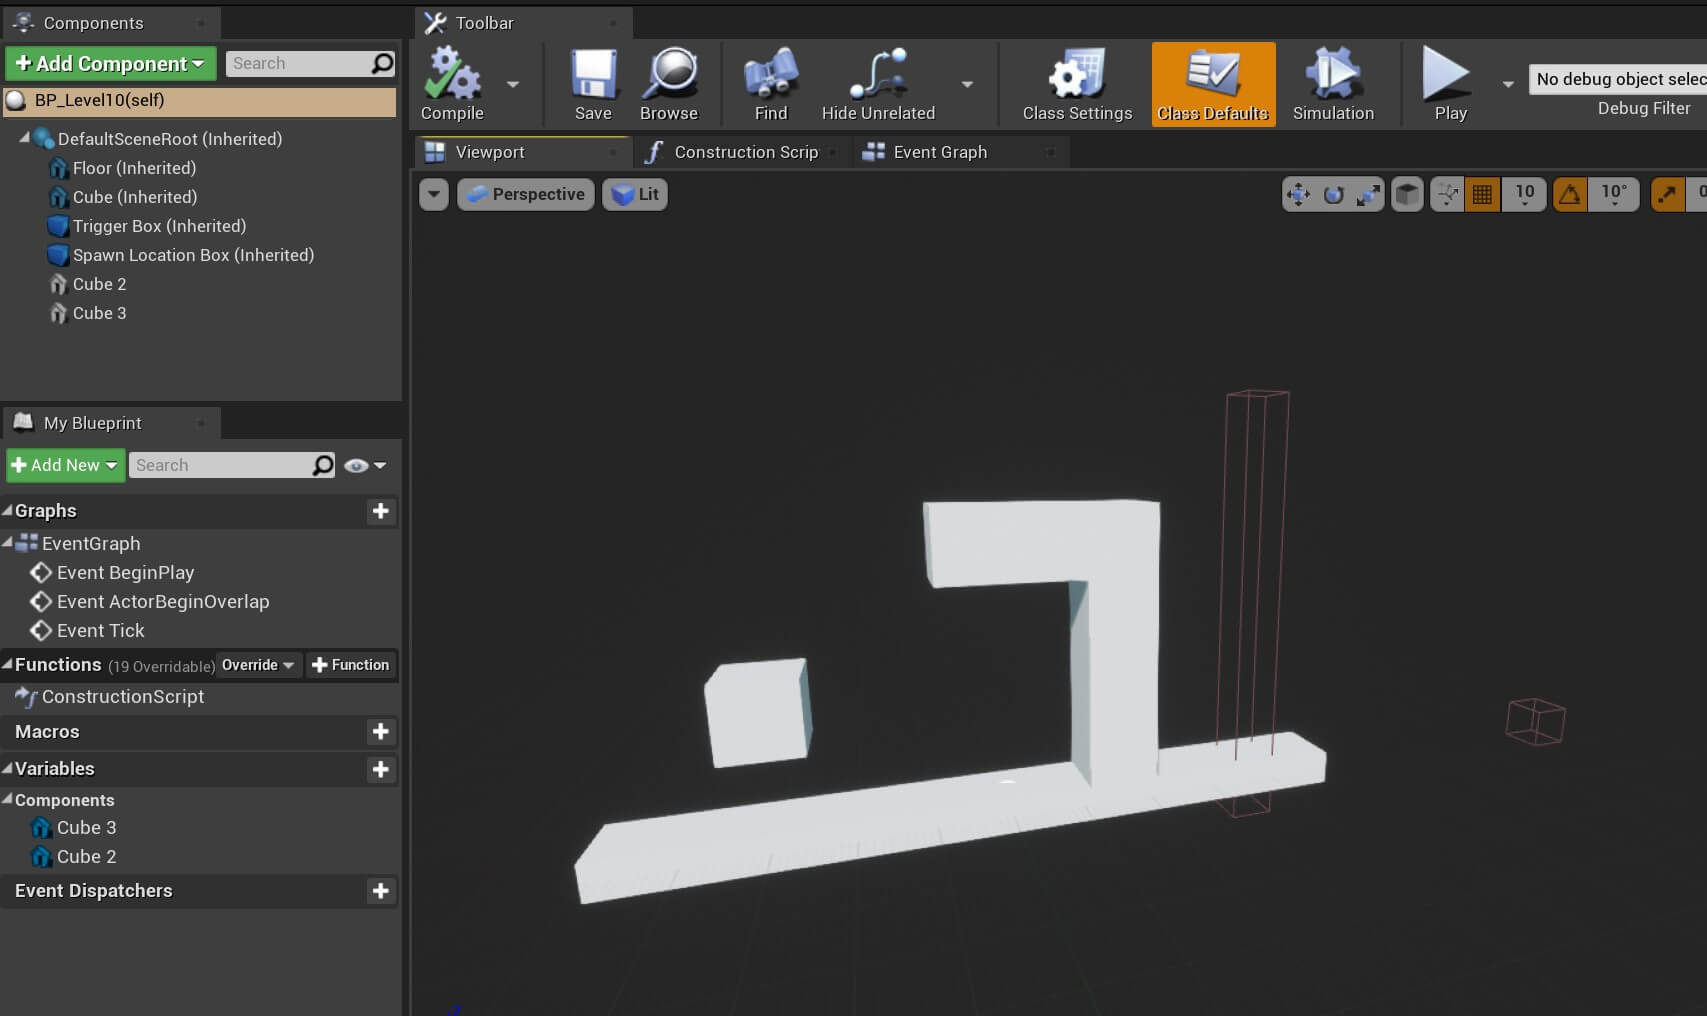
Instead I am going to leave images of every level part so that you can see how they look like and replicate their look.
I will mention here that it is not necessary that you create the exact same level parts as I did, experiment with your own imagination and create your own level parts, you can always change them if the game is difficult because we can’t pass some level parts.
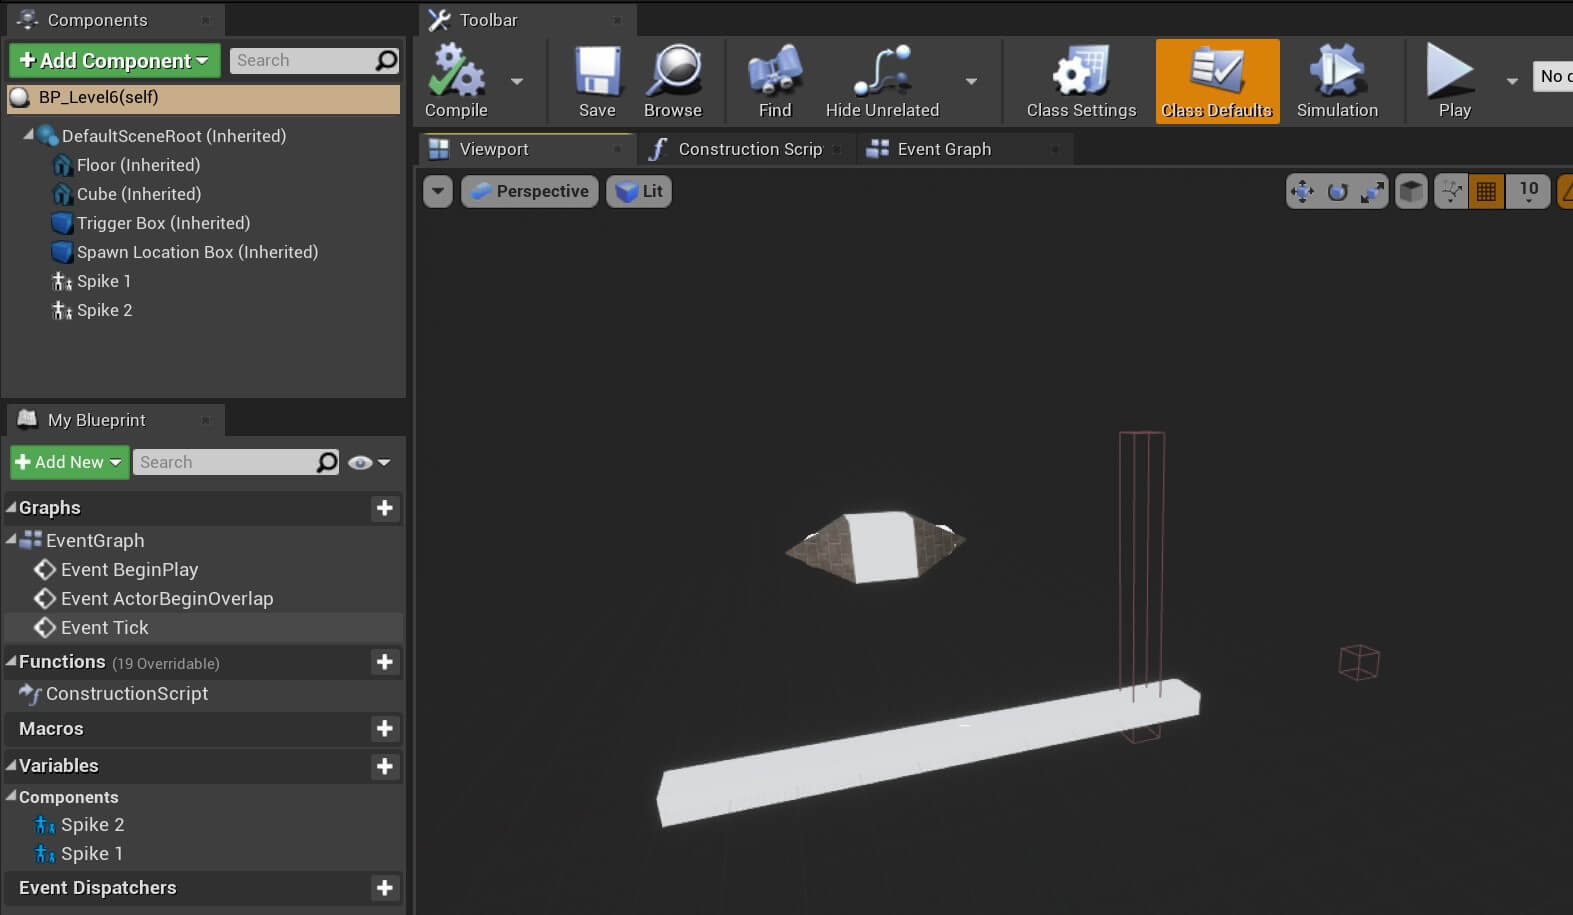
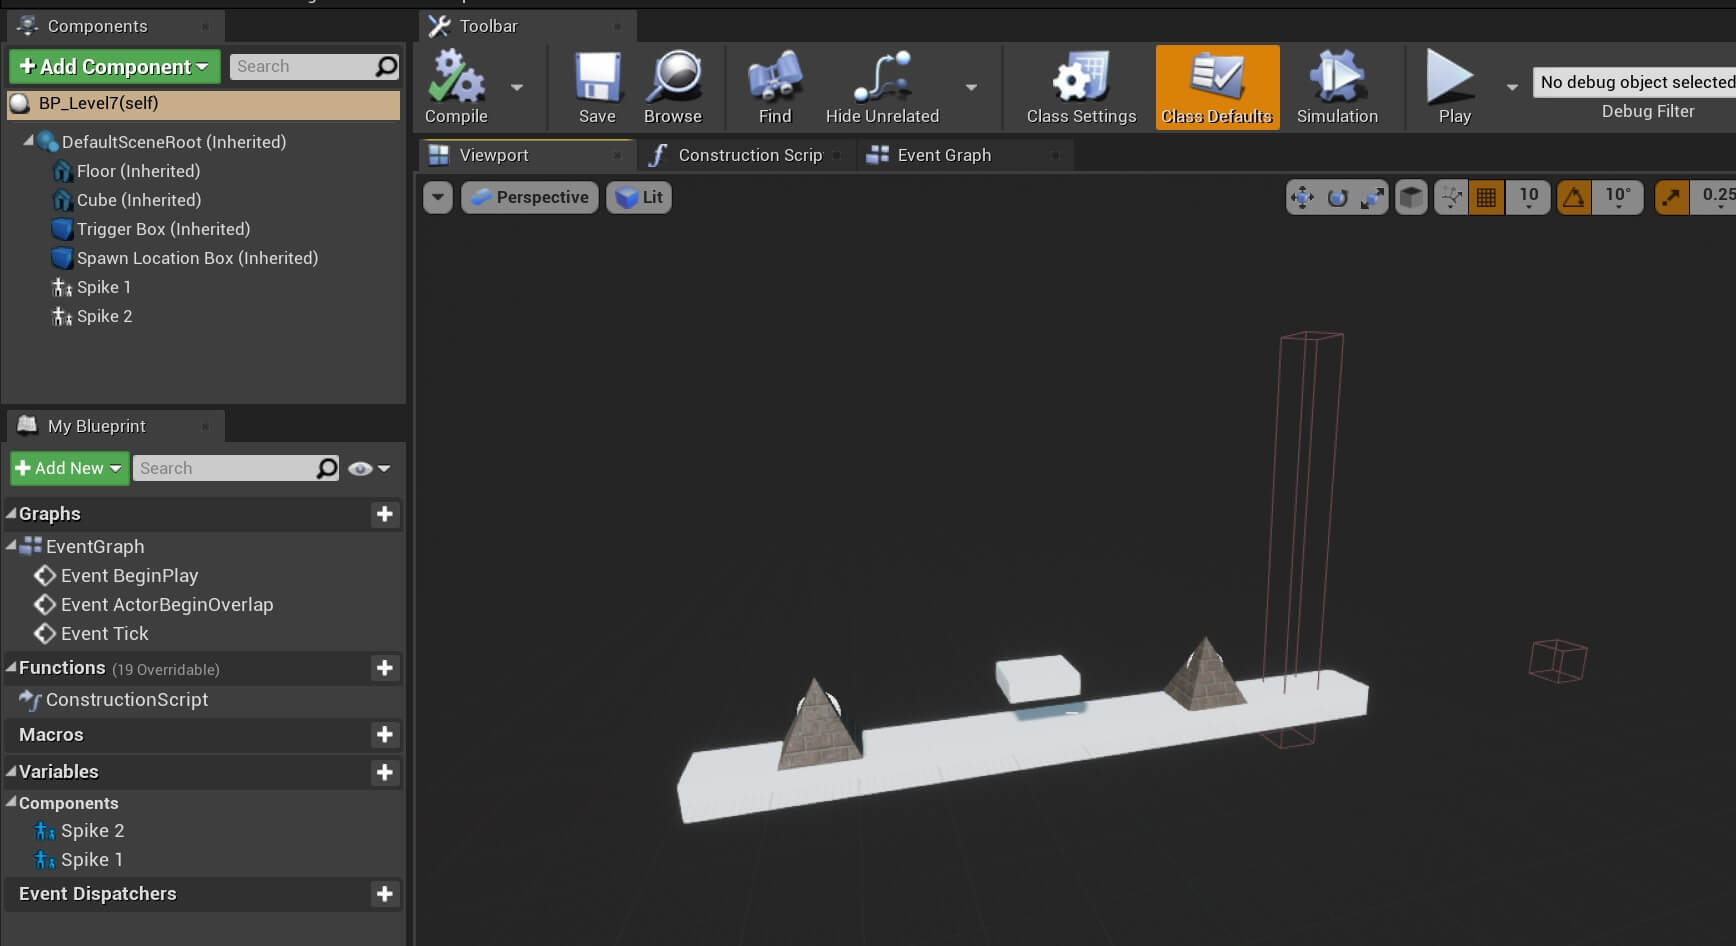
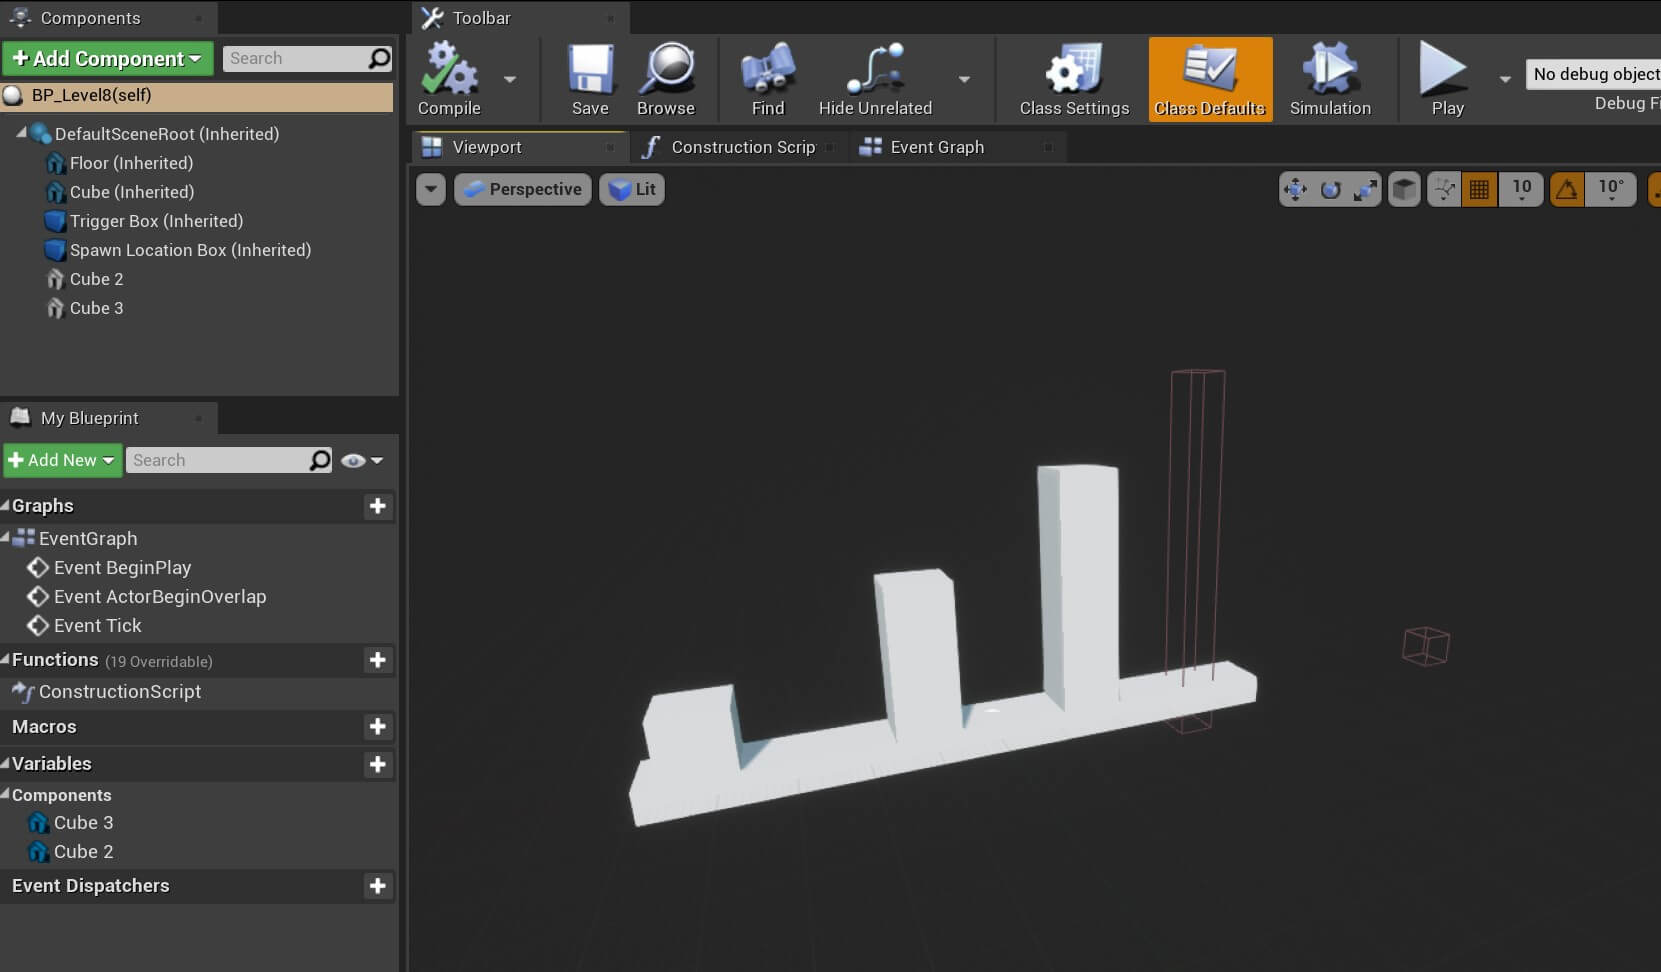
Here is the list of all remaining level parts.
BP_Level3:
BP_Level4:
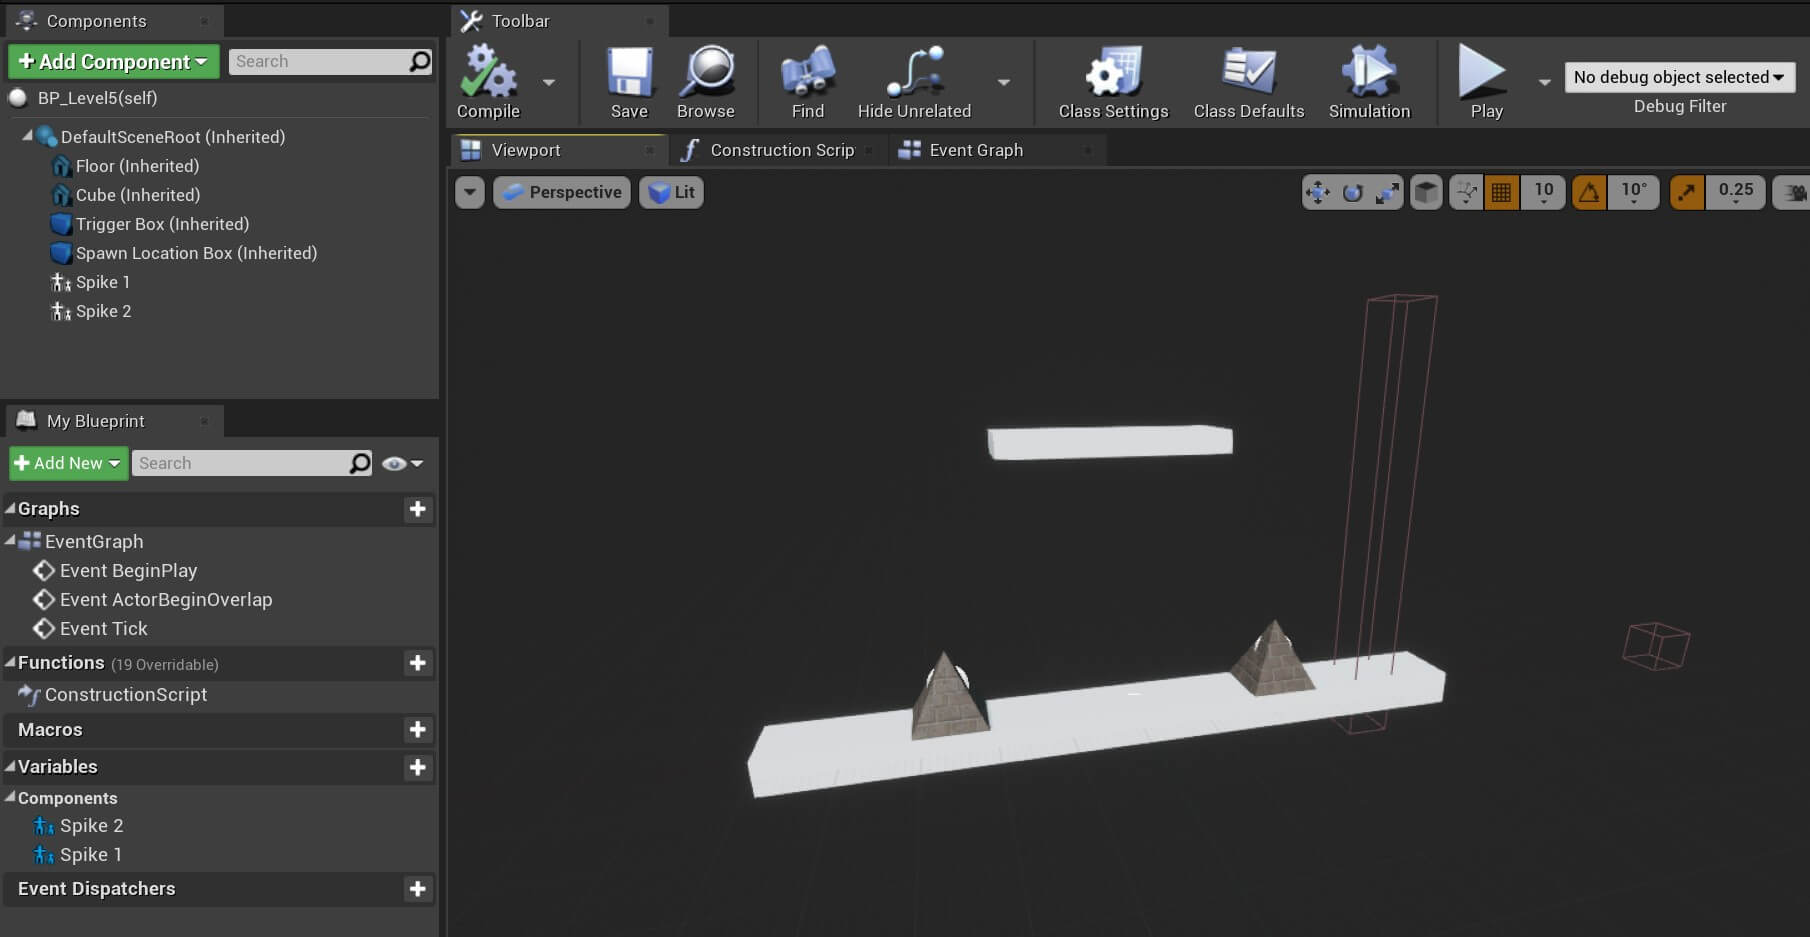
For BP_Level5, we are going to add two spike obstacles as part of the blueprint to make the game more challenging for the user who is playing.
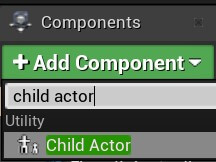
To do that, we are going to add a new Child Actor component. Click on the Add Component button, filter for child actor and select it:
Rename the Child Actor component to Spike 1, after that select it, and under the Details tab locate the Child Actor component property where you have a field called Child Actor Class. Click on the drop down list and select BP_Spike as the class:
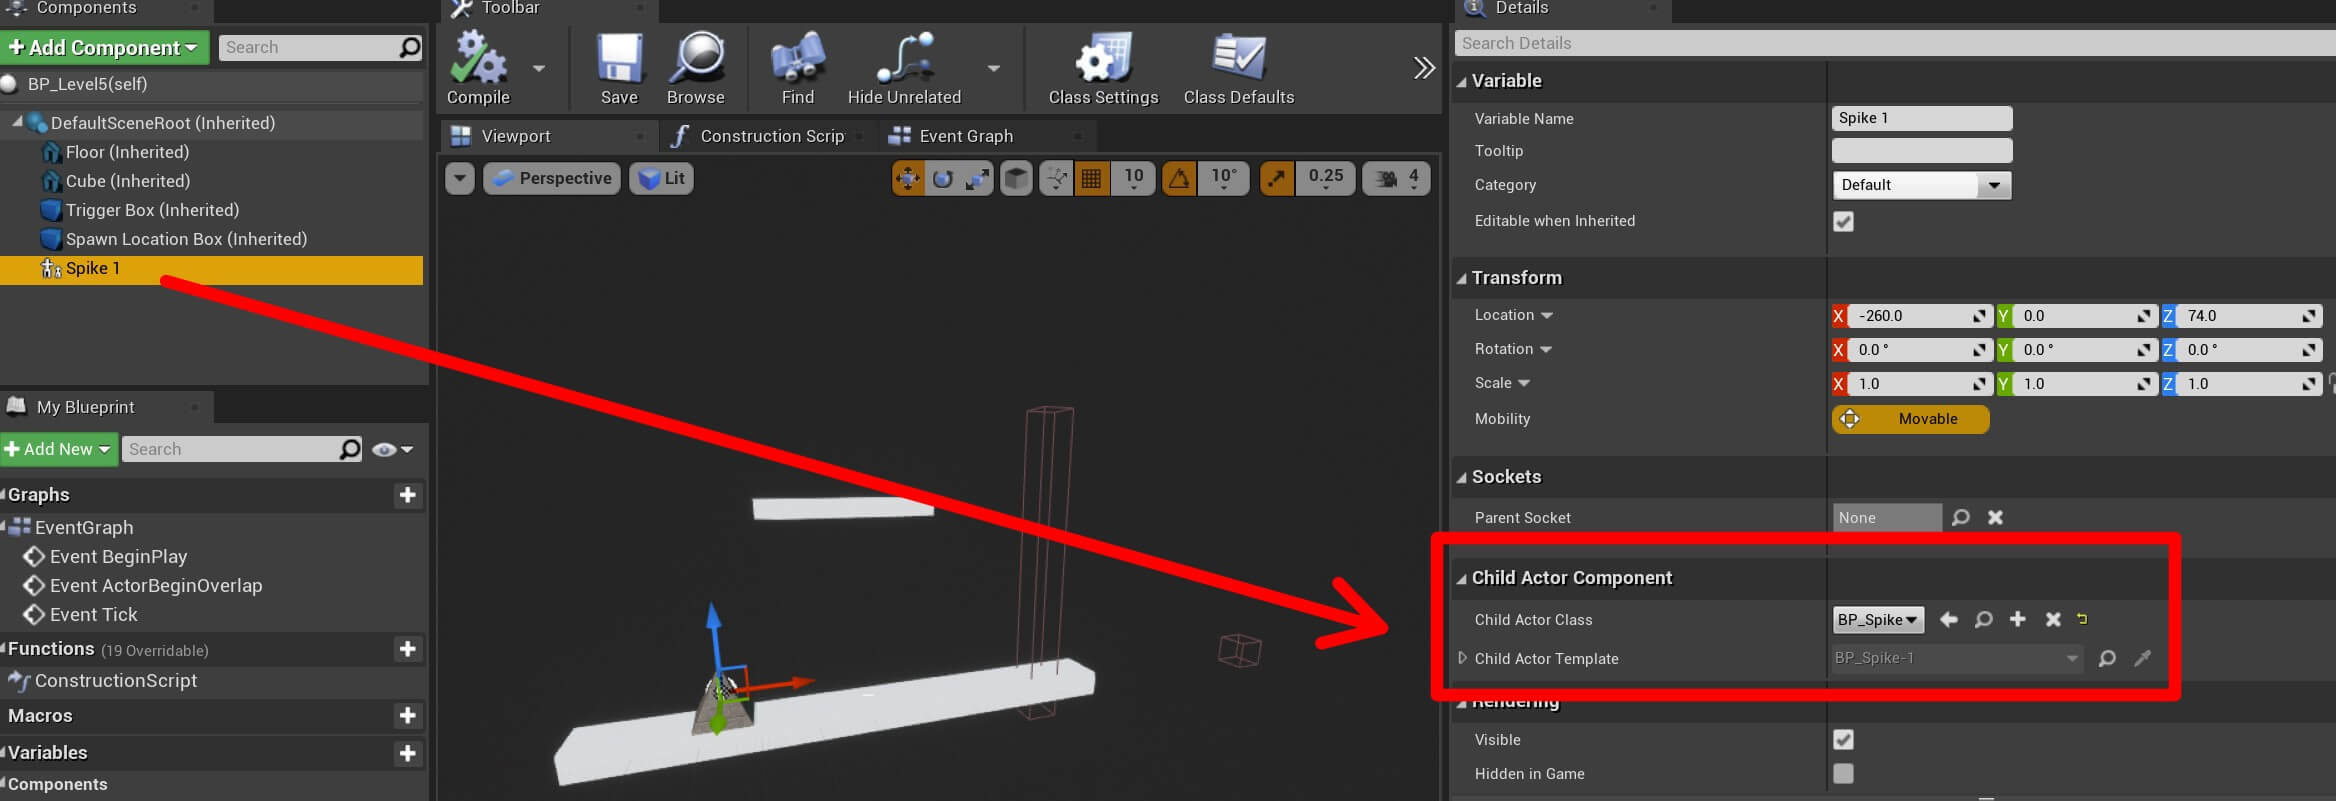
Using the Child Actor component we can use other blueprints we created in another blueprint. The blueprint we use, in this case BP_Spike, will have all of its properties the same way we defined them when we created that blueprint.
You can duplicate Spike 1 same as any other component to create copies of it. This is how the final version of BP_Level5 looks like:
Moving forward with other level blueprints, we have BP_Level6:
BP_Level7:
BP_Level8:
BP_Level9:
BP_Level10:
Where To Go From Here
In this tutorial we created the Spike and BaseLevel class. We also created an obstacle blueprint and 10 level parts that we will use to procedurally generate the level while the player actor is moving.
In the next part titled Creating The LevelSpawner Class And Generating The Game Level Using Procedural Level Generation you will learn how to dynamically generate levels using a technique called procedural level generation.

Comments are closed.