In part 8 of this tutorial series we coded the logic that will end the game when the PlayerCharacter reaches the level goal or when he collides with the fire obstacle.
We also learned how to work give input control to UI widgets and how to interact with them when we press them.
In this part of the tutorial we are going to import the enemy 3D object and learn about animations in Unreal Engine.
Where To Get Free 3D Characters For Your Game
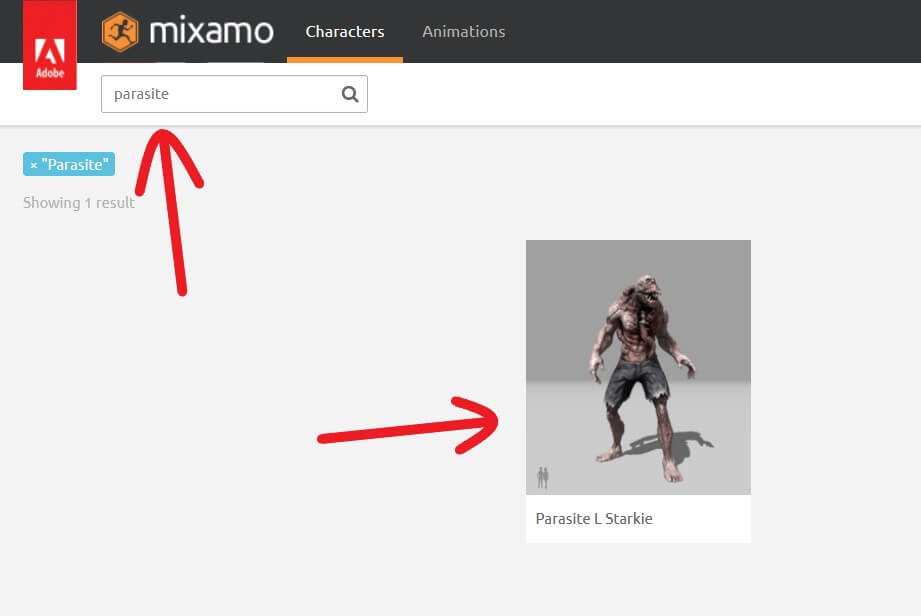
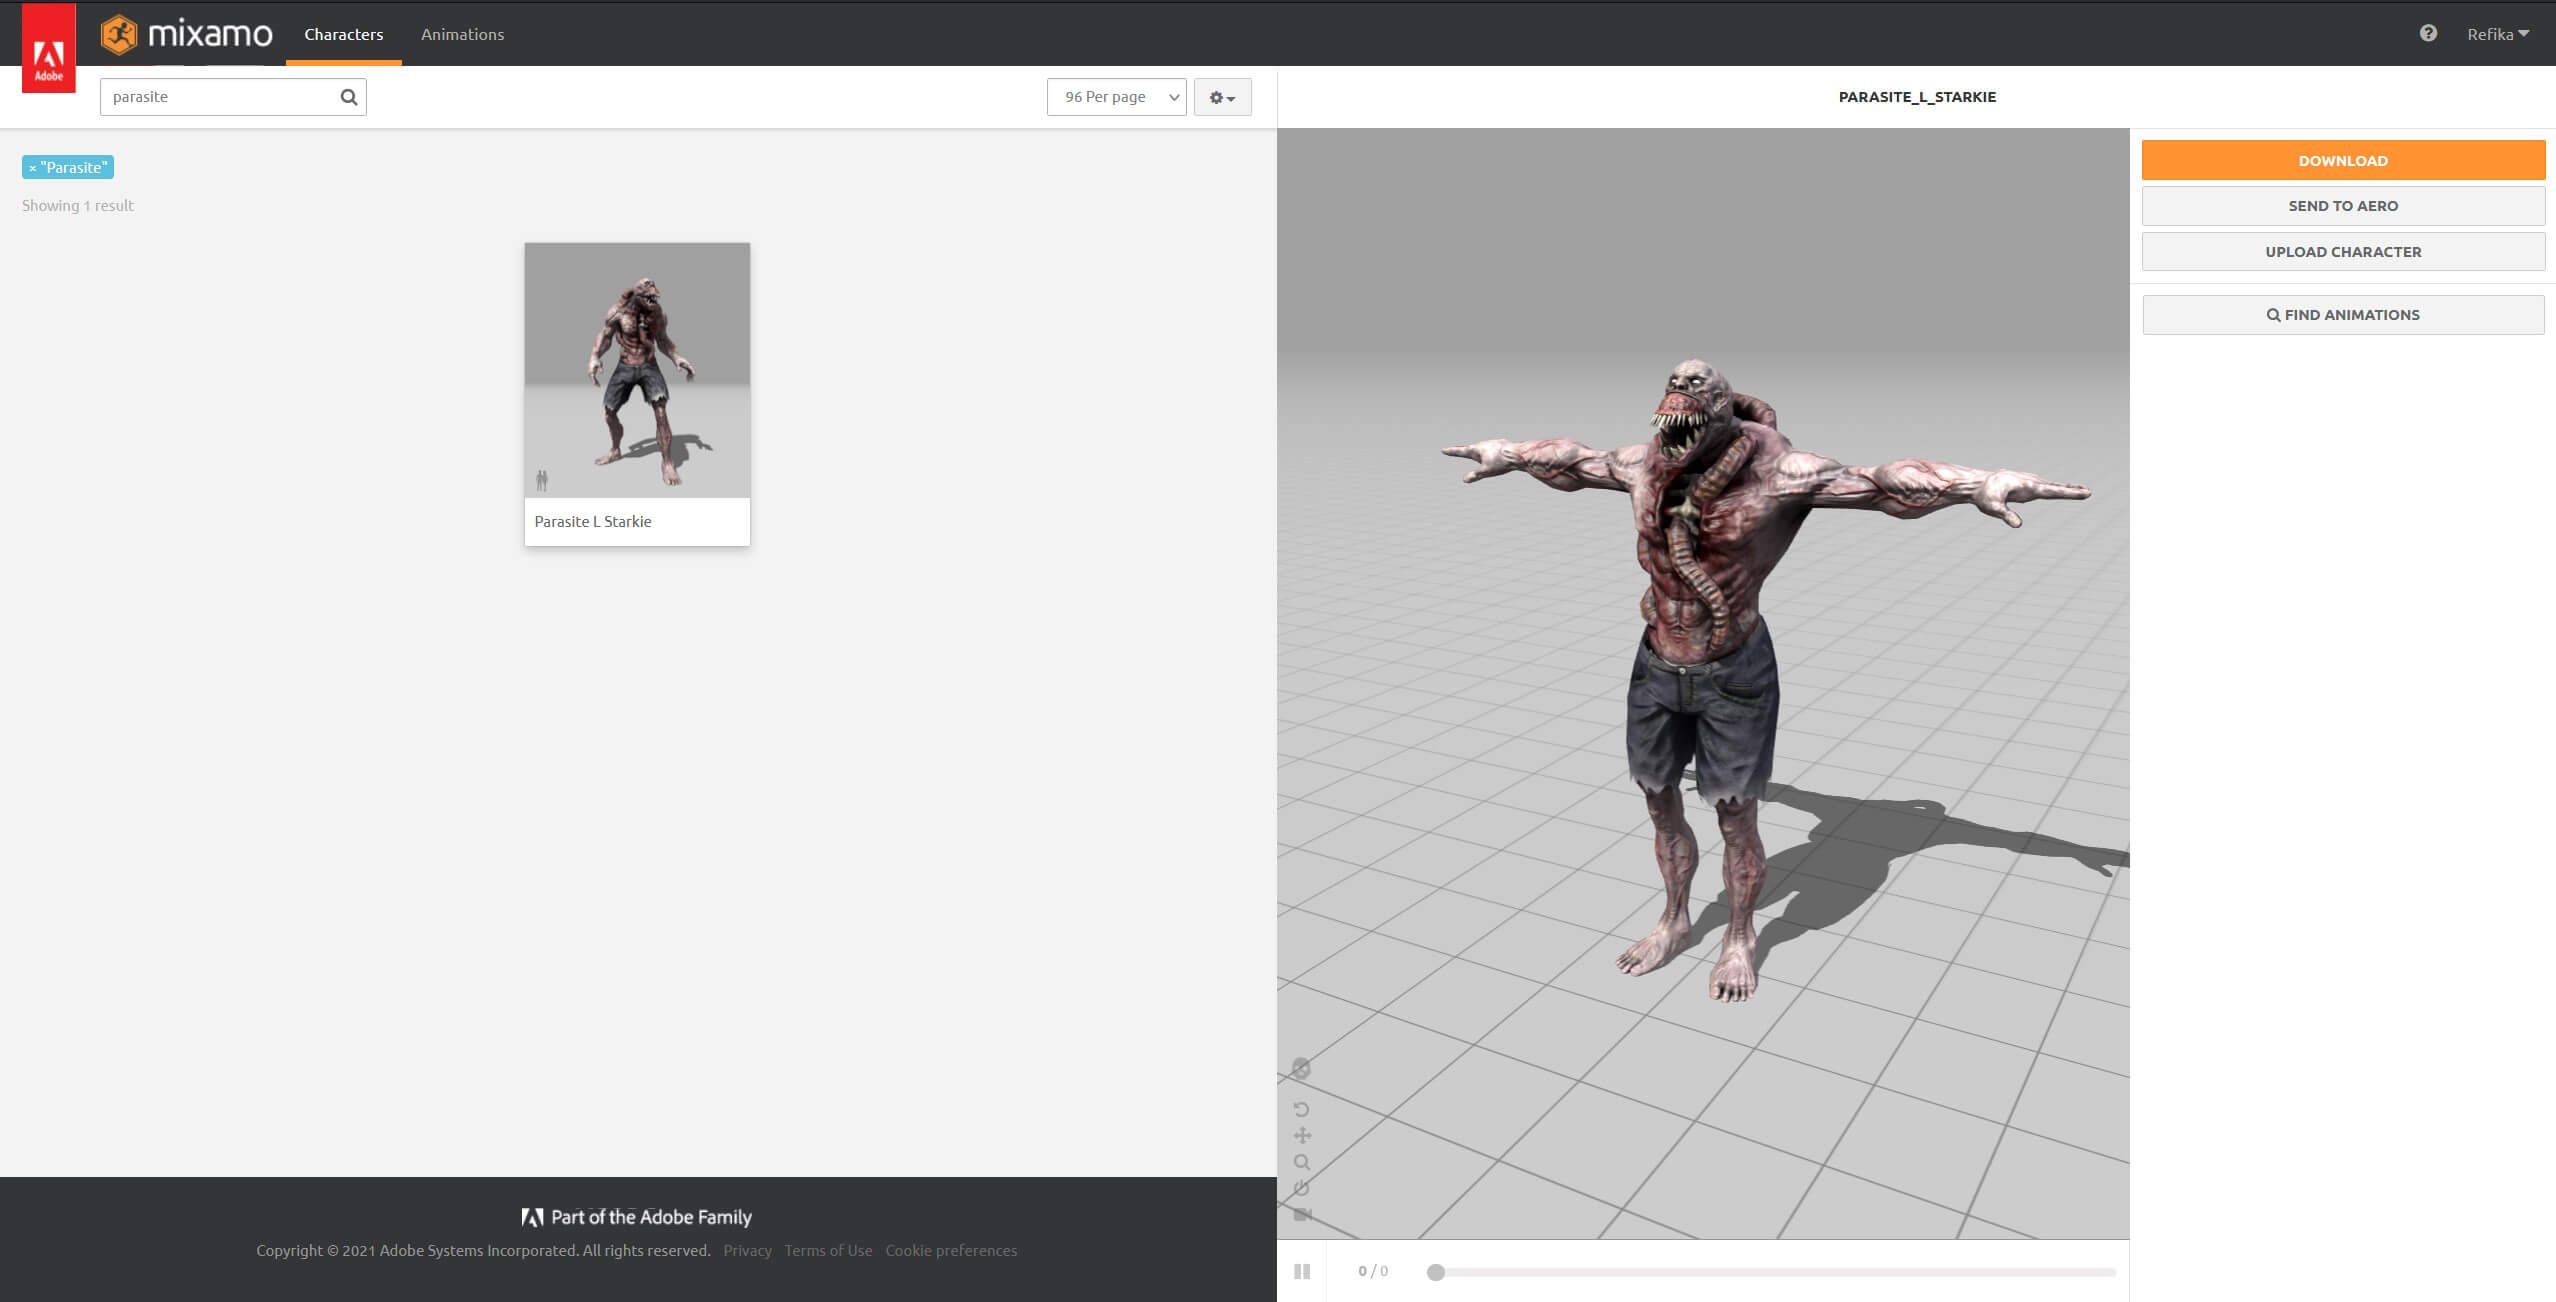
How To Use Mixamo.com

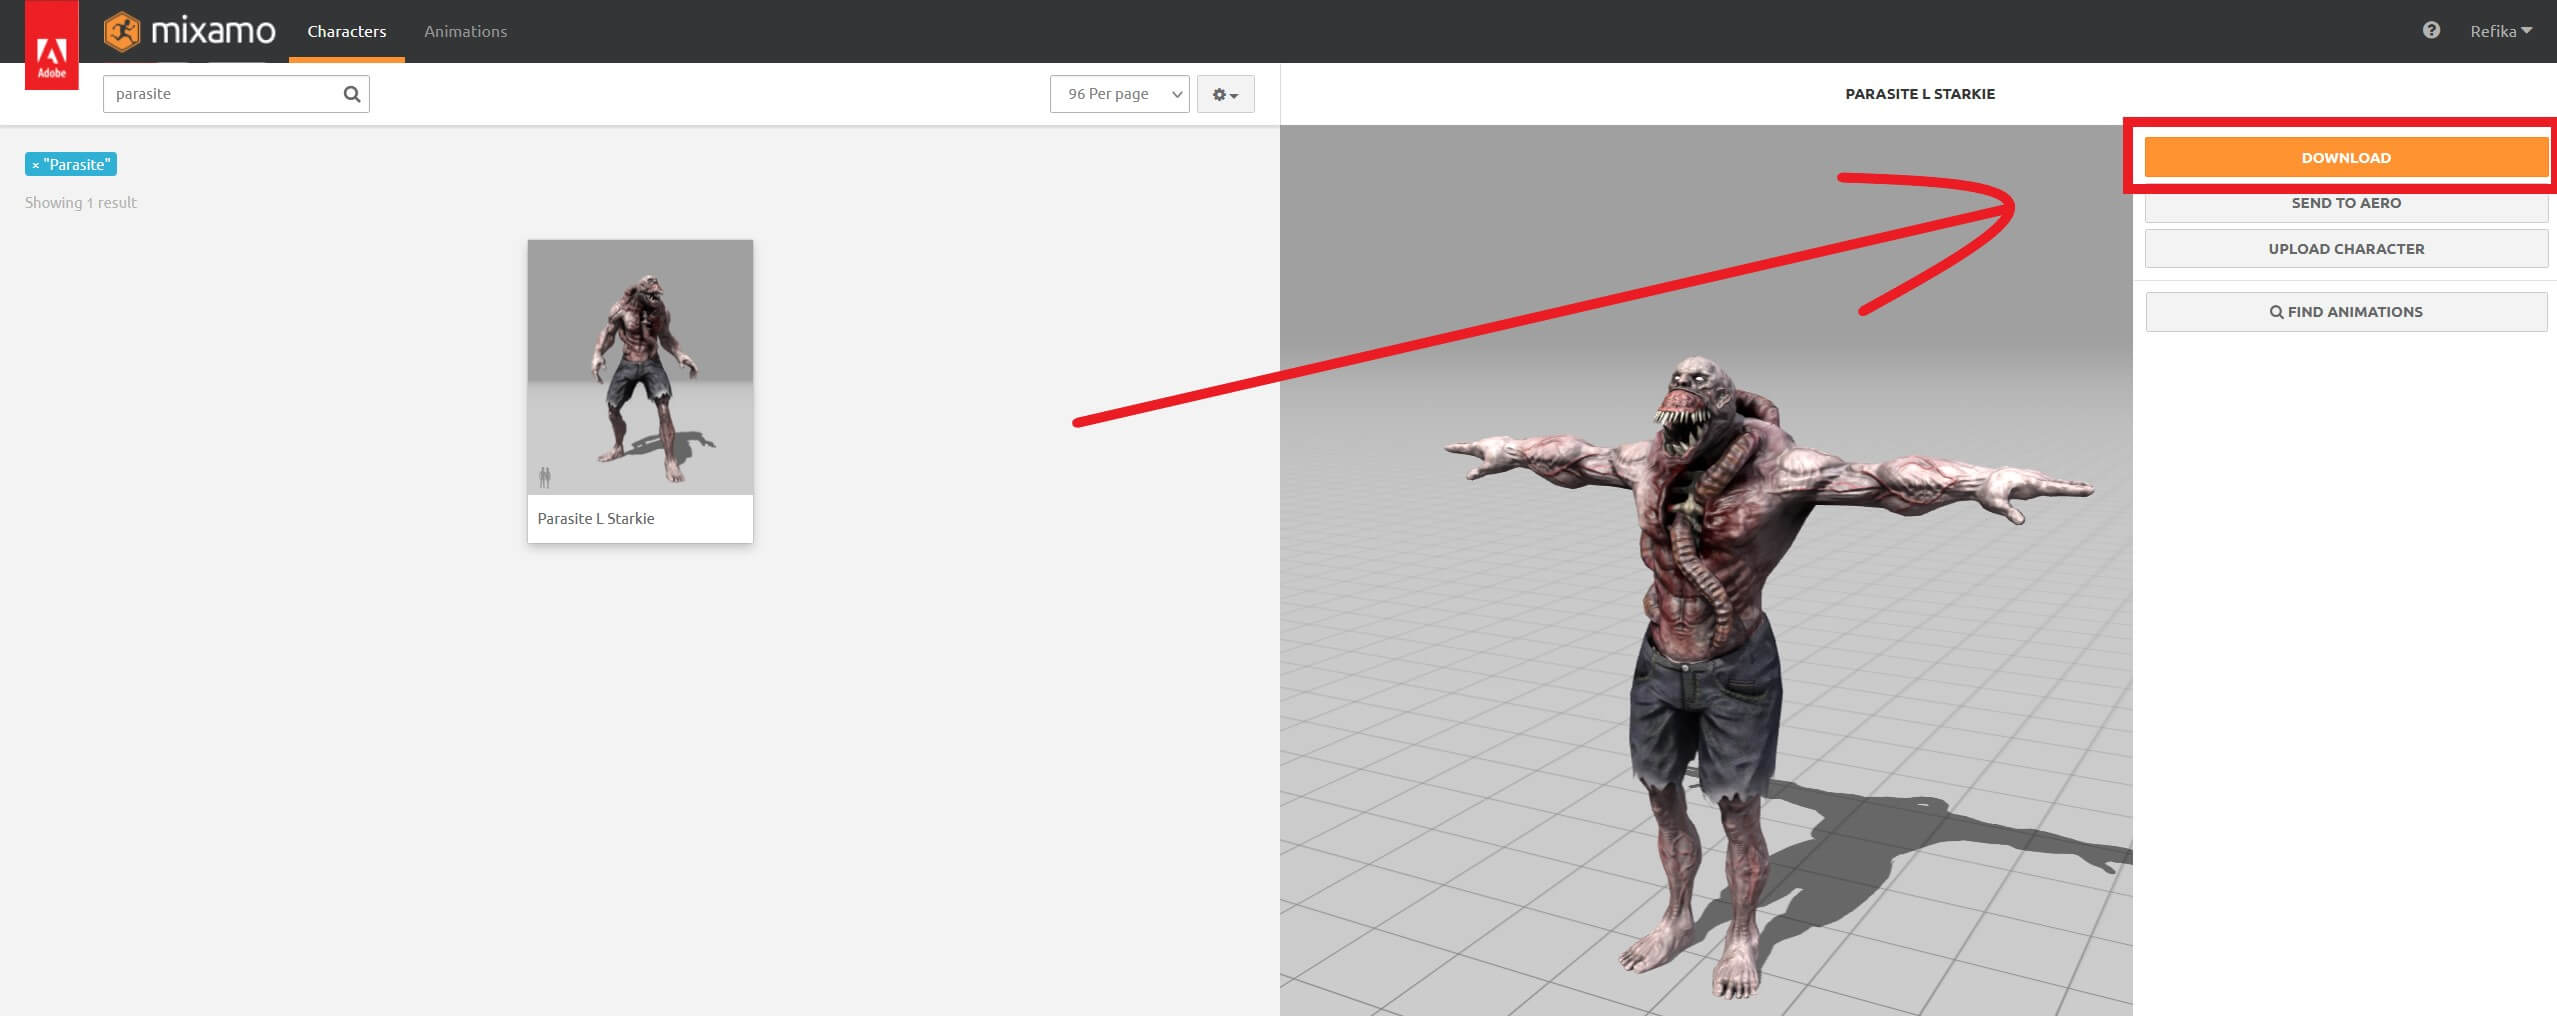

If you click on the Format drop down list you will see different formats in which we can download the 3D model:
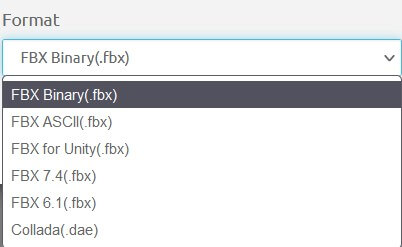
We are going to select the first one FBX Binary(.fbx). For the Pose leave it at the default T-pose. Click the Download button and choose the download folder for your 3D model.
Now click on the Animations tab and filter for idle:
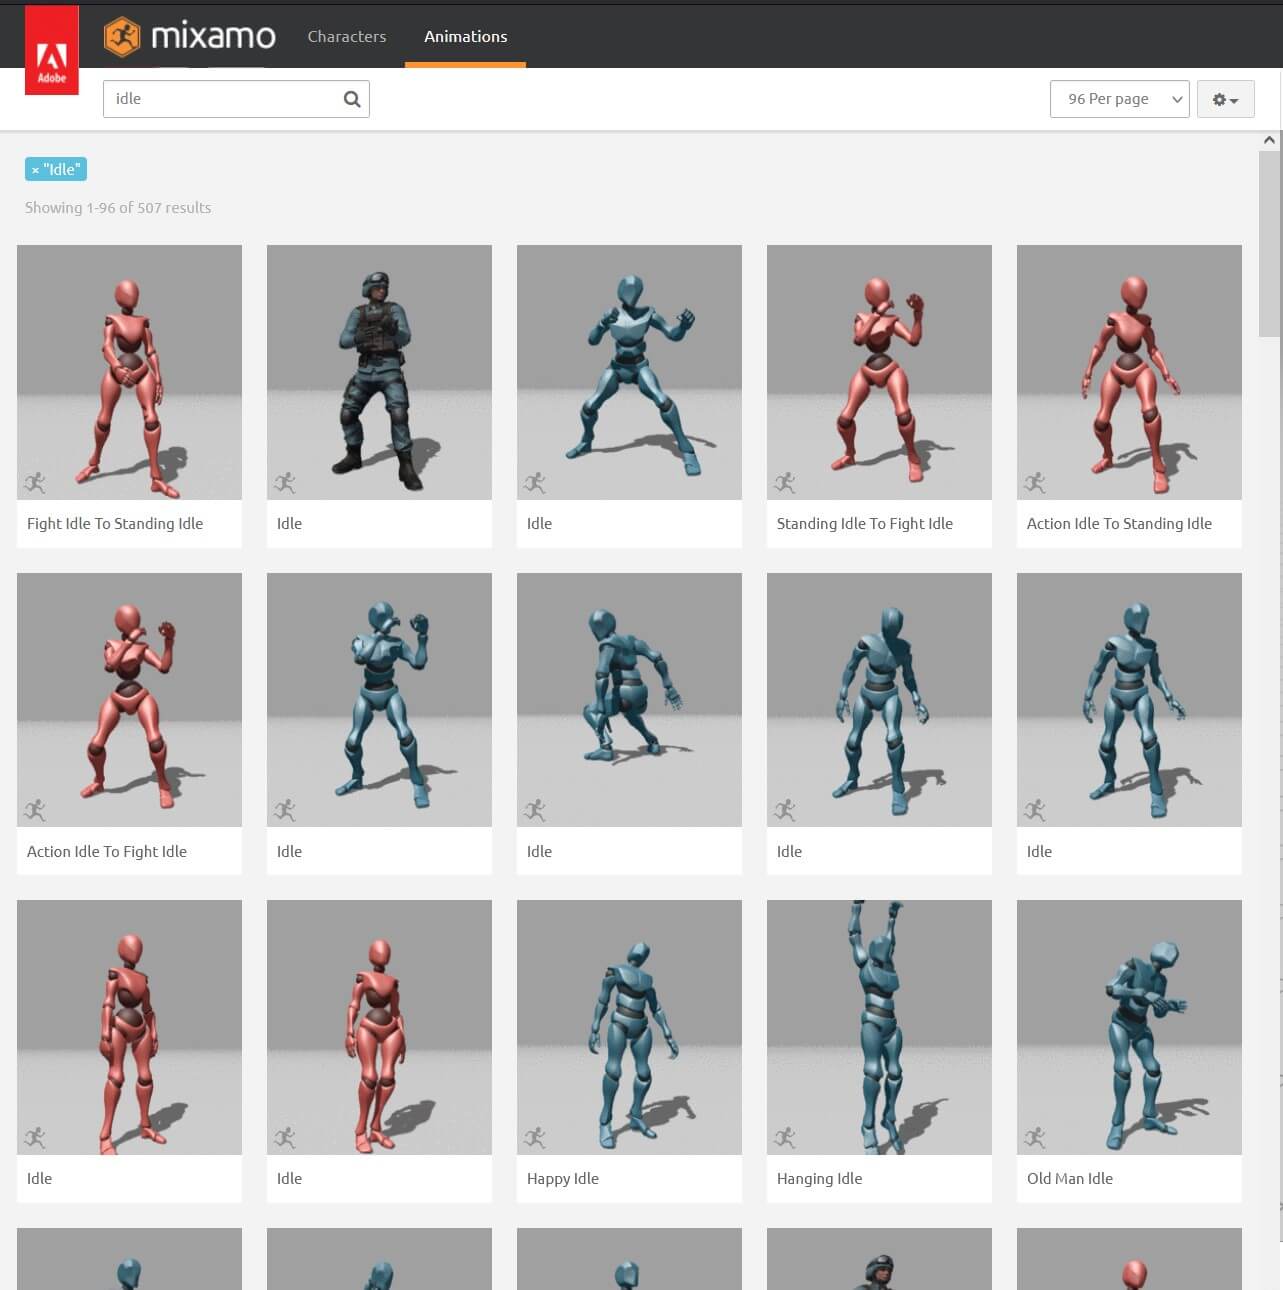
As you can see we have a lot of idle animations at our disposal. We are going to select the first animation from the right side in the second row of this list:
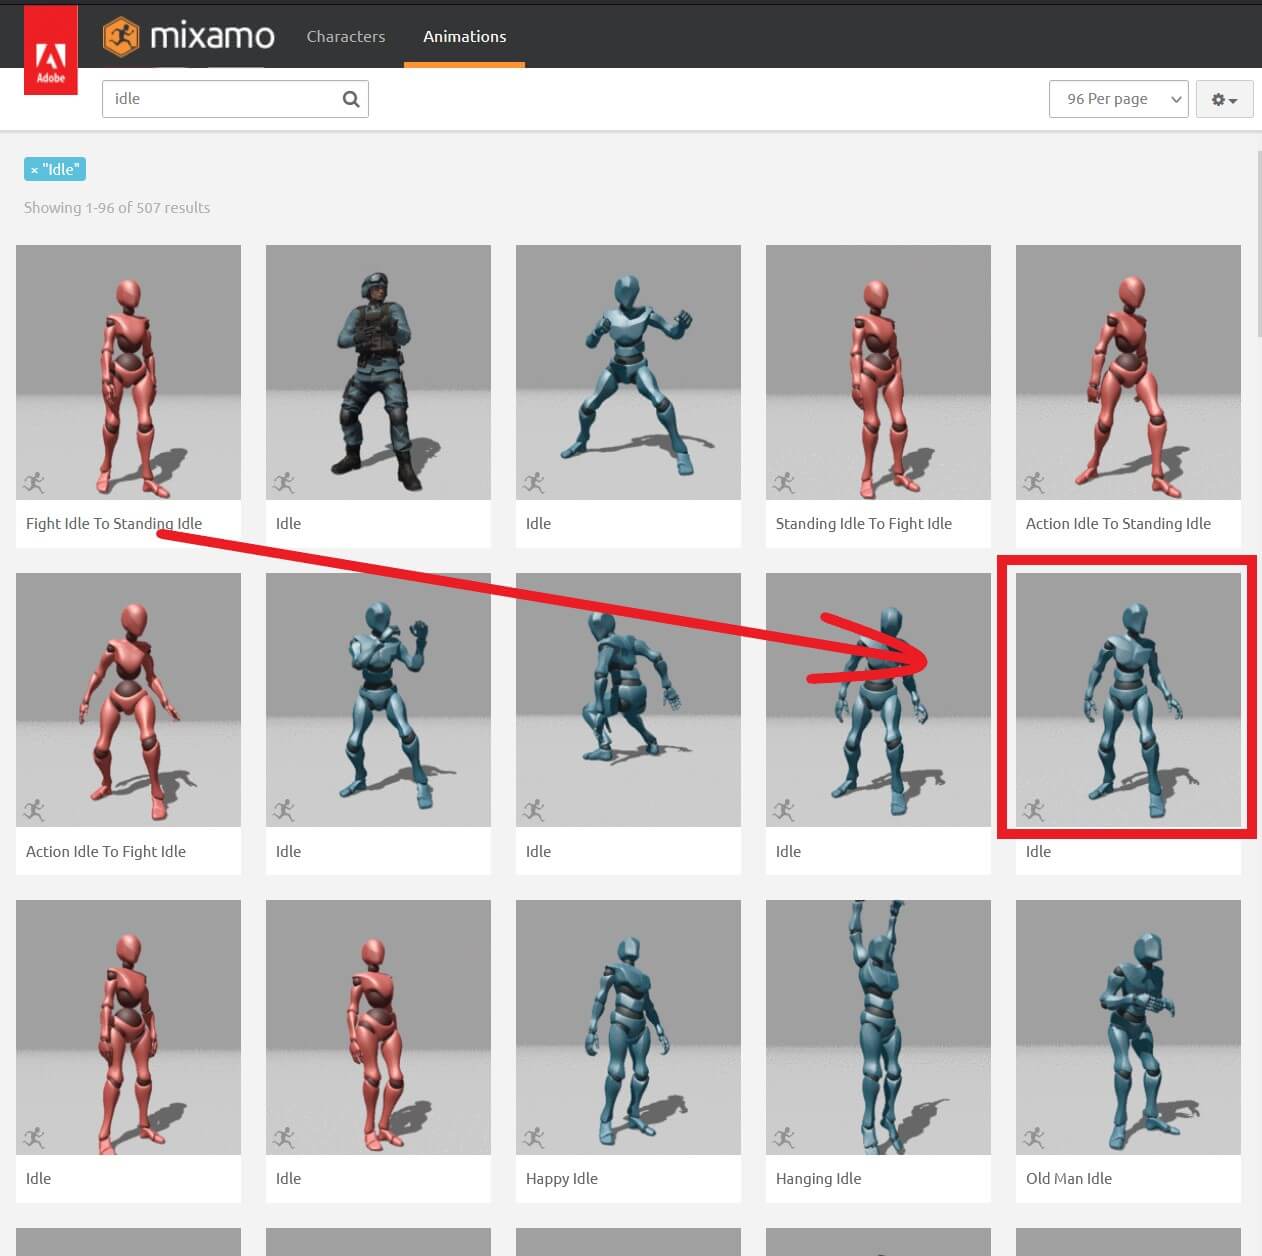
When you select the animation it will automatically be applied to the selected 3D model and you can see it action.
You can also zoom in and out in the preview window and move around using the mouse and the WASD keys on your keyboard:
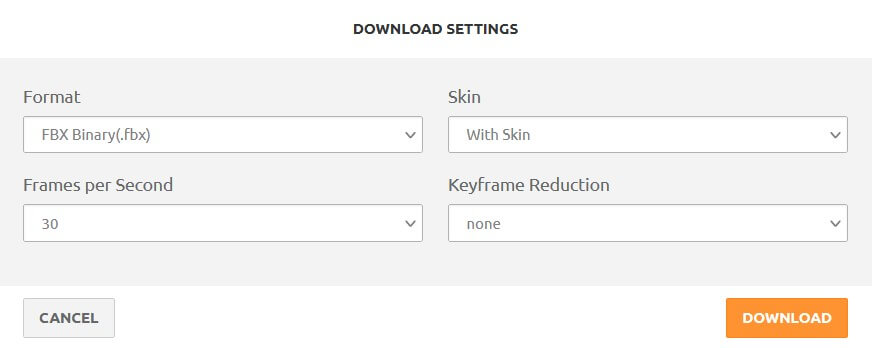
The Format settings is going to stay the same e.g. FBX Binary(.fbx), the Frames per Second is 30, Keyframe Reduction is none, as for the Skin, click the drop down list and select the Without Skin option and press the Download button:
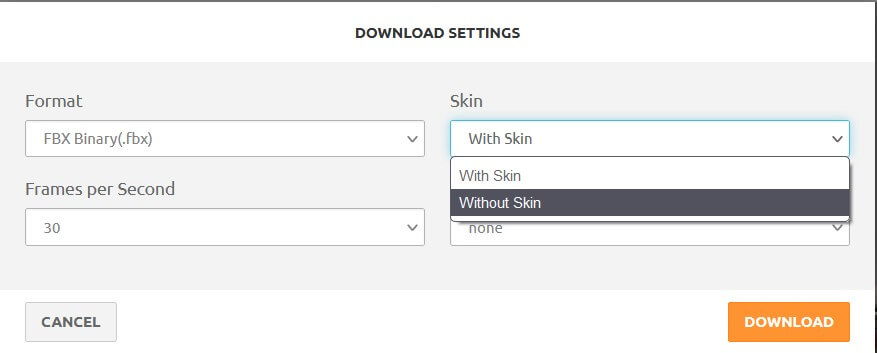
One thing that I will also mention is that you are not obligated to use the same idle animation as I did. You can use any idle animation that you find on the website, this will not affect the game in any means.
We also need the running animation so in the search at the top left corner type running, and from the animations list select the first animation from the right in the second row:
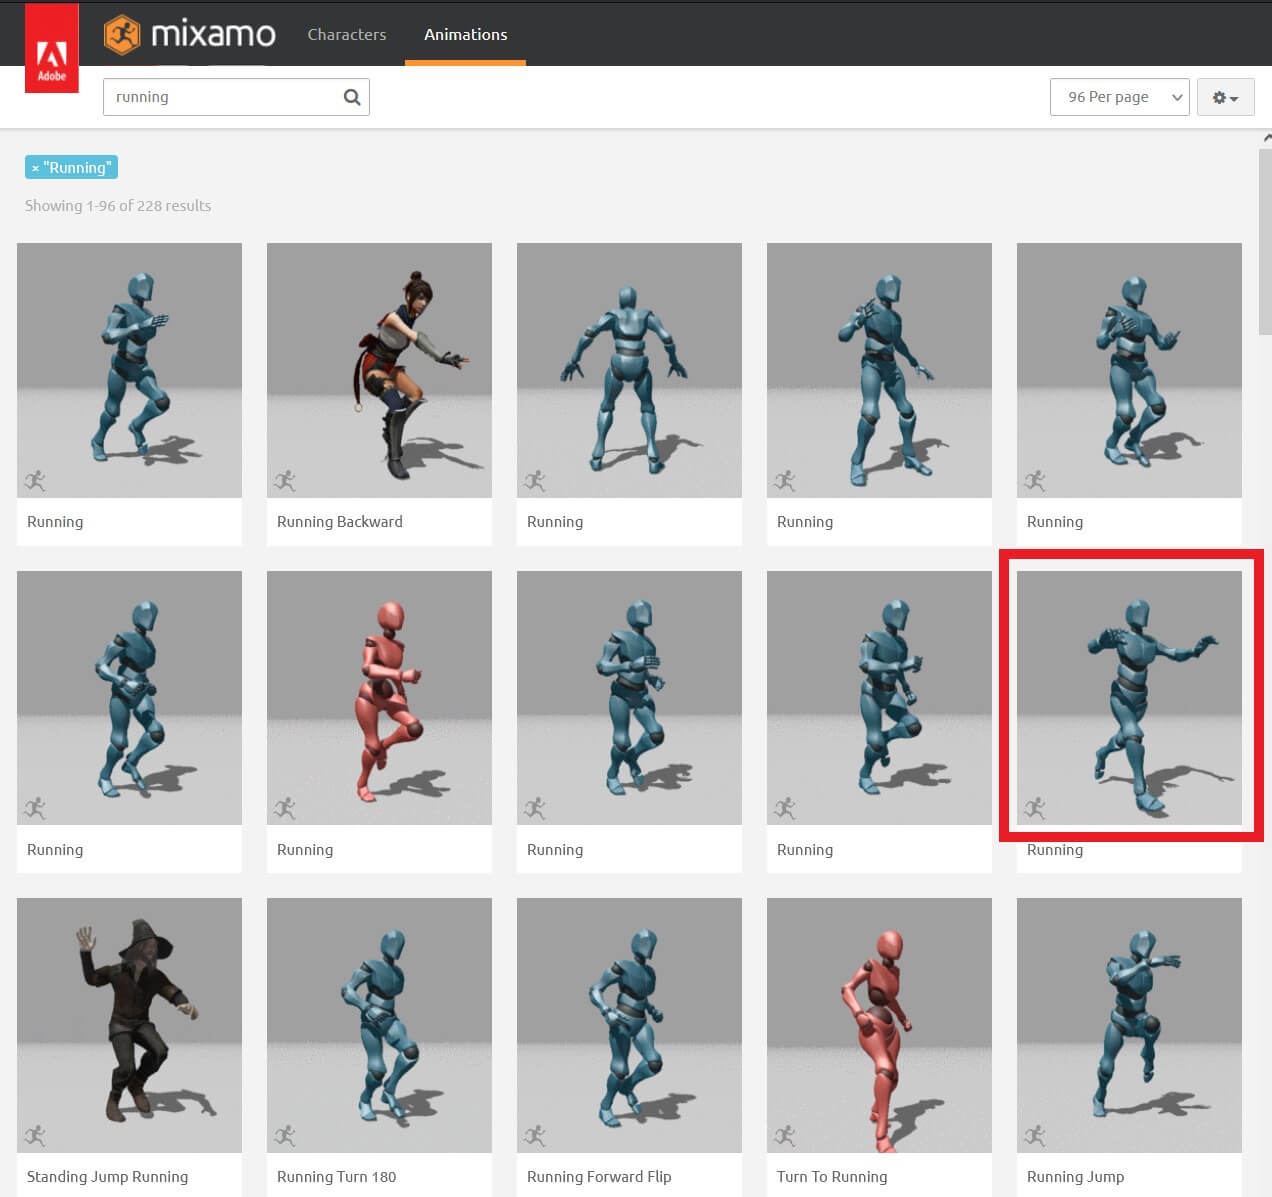
The same settings we talked about for the idle can be applied here for the running animation which means you can change the arm spread length of the 3D model.
We can also change the speed of the animation using the Overdrive settings. We didn’t cover it for the idle animation because it would not make much of a difference, but for a fast animation it can be useful to make the animation faster or slower:
For the running animation set the Overdrive settings to 30, and the arm spread length to 65, again you don’t have to use the exact settings as I am or the same animation, you can choose some other animation and other settings.
When you are done, click the Download button and in the Download Settings window use the same settings we did for the idle animation.
For the Skin choose Without Skin and other settings can stay at their defaults and press the Download button.
Importing Assets In Unreal Engine
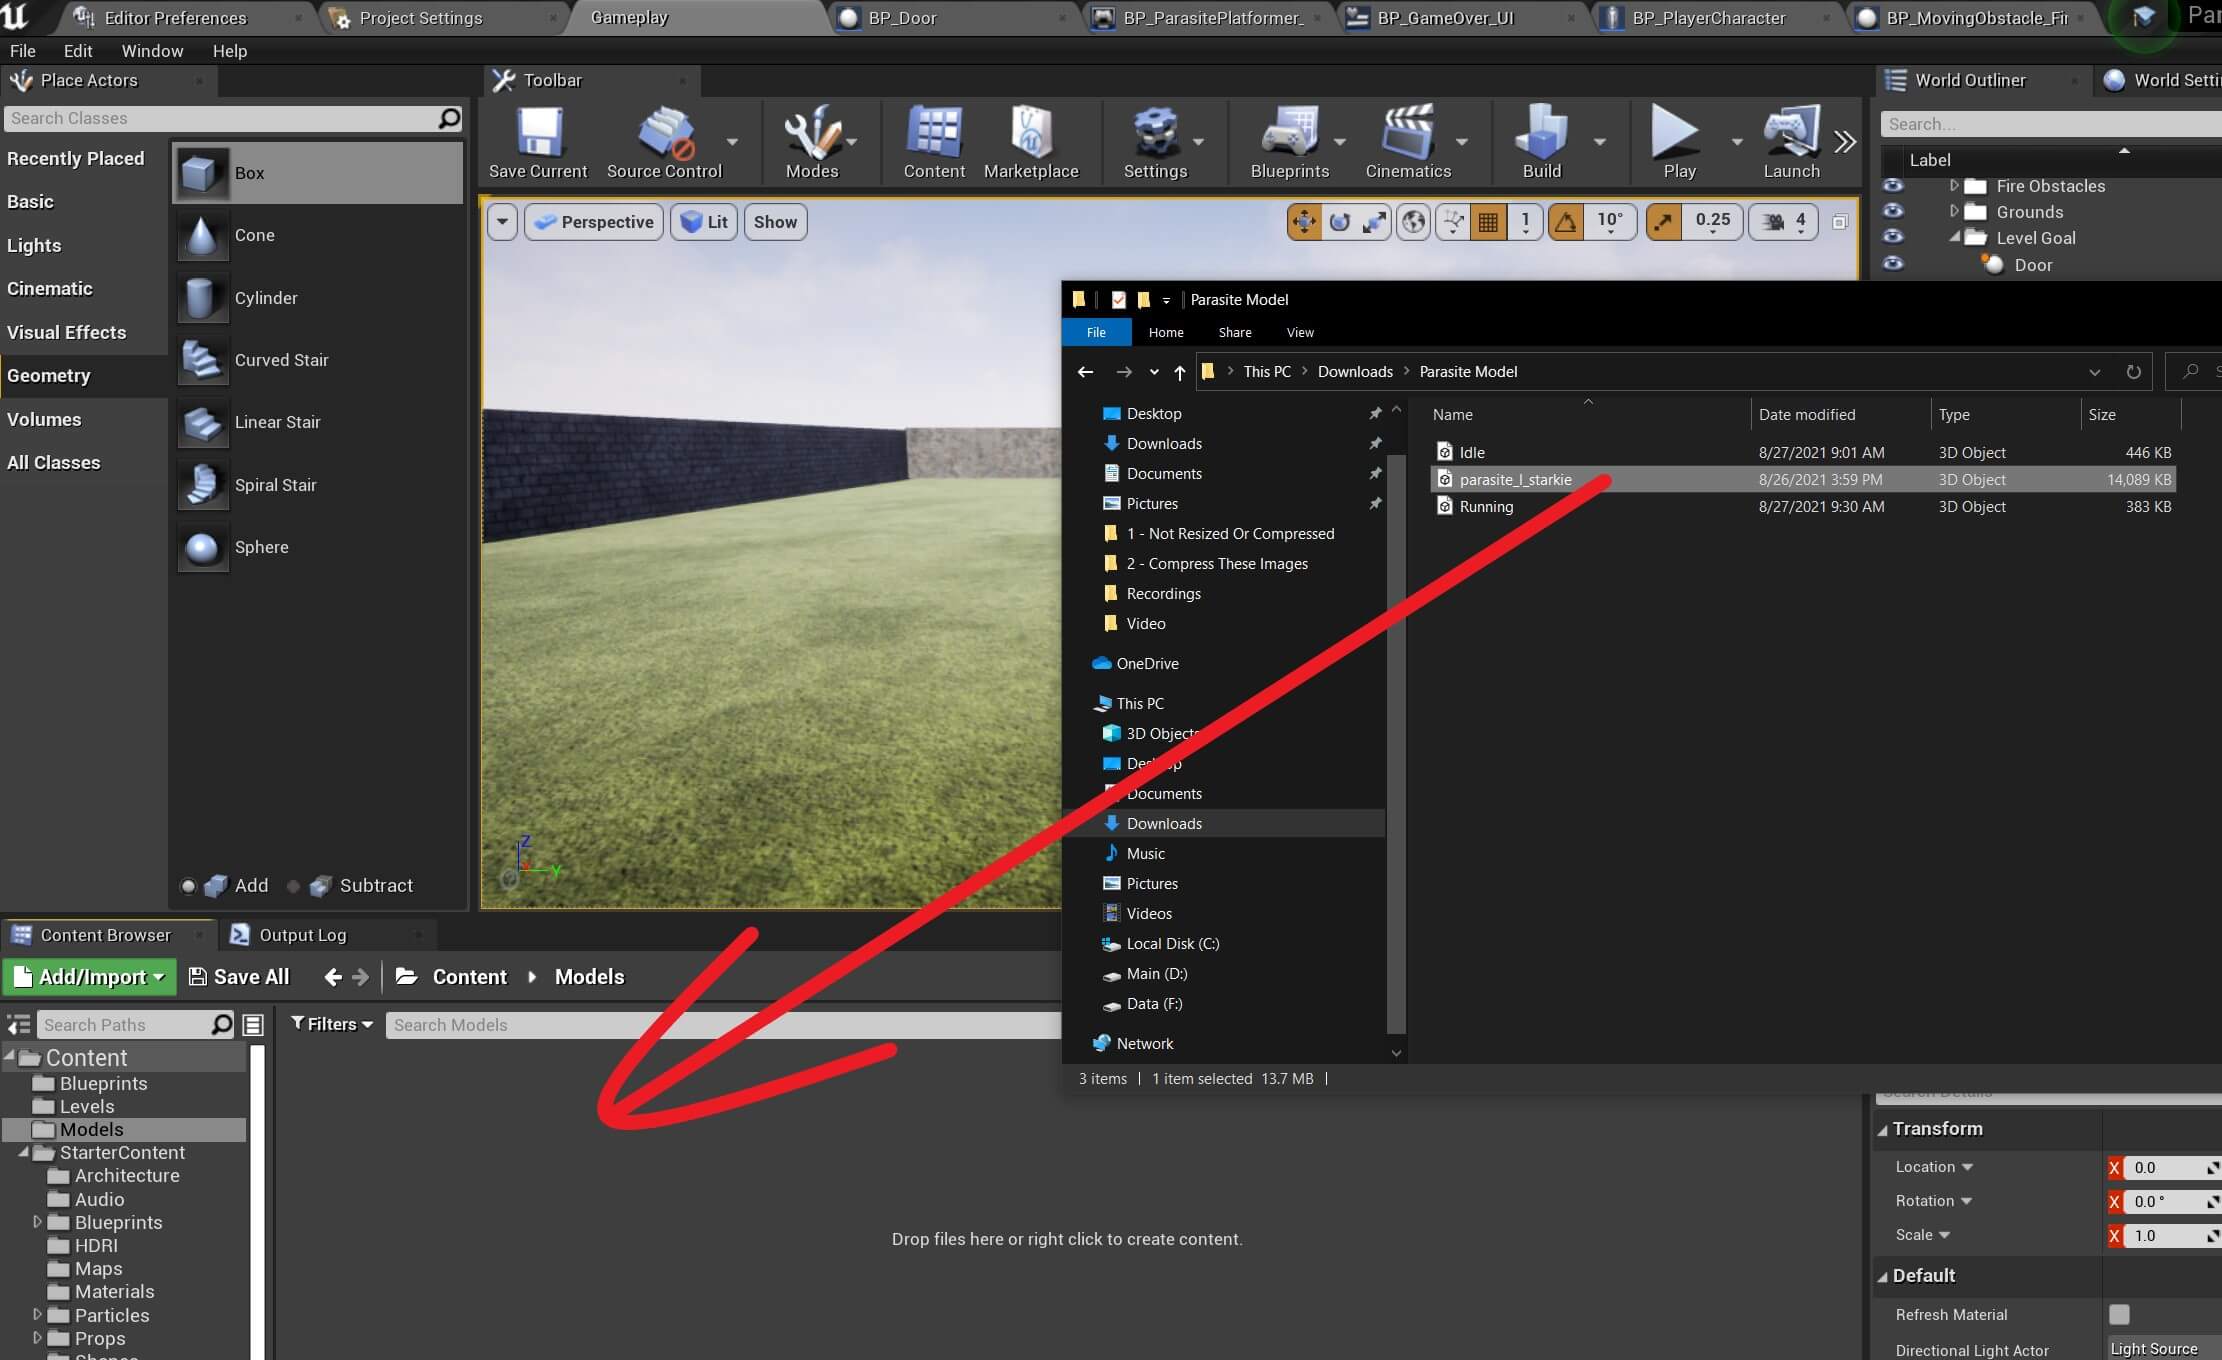
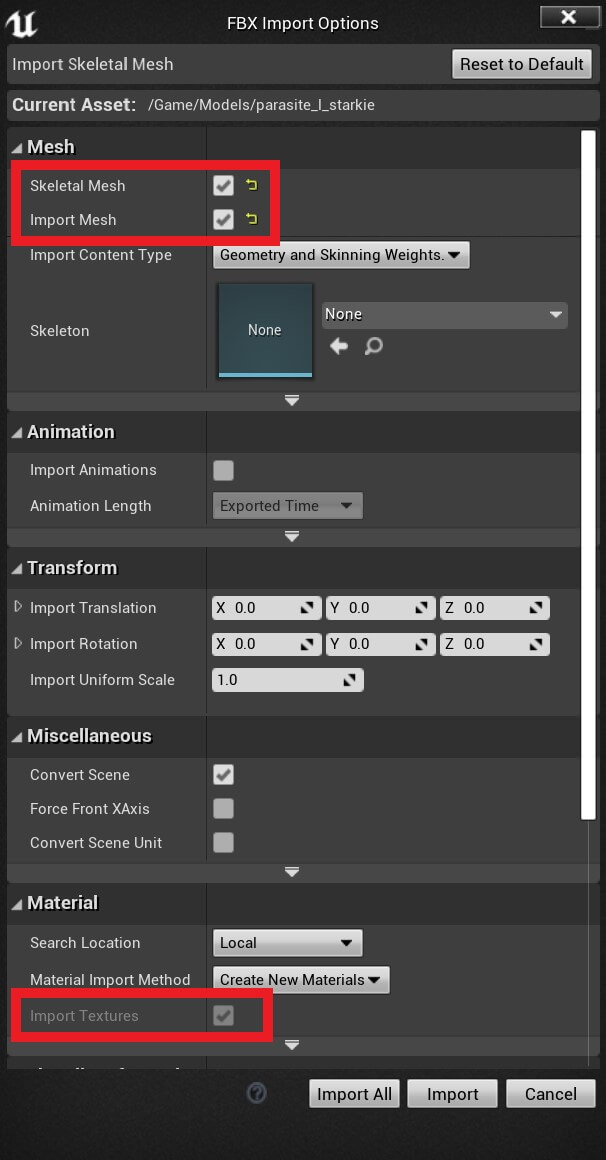
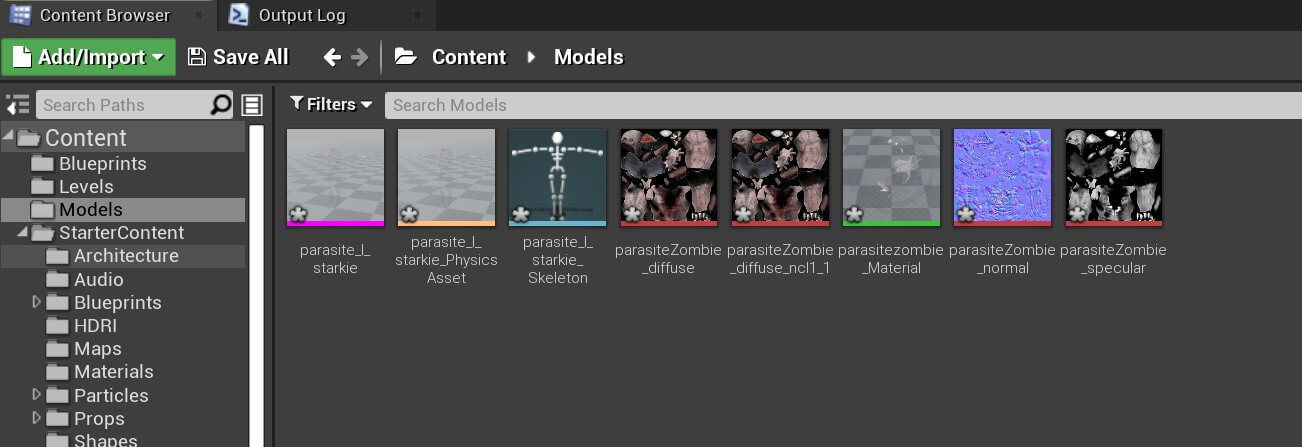
Now that we imported the Parasite 3D model we can import its animations.
The reason why we first import the 3D model then we import the animations is that the animations are depended on the 3D model because they need a skeleton of the 3D model for the animation to work.
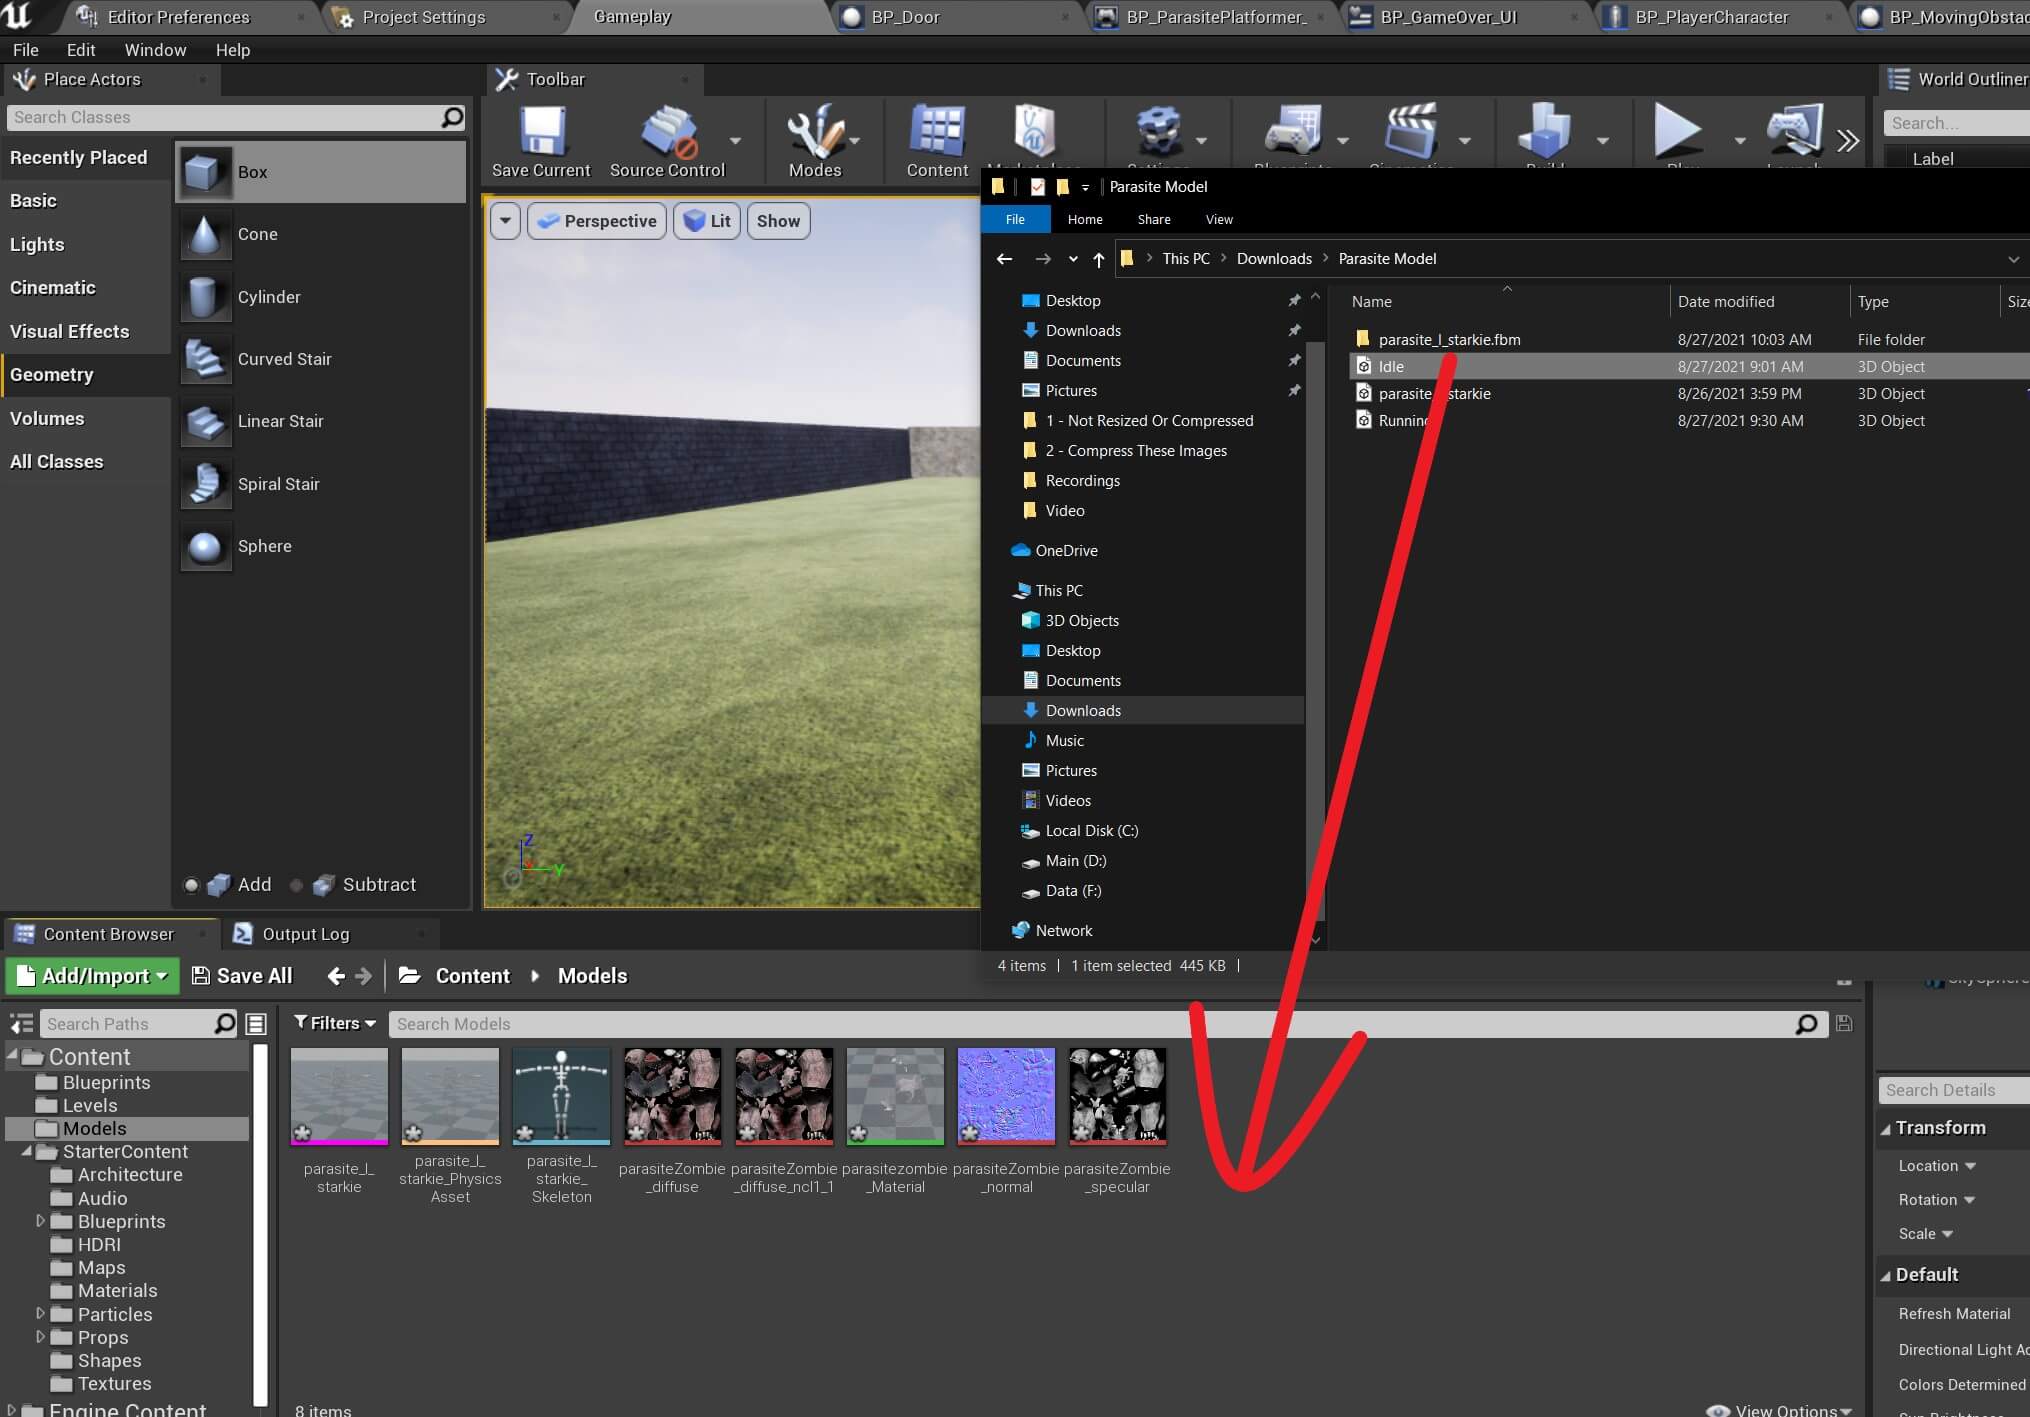
We can create a separate folder where we would store the animations, but again, since we have only one 3D model in the whole game we can place the model and its animations inside the Models folder.
So now, drag the idle animation inside the Models folder:
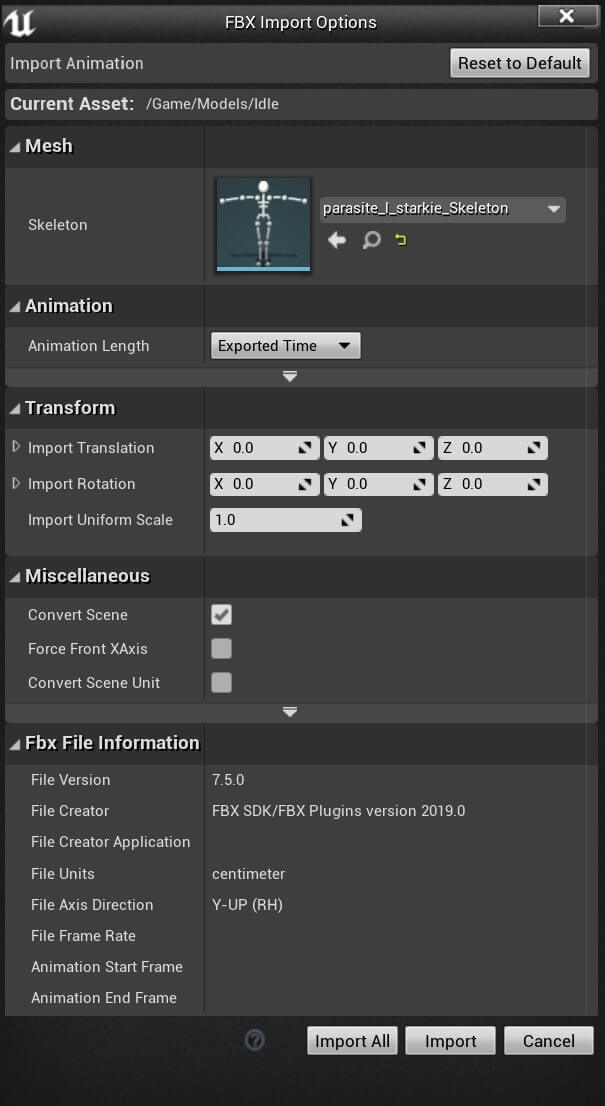
Same as with importing the 3D model, the FBX Import Options will appear.
You can see that under the Mesh settings the selected skeleton for the idle animation is the parasite_l_starkie_Skeleton which is detected by default because we imported the 3D model first.
For the animation we don’t need to check anything inside the FBX Import Options we can just press Import All button and wait for Unreal Engine to import the animation:
Import the running animation by repeating the same process we did for the idle animation.
Making The 3D Parasite Model Visible By Changing The Material Settings
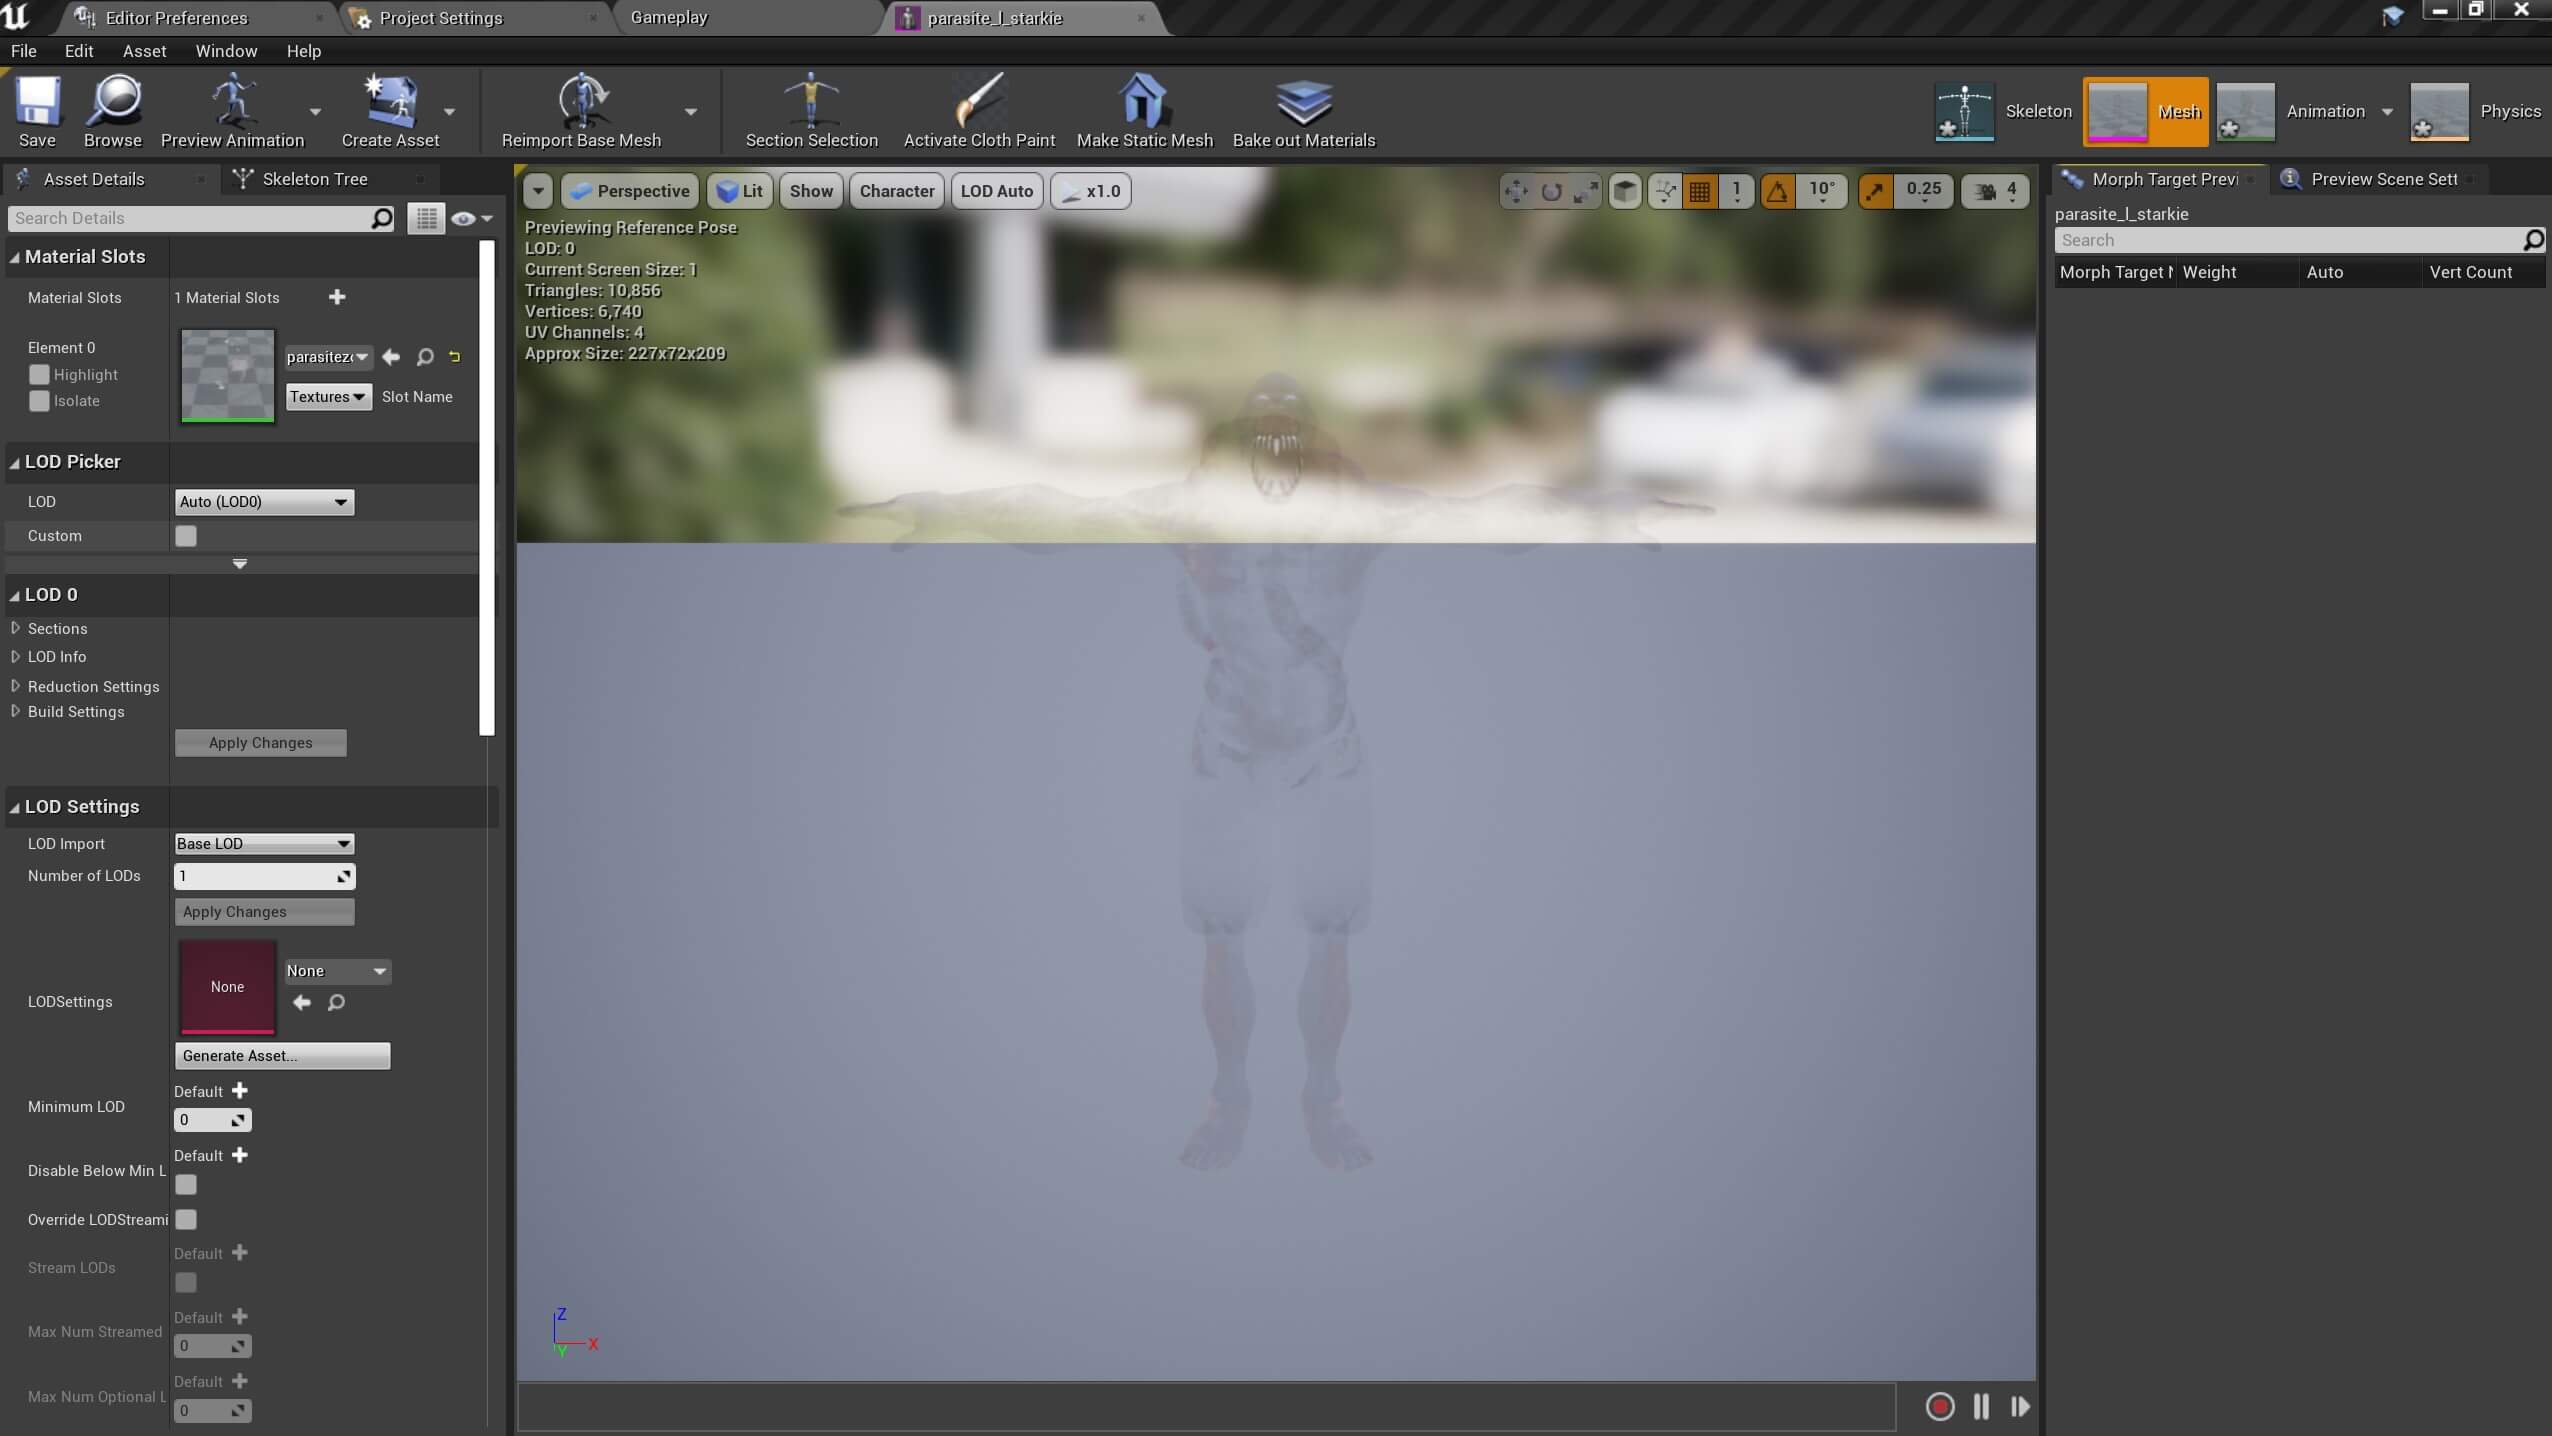
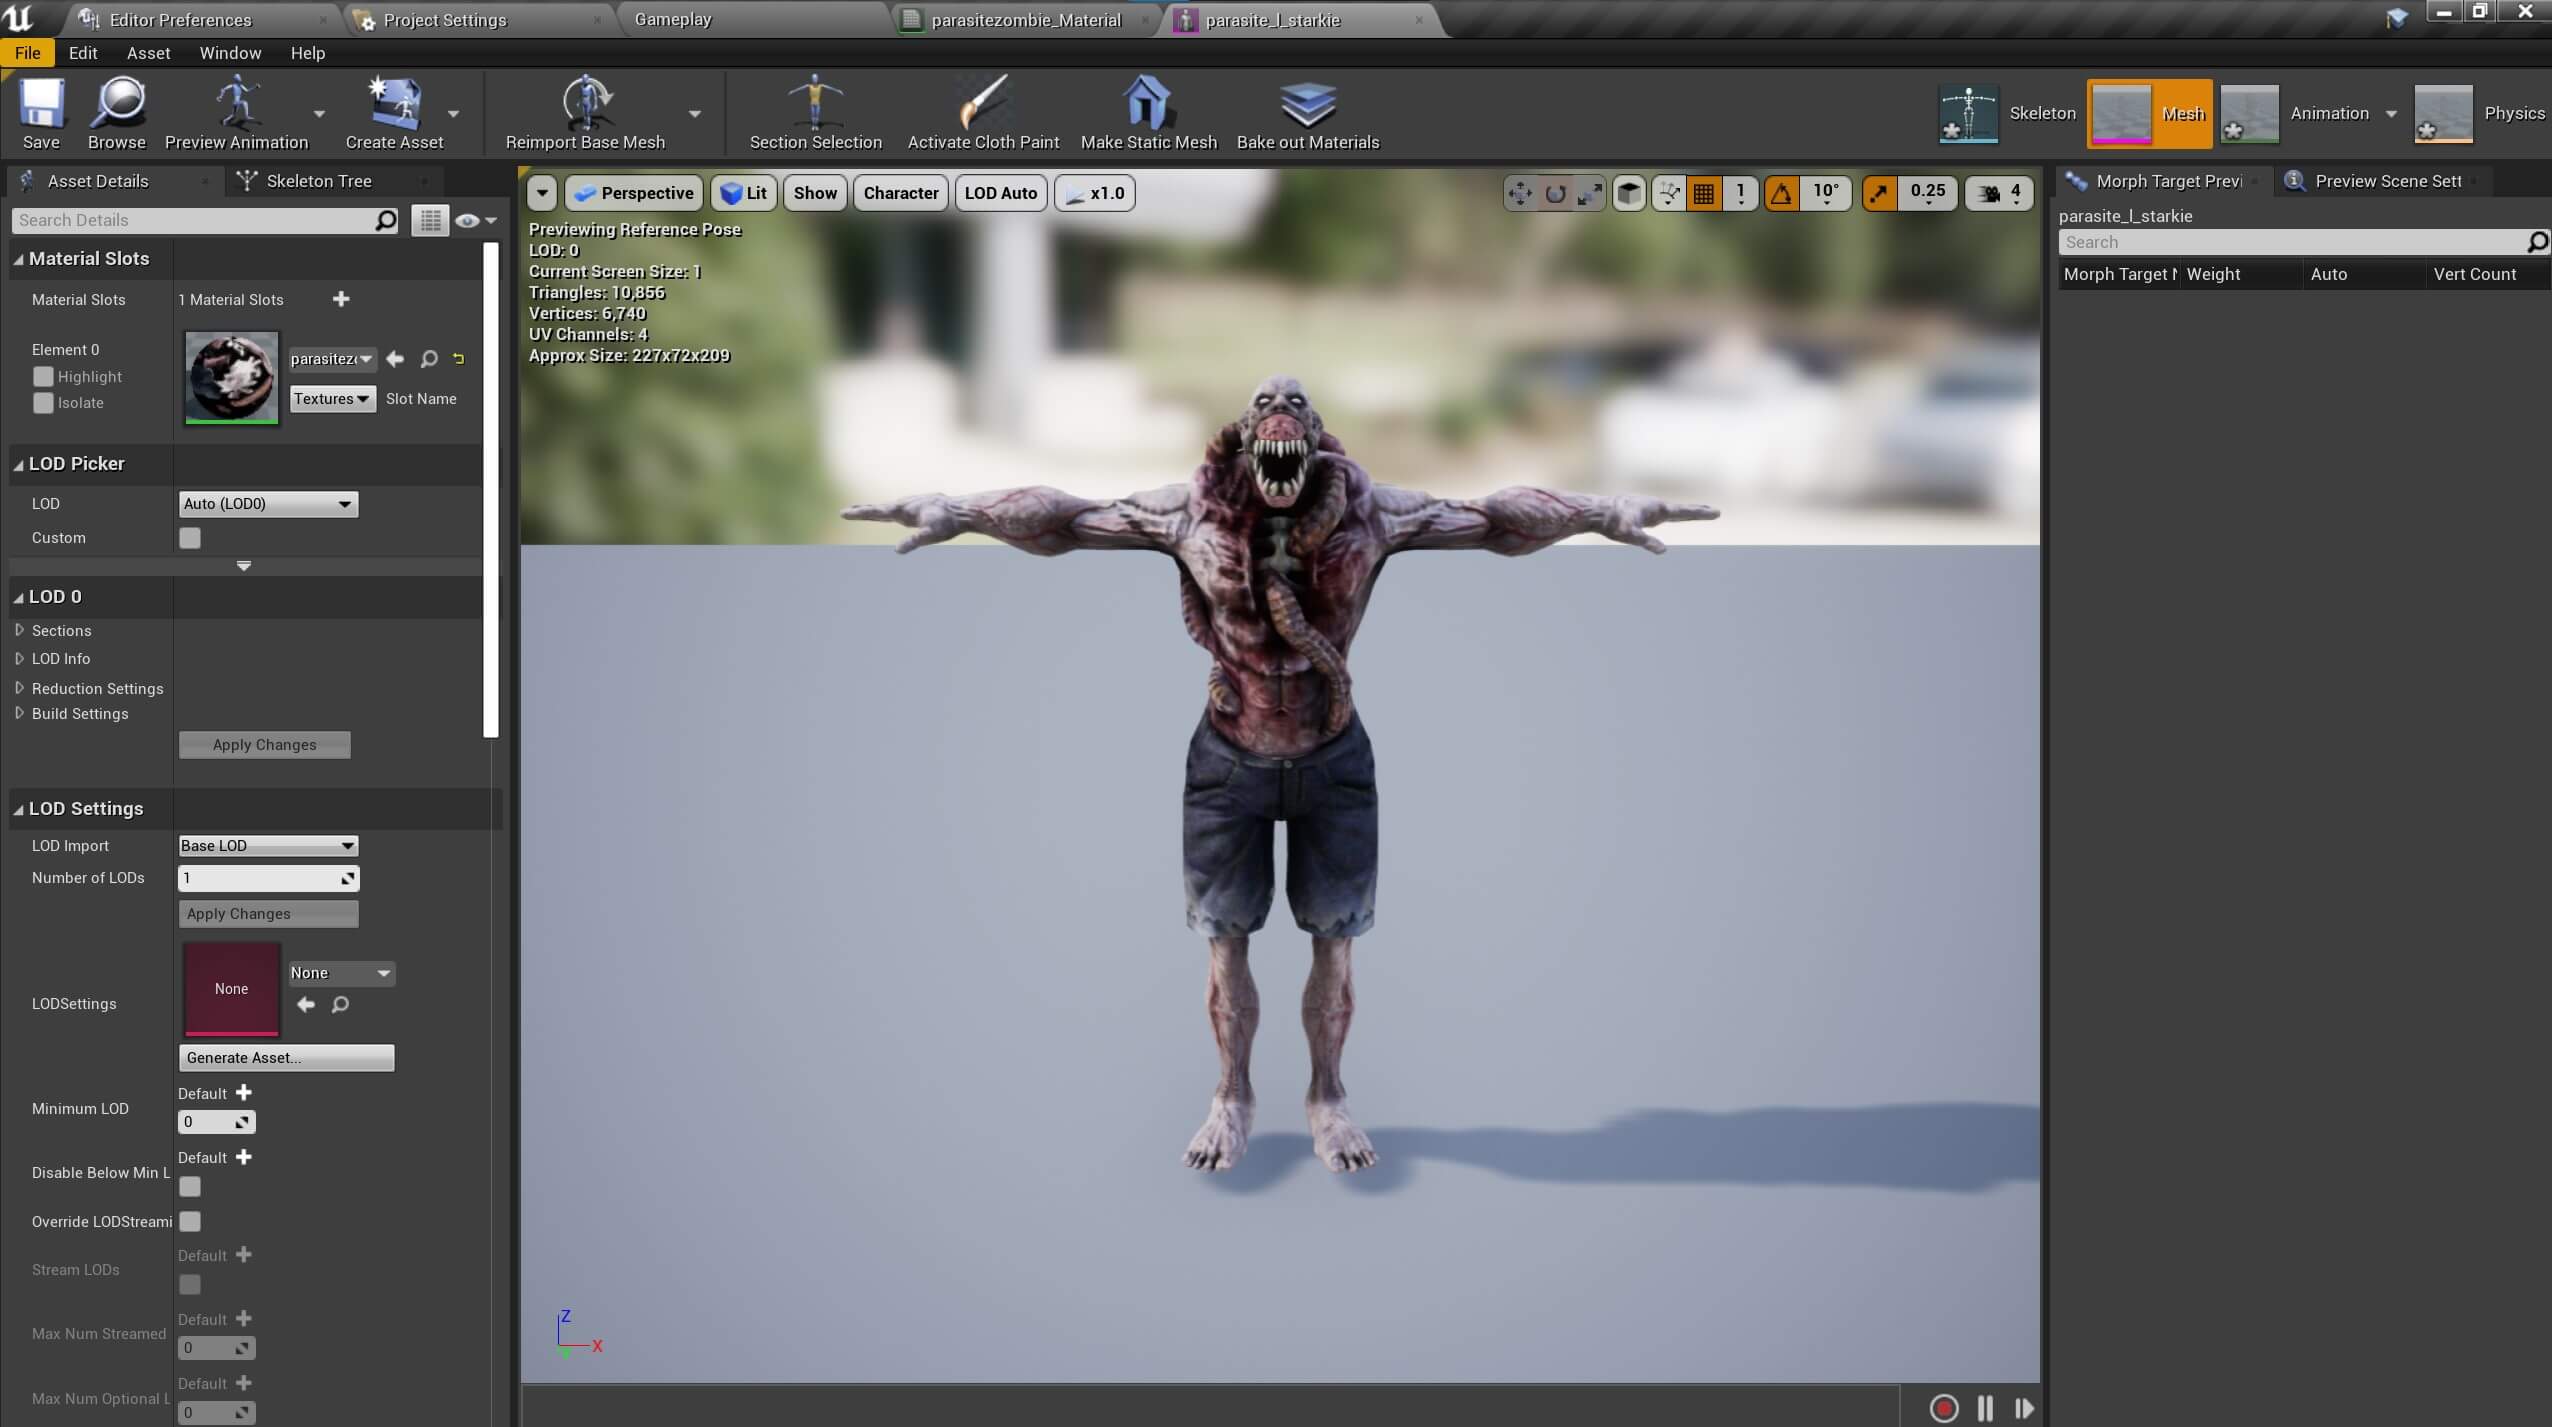
We can preview the 3D model that we imported by opening it in the editor window. Double click on the parasite_l_starkie in the Models folder:


Inside the Material editor window for the parasitezombie_Material, in the Details tab on the left side under the Material settings, change the Blend mode settings from Translucent to Masked, and when you are done, press the Apply and Save buttons at the top left corner:
If we check out the 3D Parasite model now, we will see that it is not transparent anymore and it is fully visible with all of its textures:
Creating The Enemy Blueprint
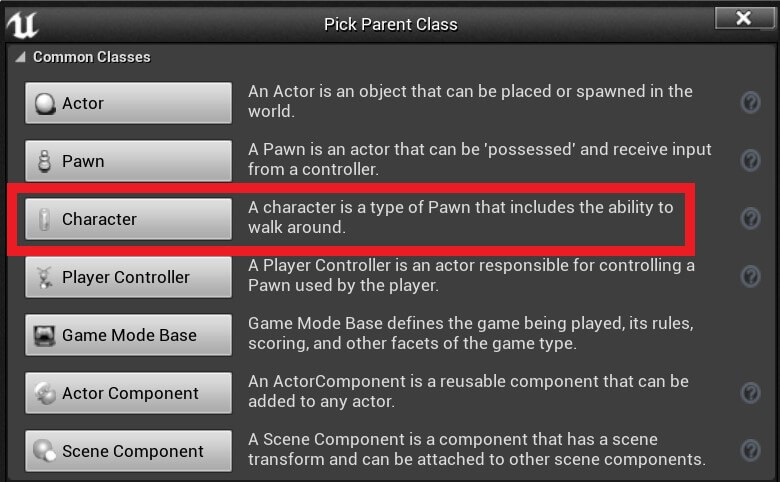
Before we can animate the Parasite enemy we need to create a Blueprint for it.
Inside the Blueprints folder Right Click -> Blueprint class. Make sure it inherits from the Character class and give the new Blueprint name BP_Parasite_Enemy:
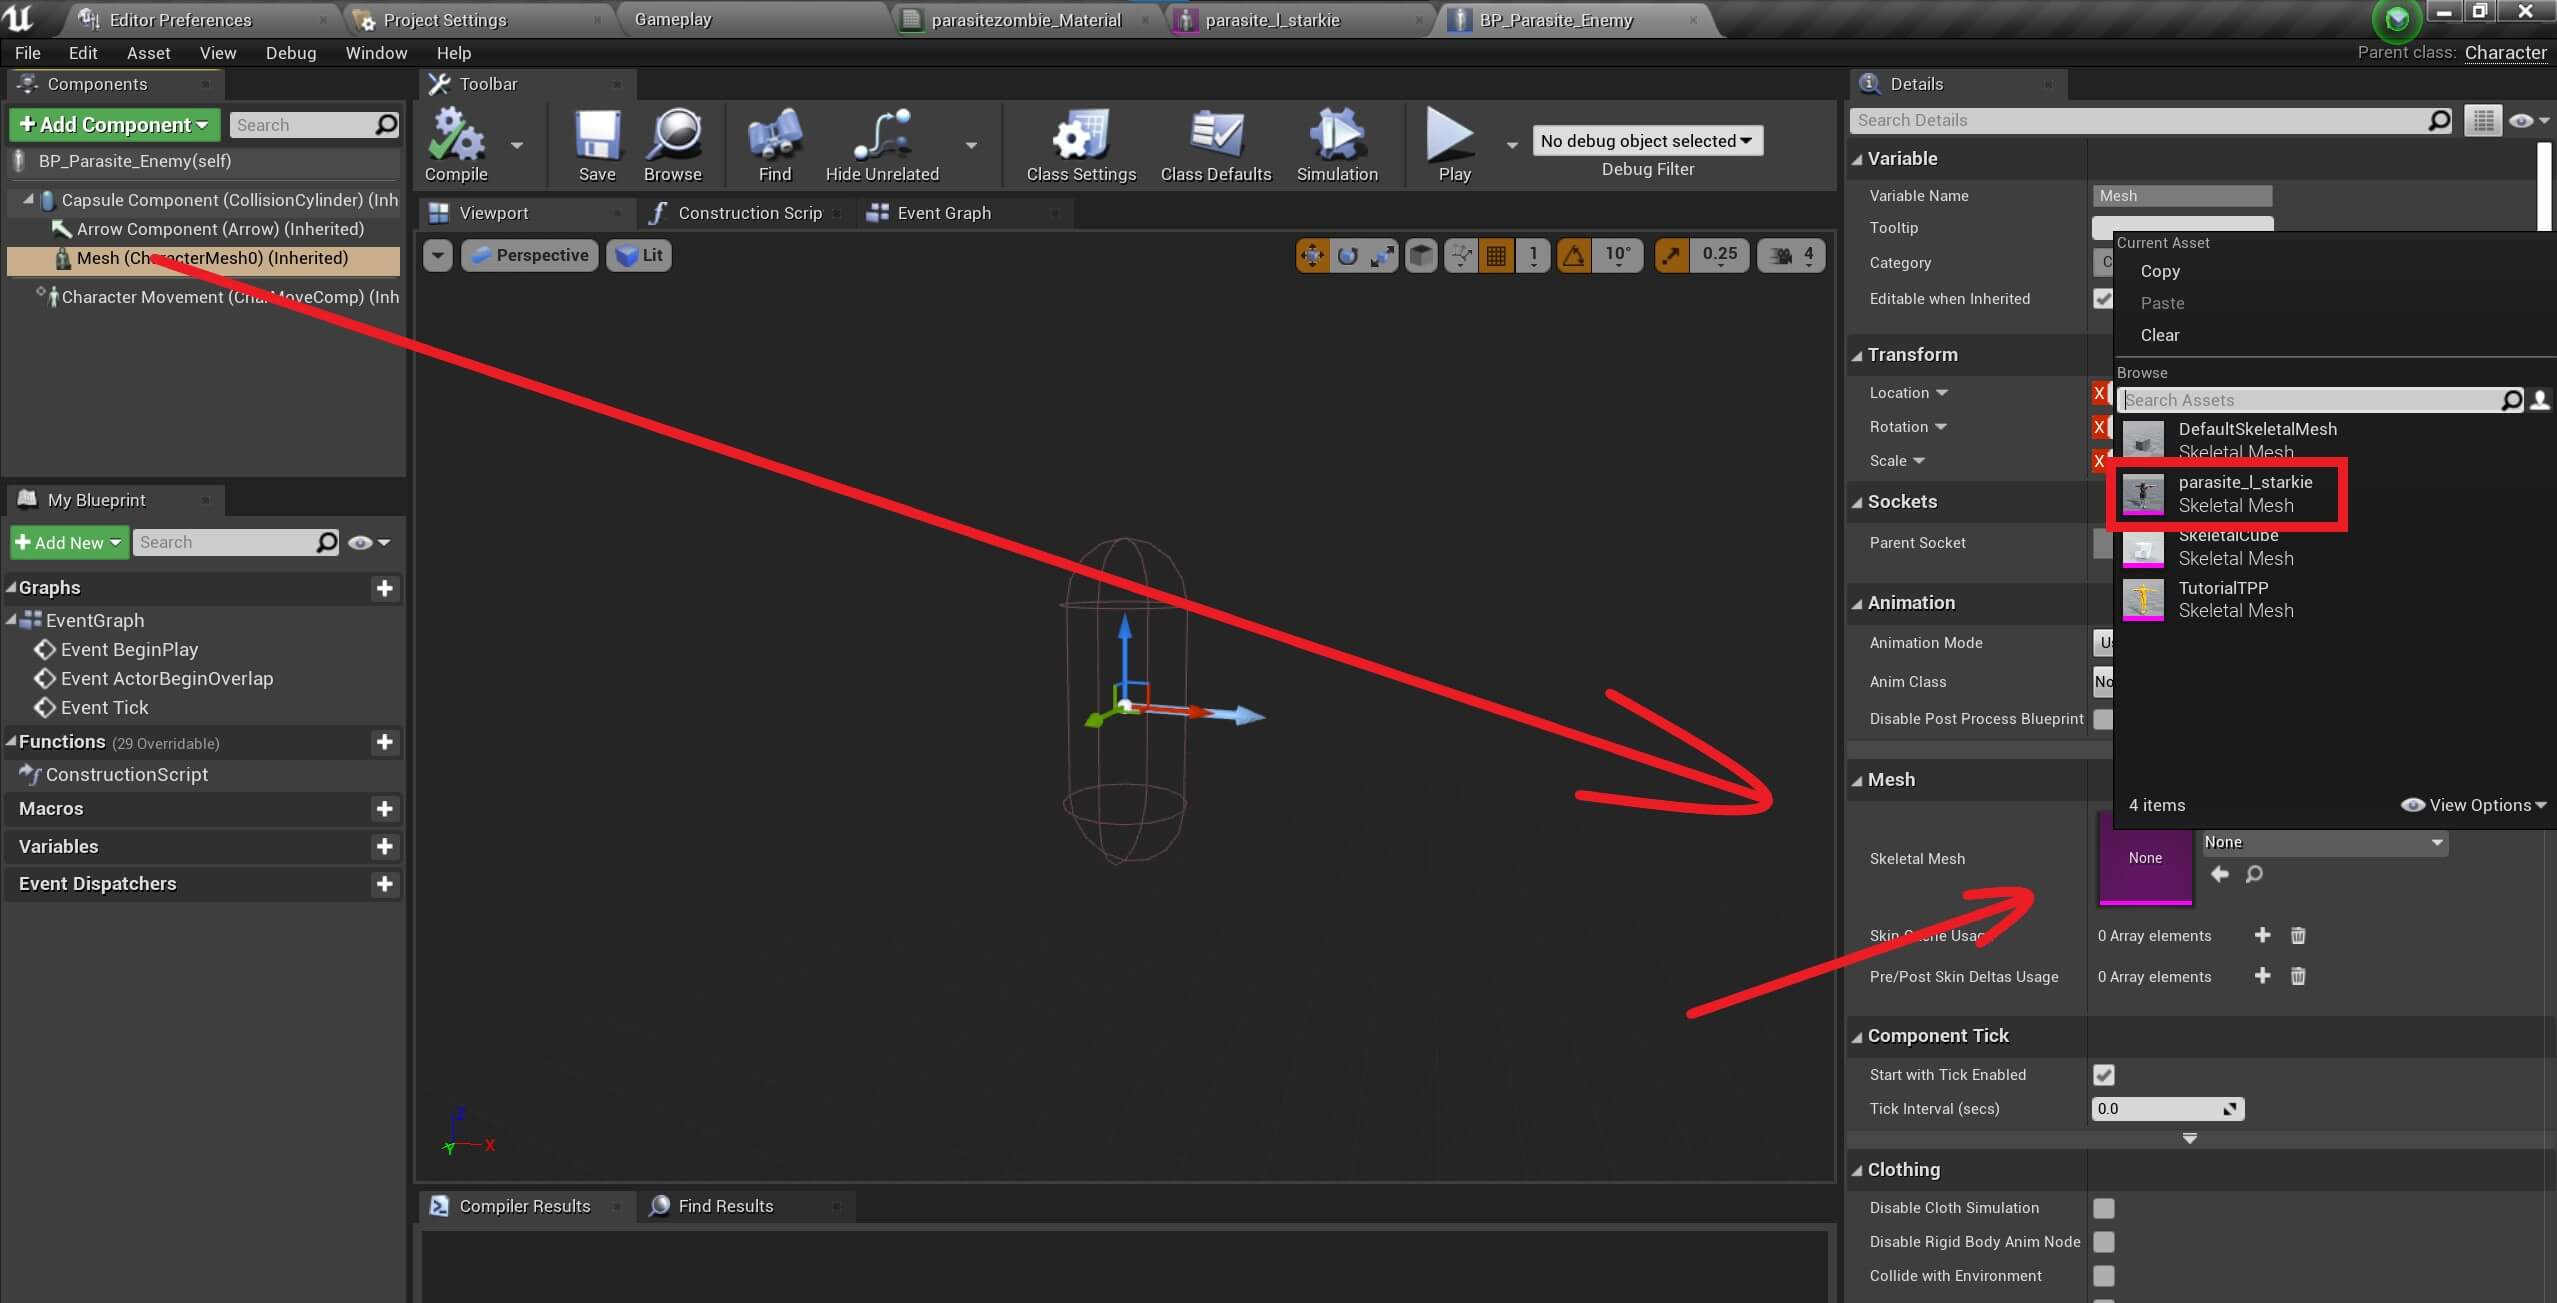
Open BP_Parasite_Enemy in Blueprint editor. In the Components tab, select the Mesh component and in the Details tab under Mesh settings select parasite_l_starkie as the Skeletal Mesh:
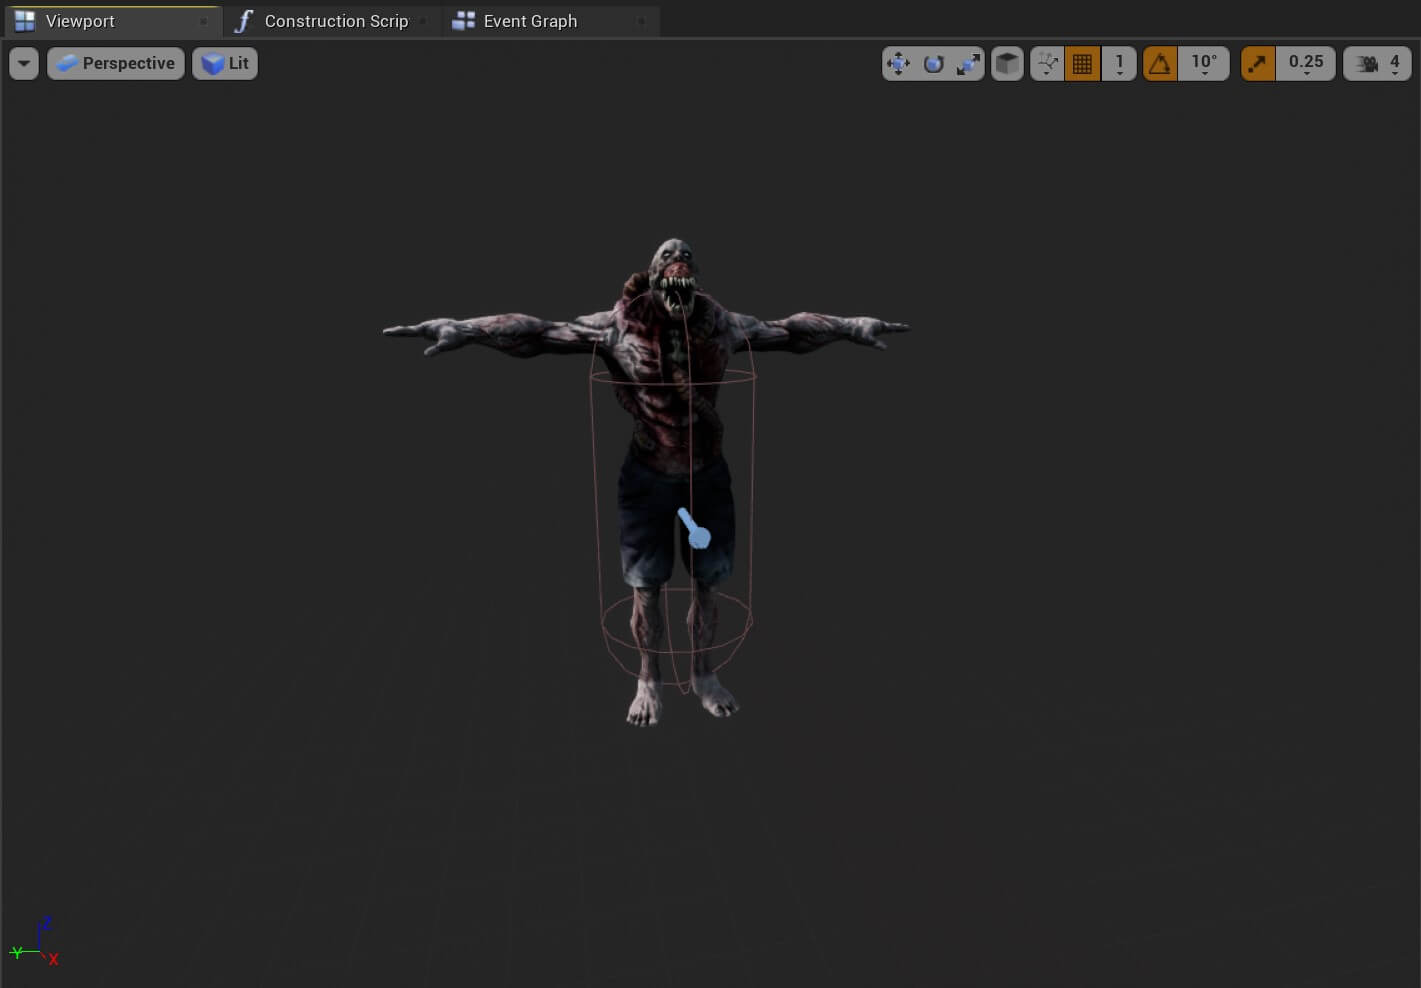
Now you will see the Parasite model inside the BP_Parasite_Enemy editor:
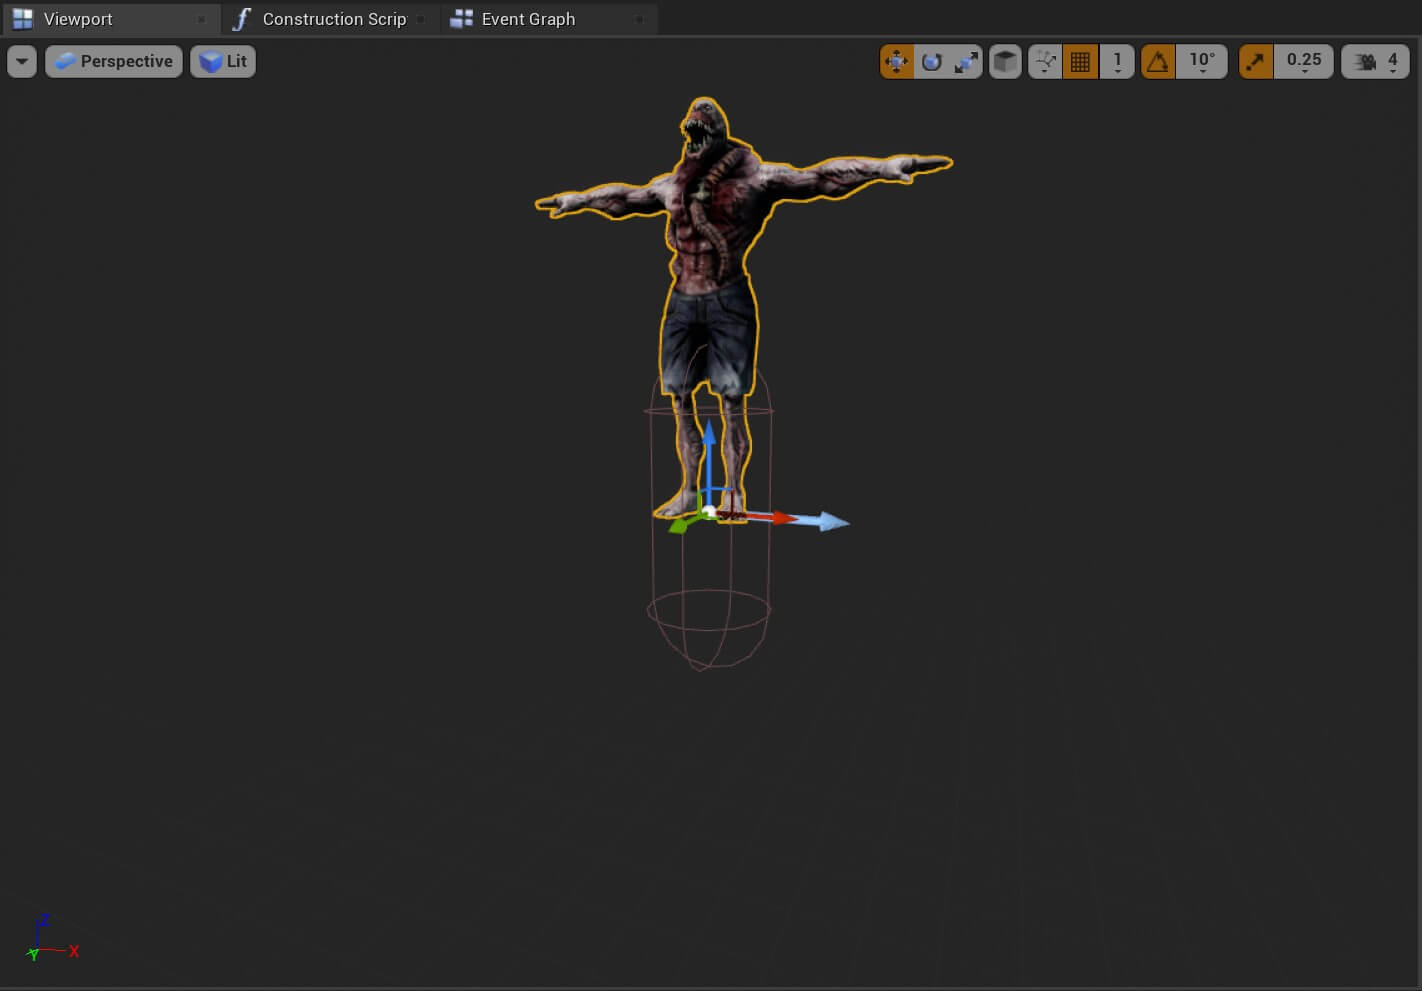
You can see that the Parasite mesh is placed above the Capsule component which is used to provide a solid body for the Parasite mesh.
Because of that we are going to edit the Location property of the Parasite mesh. In the Transform property set the following values for the Location:
- X = 0
- Y = 0
- Z = -87
And set the values for the Rotation:
- X = 0
- Y = 0
- Z = 270
We changed the Z rotation value so that the Parasite mesh is facing forward when he is spawned in the game.
Now the Parasite mesh is placed inside the Capsule component:
Animations In Unreal Engine
As I already mentioned a few times, if this was a larger game where we have more enemies and we need to animate them all we would create a separate folder to store the animations.
But for this game since we only have one enemy we can save the animations inside the Models folder.
So inside the Models folder Right Click -> Animations -> Blend Space 1D:
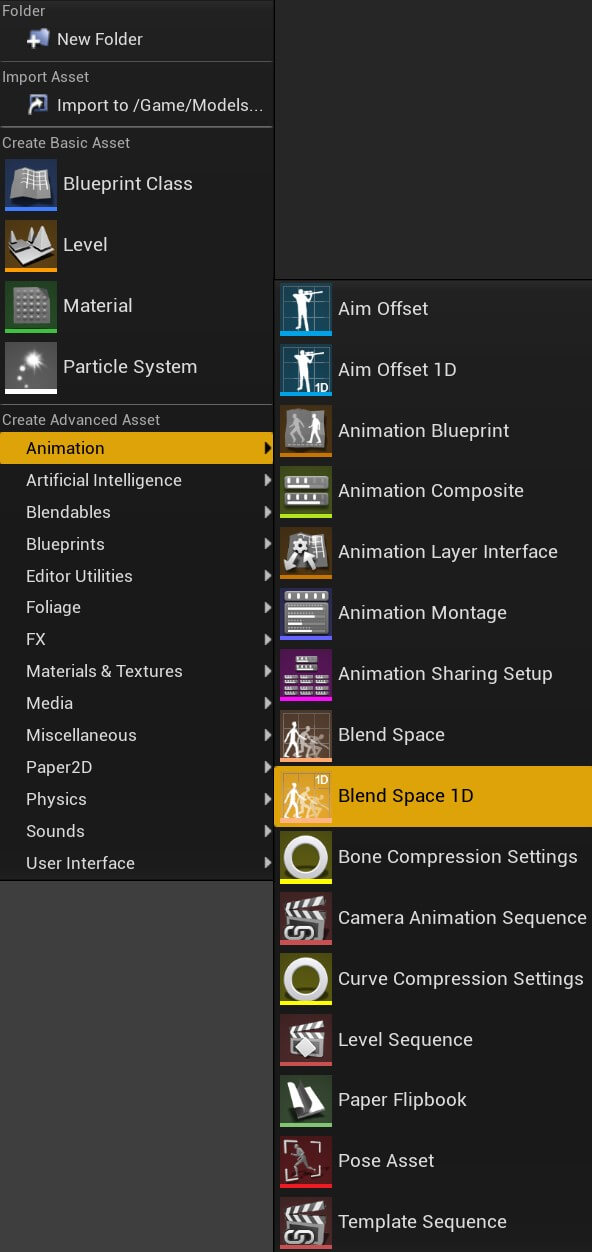
When you click on Blend Space 1D a new window will open prompting you to select a skeleton of the 3D model that will be used for this animation, in our case parasite_l_starkie_Skeleton:
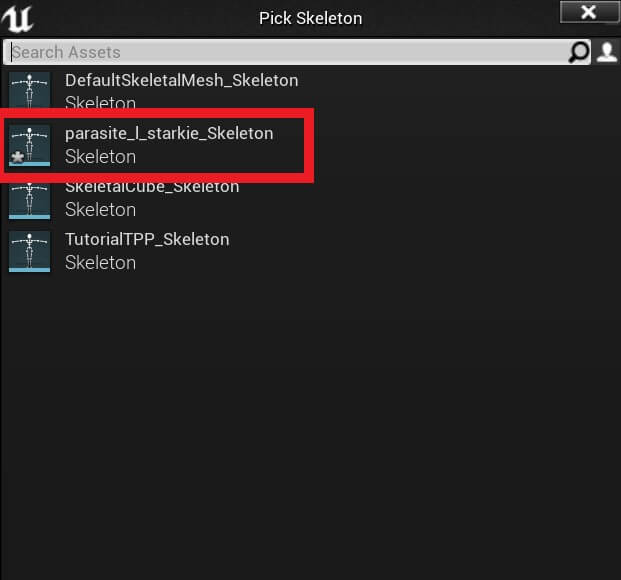
Name the animation Idle_Run_Animation.
If we had more idle and run animations for different enemies I would add the name of the 3D model who is the owner of that animation, for example Idle_Run_Parasite_Animation.
But again, since we only have one enemy we can just name it Idle_Run_Animation.
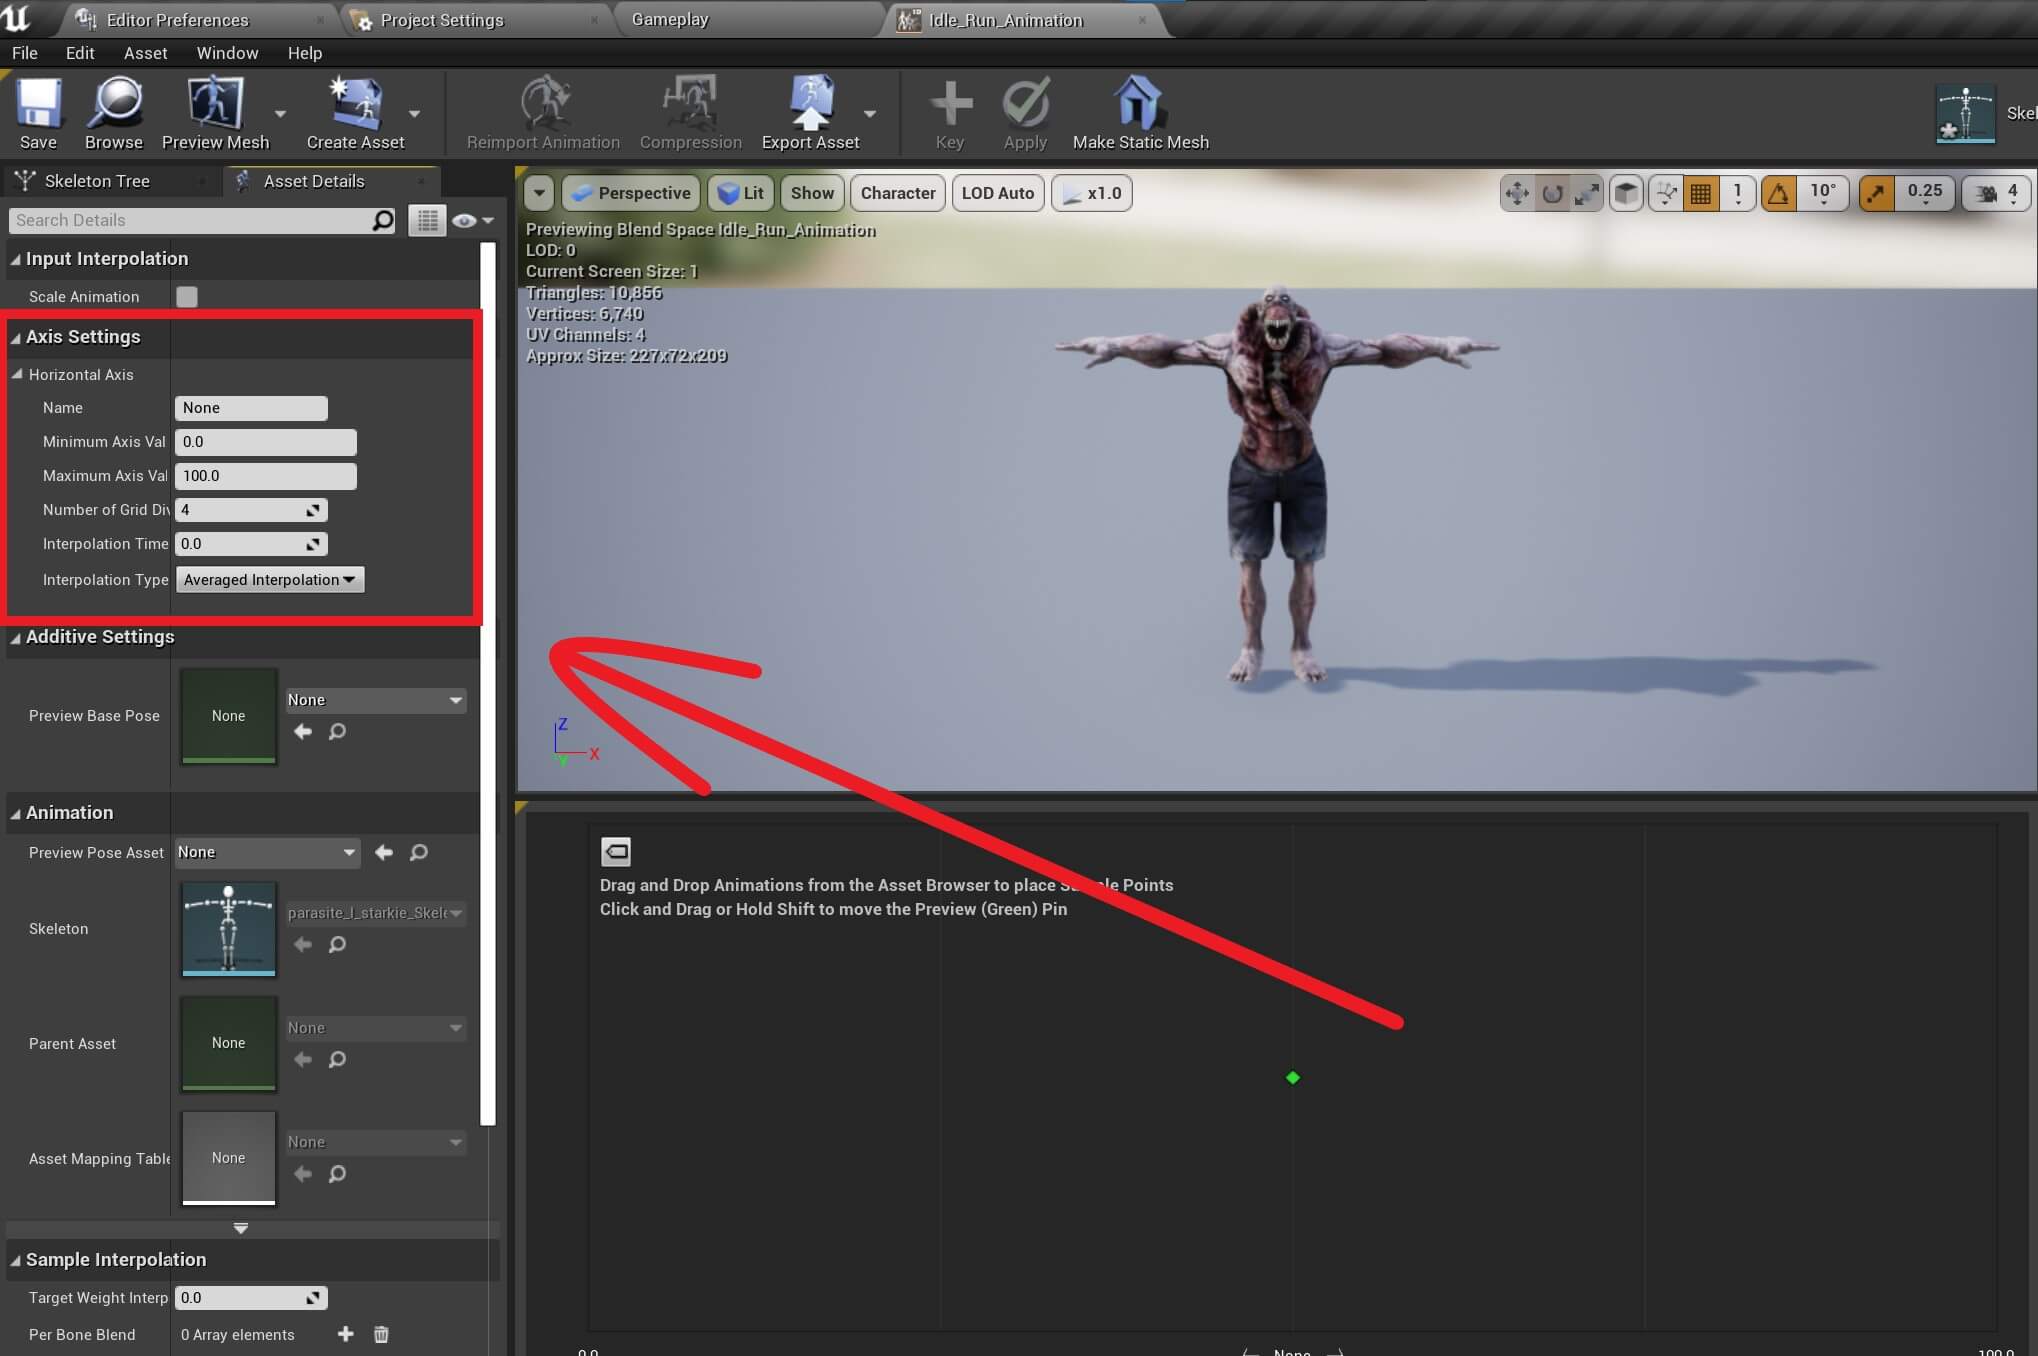
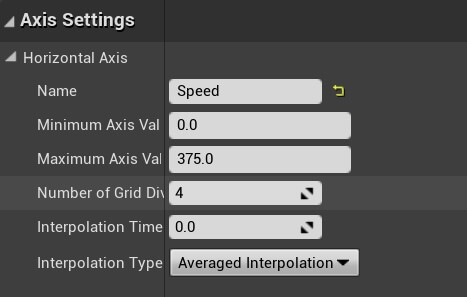
The Horizontal Axis is going to be the parameter that we will use to blend the idle and running animation.
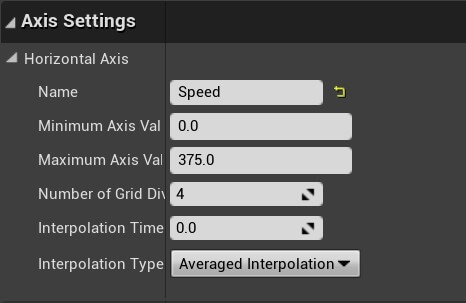
In the settings of the Horizontal Axis under name type Speed. For the Minimum Axis Value leave it at 0, and for the Maximum Axis Value set it at 375:
To make this work, we need to drag the idle and the running animations in the timeline.
Keep in mind, the idle animation goes on the left side and the running animation goes to the right side:
Because this is a Blend Space 1, we can add two animations in the timeline. One on the left side and the other on the right side.
On the left side we added the idle animation and on the right side the running animation.
Which means when the Speed parameter that we set up changes its value, we will shift from idle to running animation.
We can even preview that by using the Green frame icon in the timeline:
The Green Frame icon as I named it, represents the Speed parameter that we created.
When the Speed parameter has a value of 0 the idle animation is being played, when it has a value of 375 the running animation is played.
We also saw that while the Speed value gradually increases, a transition from one animation to another is performed.
Creating The Animation Blueprint
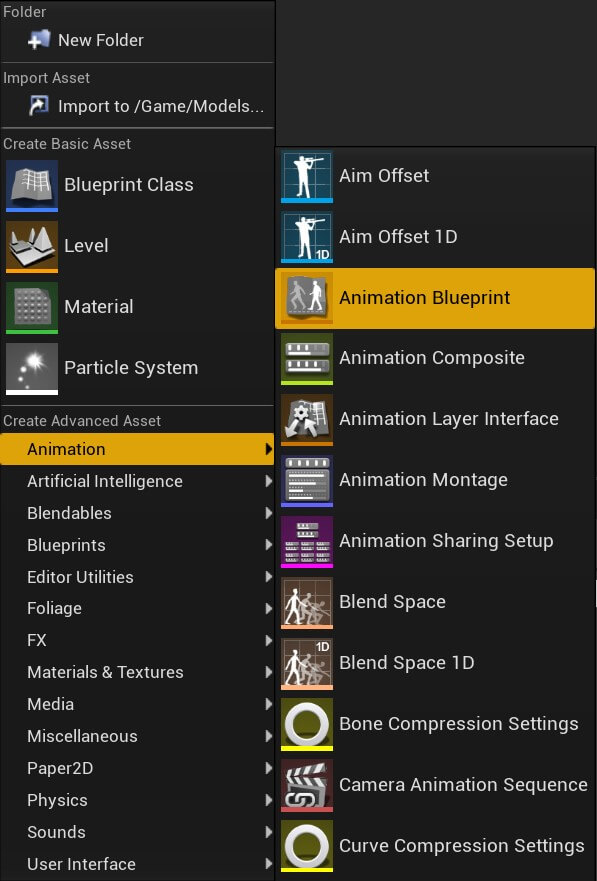
When you do that you will be prompted to select a Target Skeleton. The Target Skeleton is always the skeleton of the 3D model you want to animate.
In our case, you are going to select parasite_l_starkie_Skeleton and press the Ok button to create the animation Blueprint:
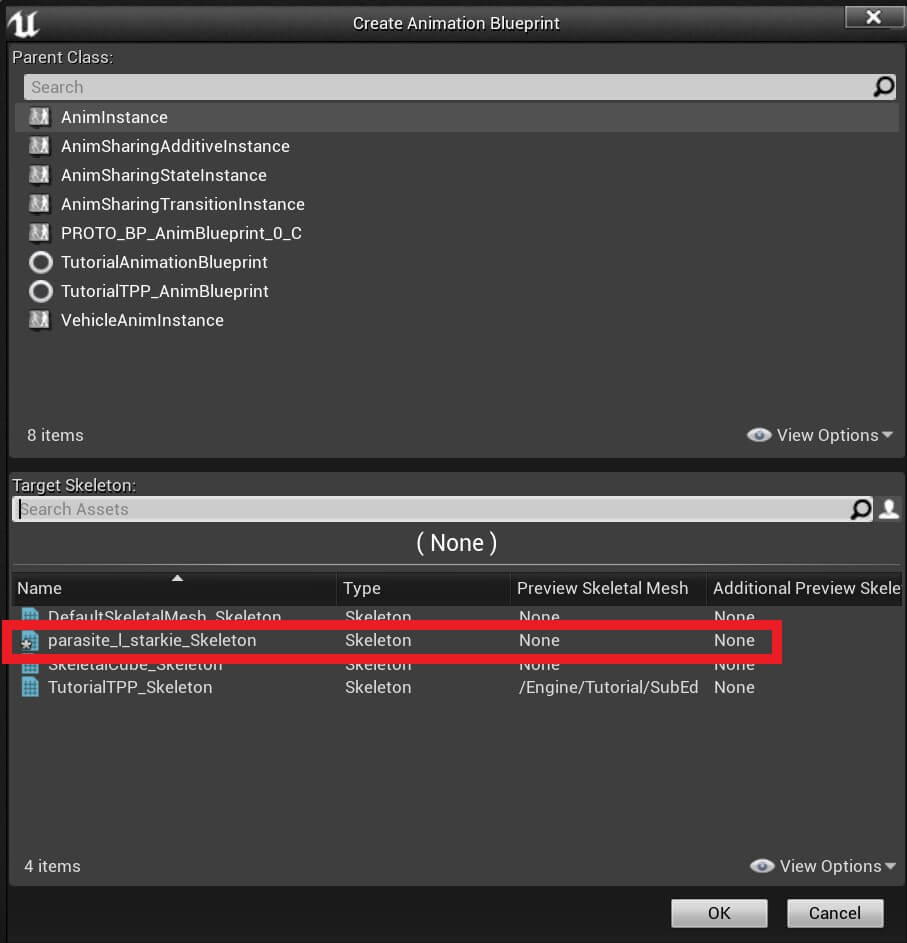
Give the new Blueprint name BP_Parasite_Animation and open it in the editor.
So far you noticed that all different Blueprints have similar tabs and previews in the editor, be that UI Blueprints or normal Blueprints.
Animation Blueprints is not different so when you open it in the editor this is what you will see:
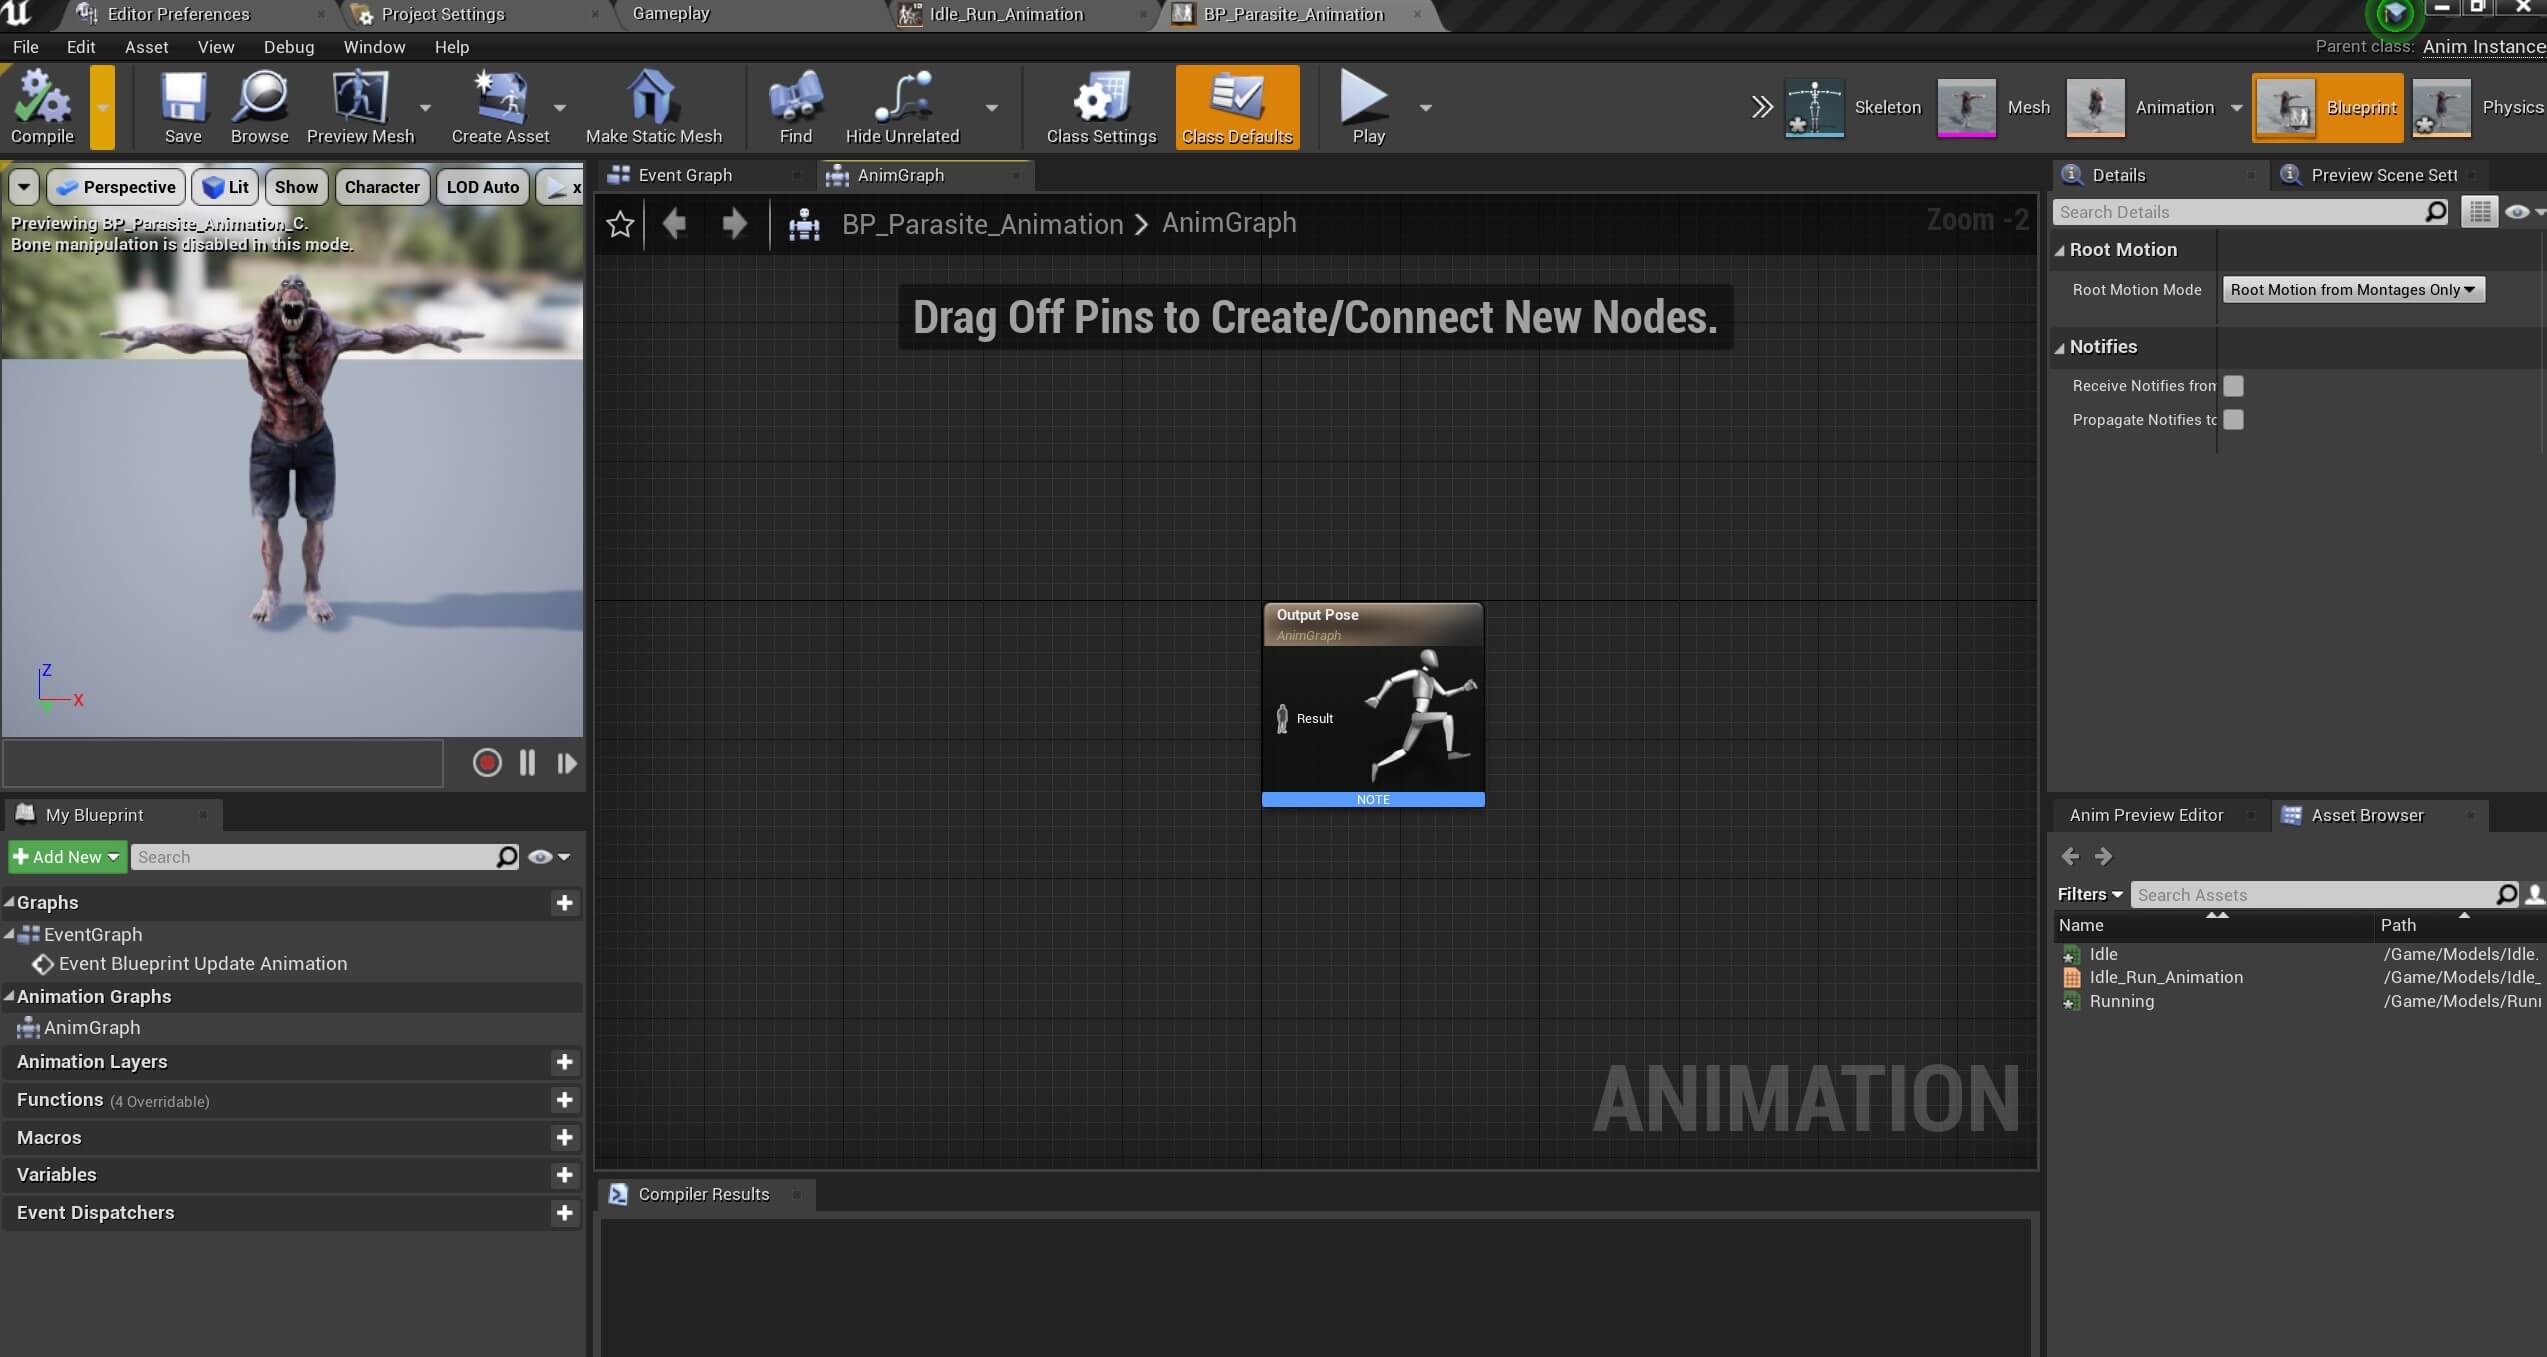
State Machines
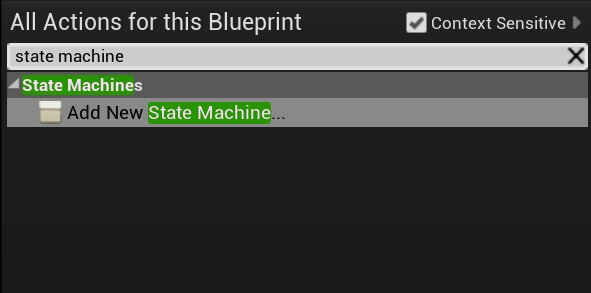
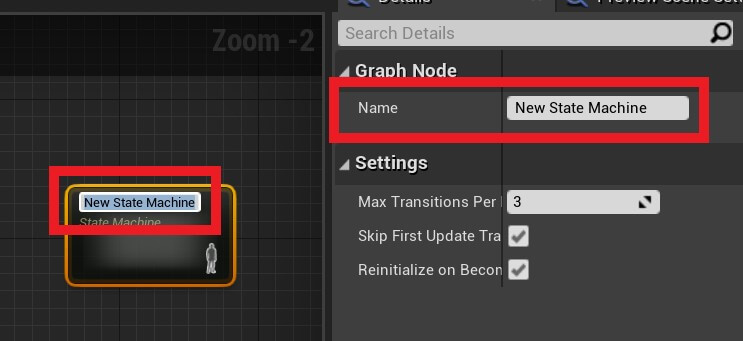
Rename the state machine to Default State by either selecting it and renaming it in the Details tab, or click on the name of the state machine two times until you see a text field where you can rename it:
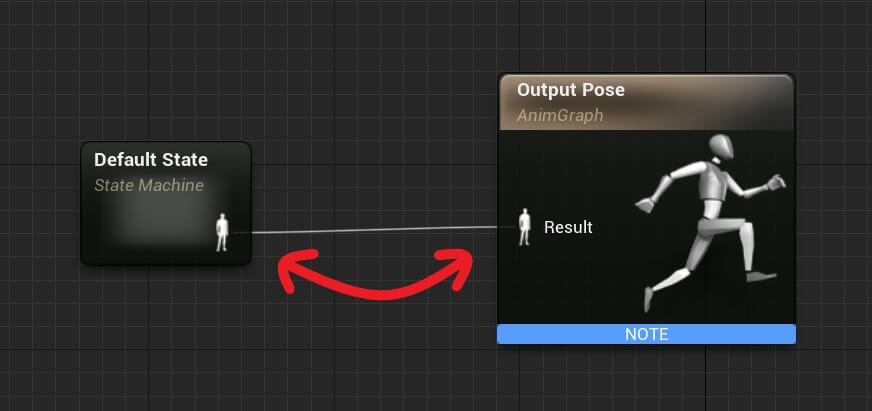
Connect the output from the Default State in the input of the Output Pose, basically connect the two human icons together:
Make sure that you hit the Compile and Save button every time you make a change to the animation Blueprint for the change to apply to the Blueprint.
Now what are state machines?
In the simplest way, we put the animations we created, such as Idle_Run_Animation, inside the state machine and we define transitions with conditions that need to be fulfilled for those animations to play.
We can also transition from one state machine to another, and we can also add an animation inside the state machine and make it play without any conditions.
To do this, double click on the Default State machine. Inside, Right Click -> Add State… and rename the new state to Idle / Run:
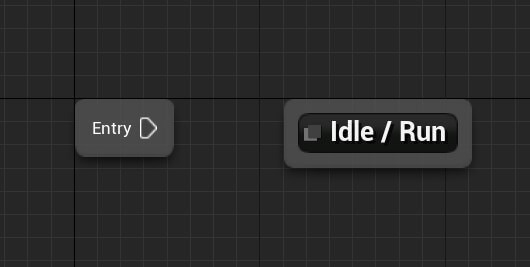
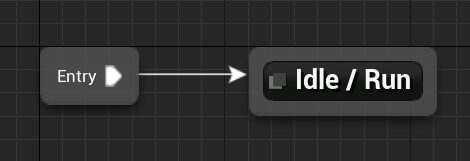
This will denote that when the execution enters the Default State machine, it will go where the Entry node is pointing which is the Idle / Run state and it will play the animation we add inside.
To add the animation, double click on the Idle / Run state, and drag the Idle_Run_Animation from the Asset Browser window inside the Idle / Run state:

You will notice two things on the Idle_Run_Animation. First it has a Speed parameter to the left side and it has an output on the right side denoted with the human icon:
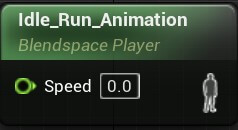

The Speed parameter is the one we set up for the Horizontal Axis in the Axis Settings inside the Idle_Run_Animation Blueprint:


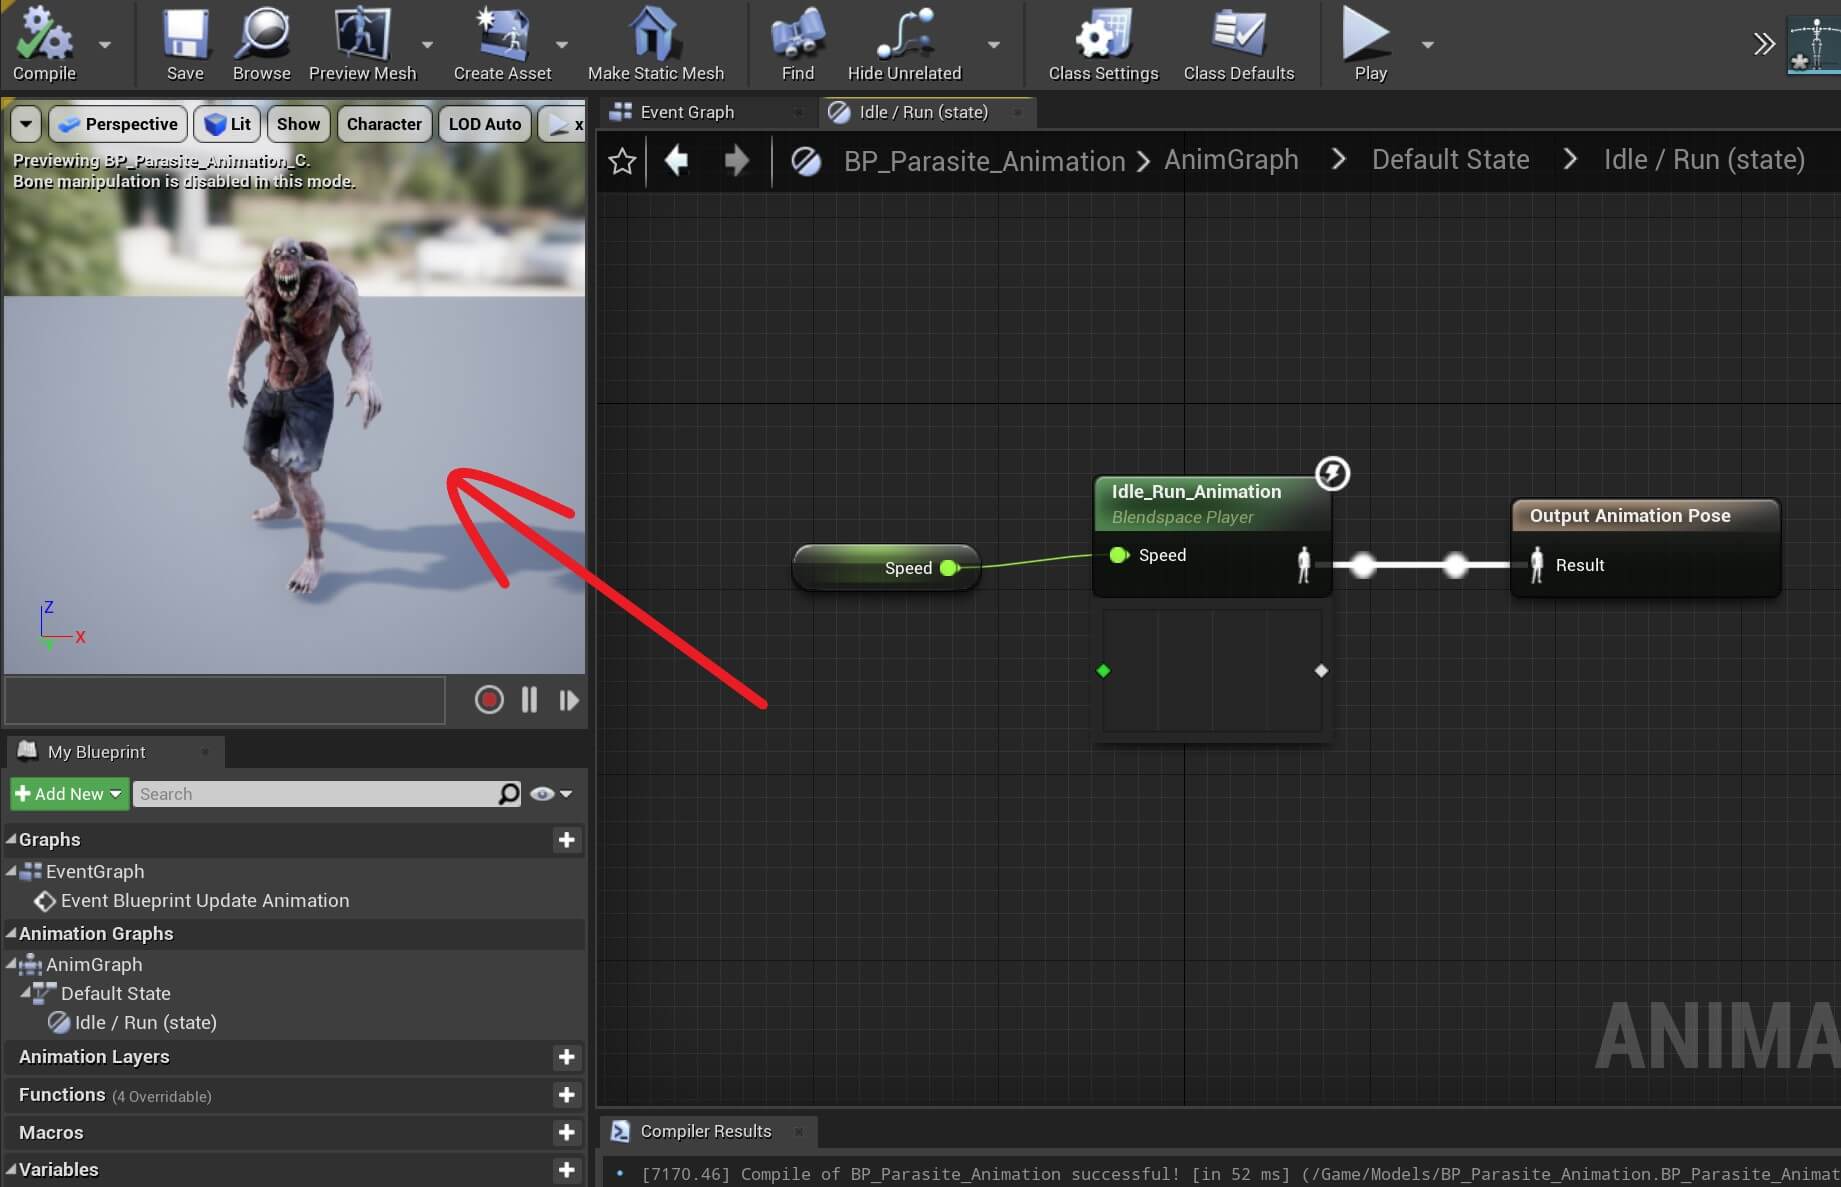
And the last step is to plug in the Speed variable in the Speed parameter of the Idle_Run_Animation node:

Navigating Inside The Animation Blueprint
Other navigation inside the animation Blueprint is the same as in other Blueprints, but the state nodes are specific for the animation Blueprint so we had to learn how to navigate to and back from them.
Applying The Animation Blueprint To The Enemy Blueprint
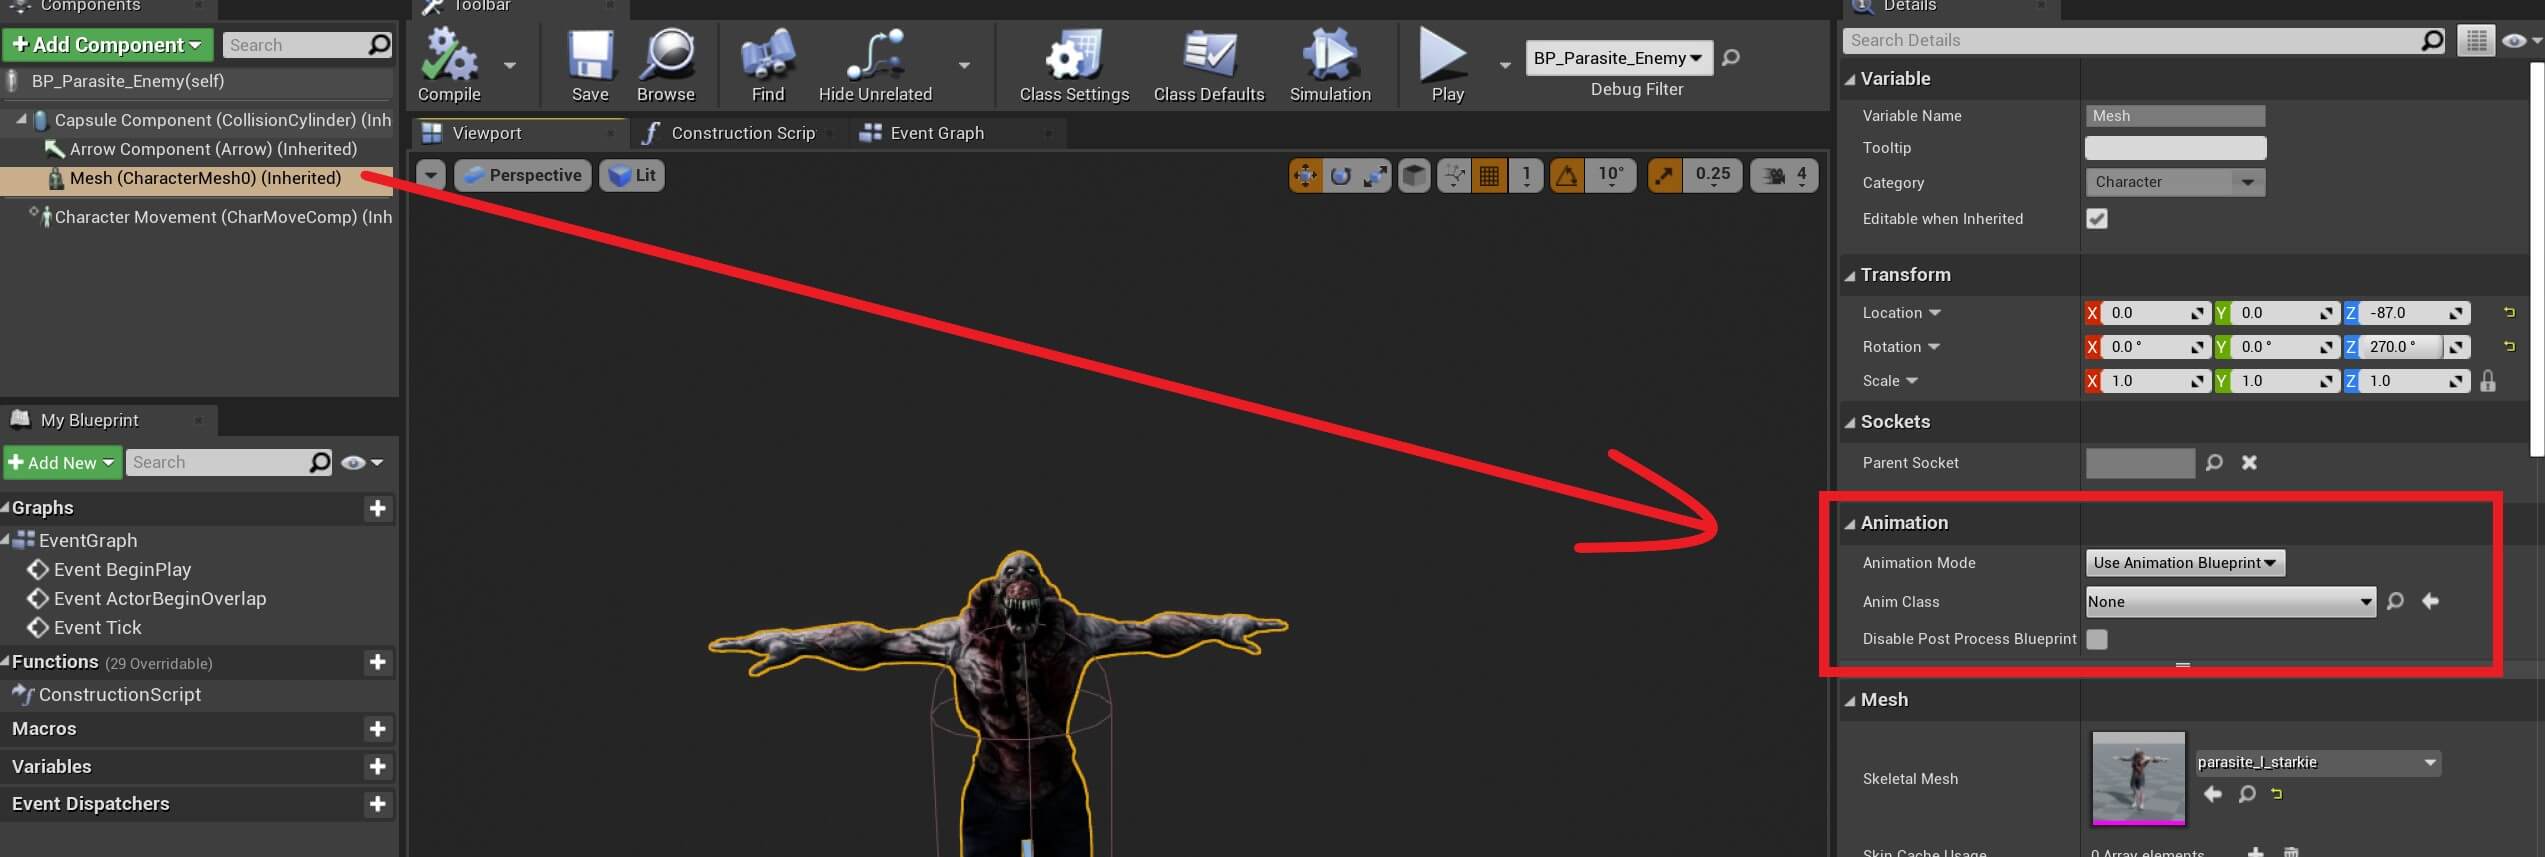
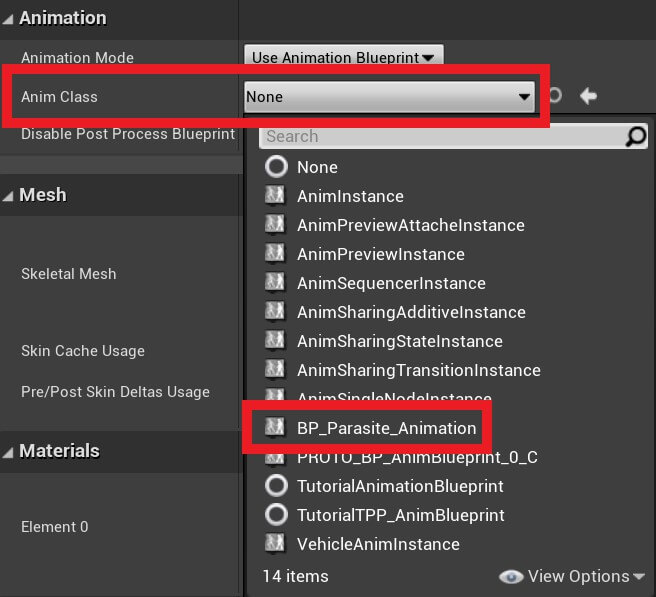
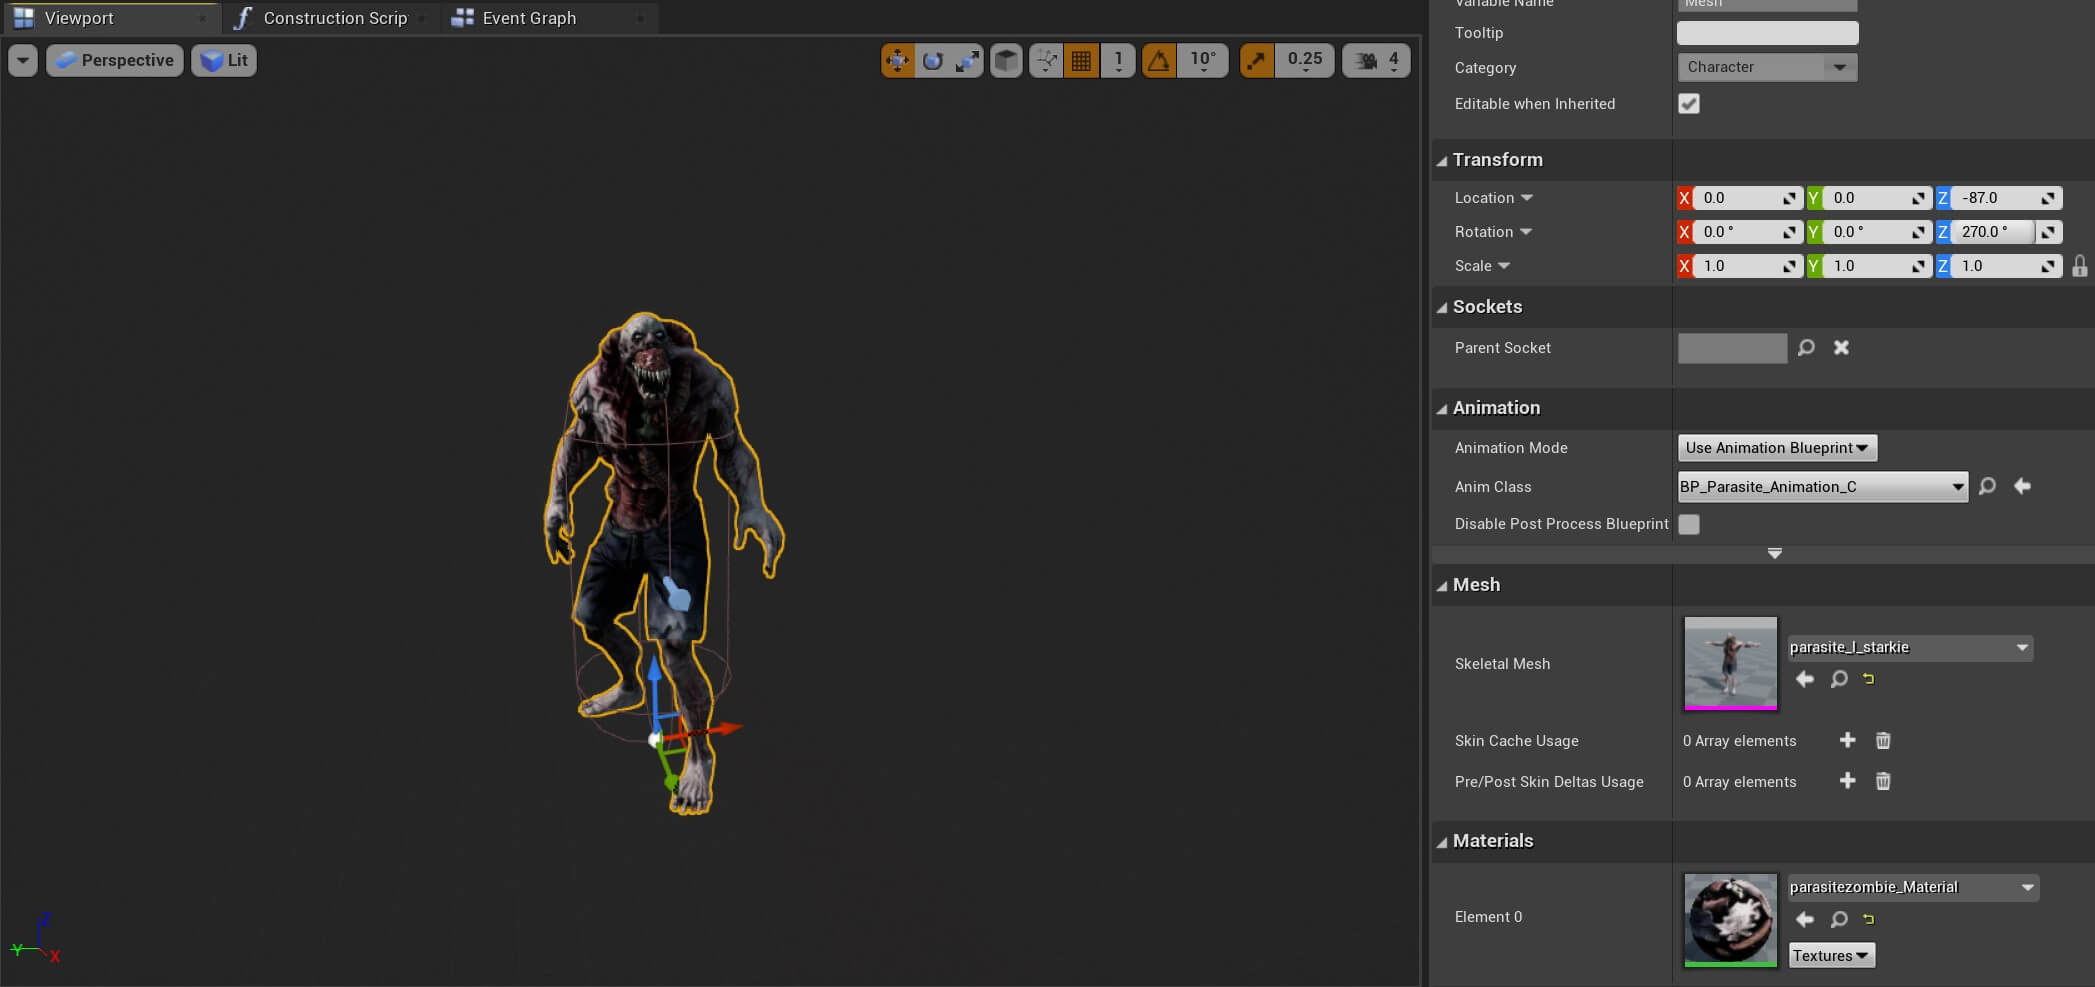
To animate the Parasite enemy, we need to specify that the BP_Parasite_Enemy Blueprint should use the animation Blueprint that we just created.
To do that, go inside the BP_Parasite_Enemy Blueprint and select the Mesh in the Components tab.
When you do that, inside the Details tab you will see the Animation settings:
- X = -9858
- Y = -855
- Z = 93
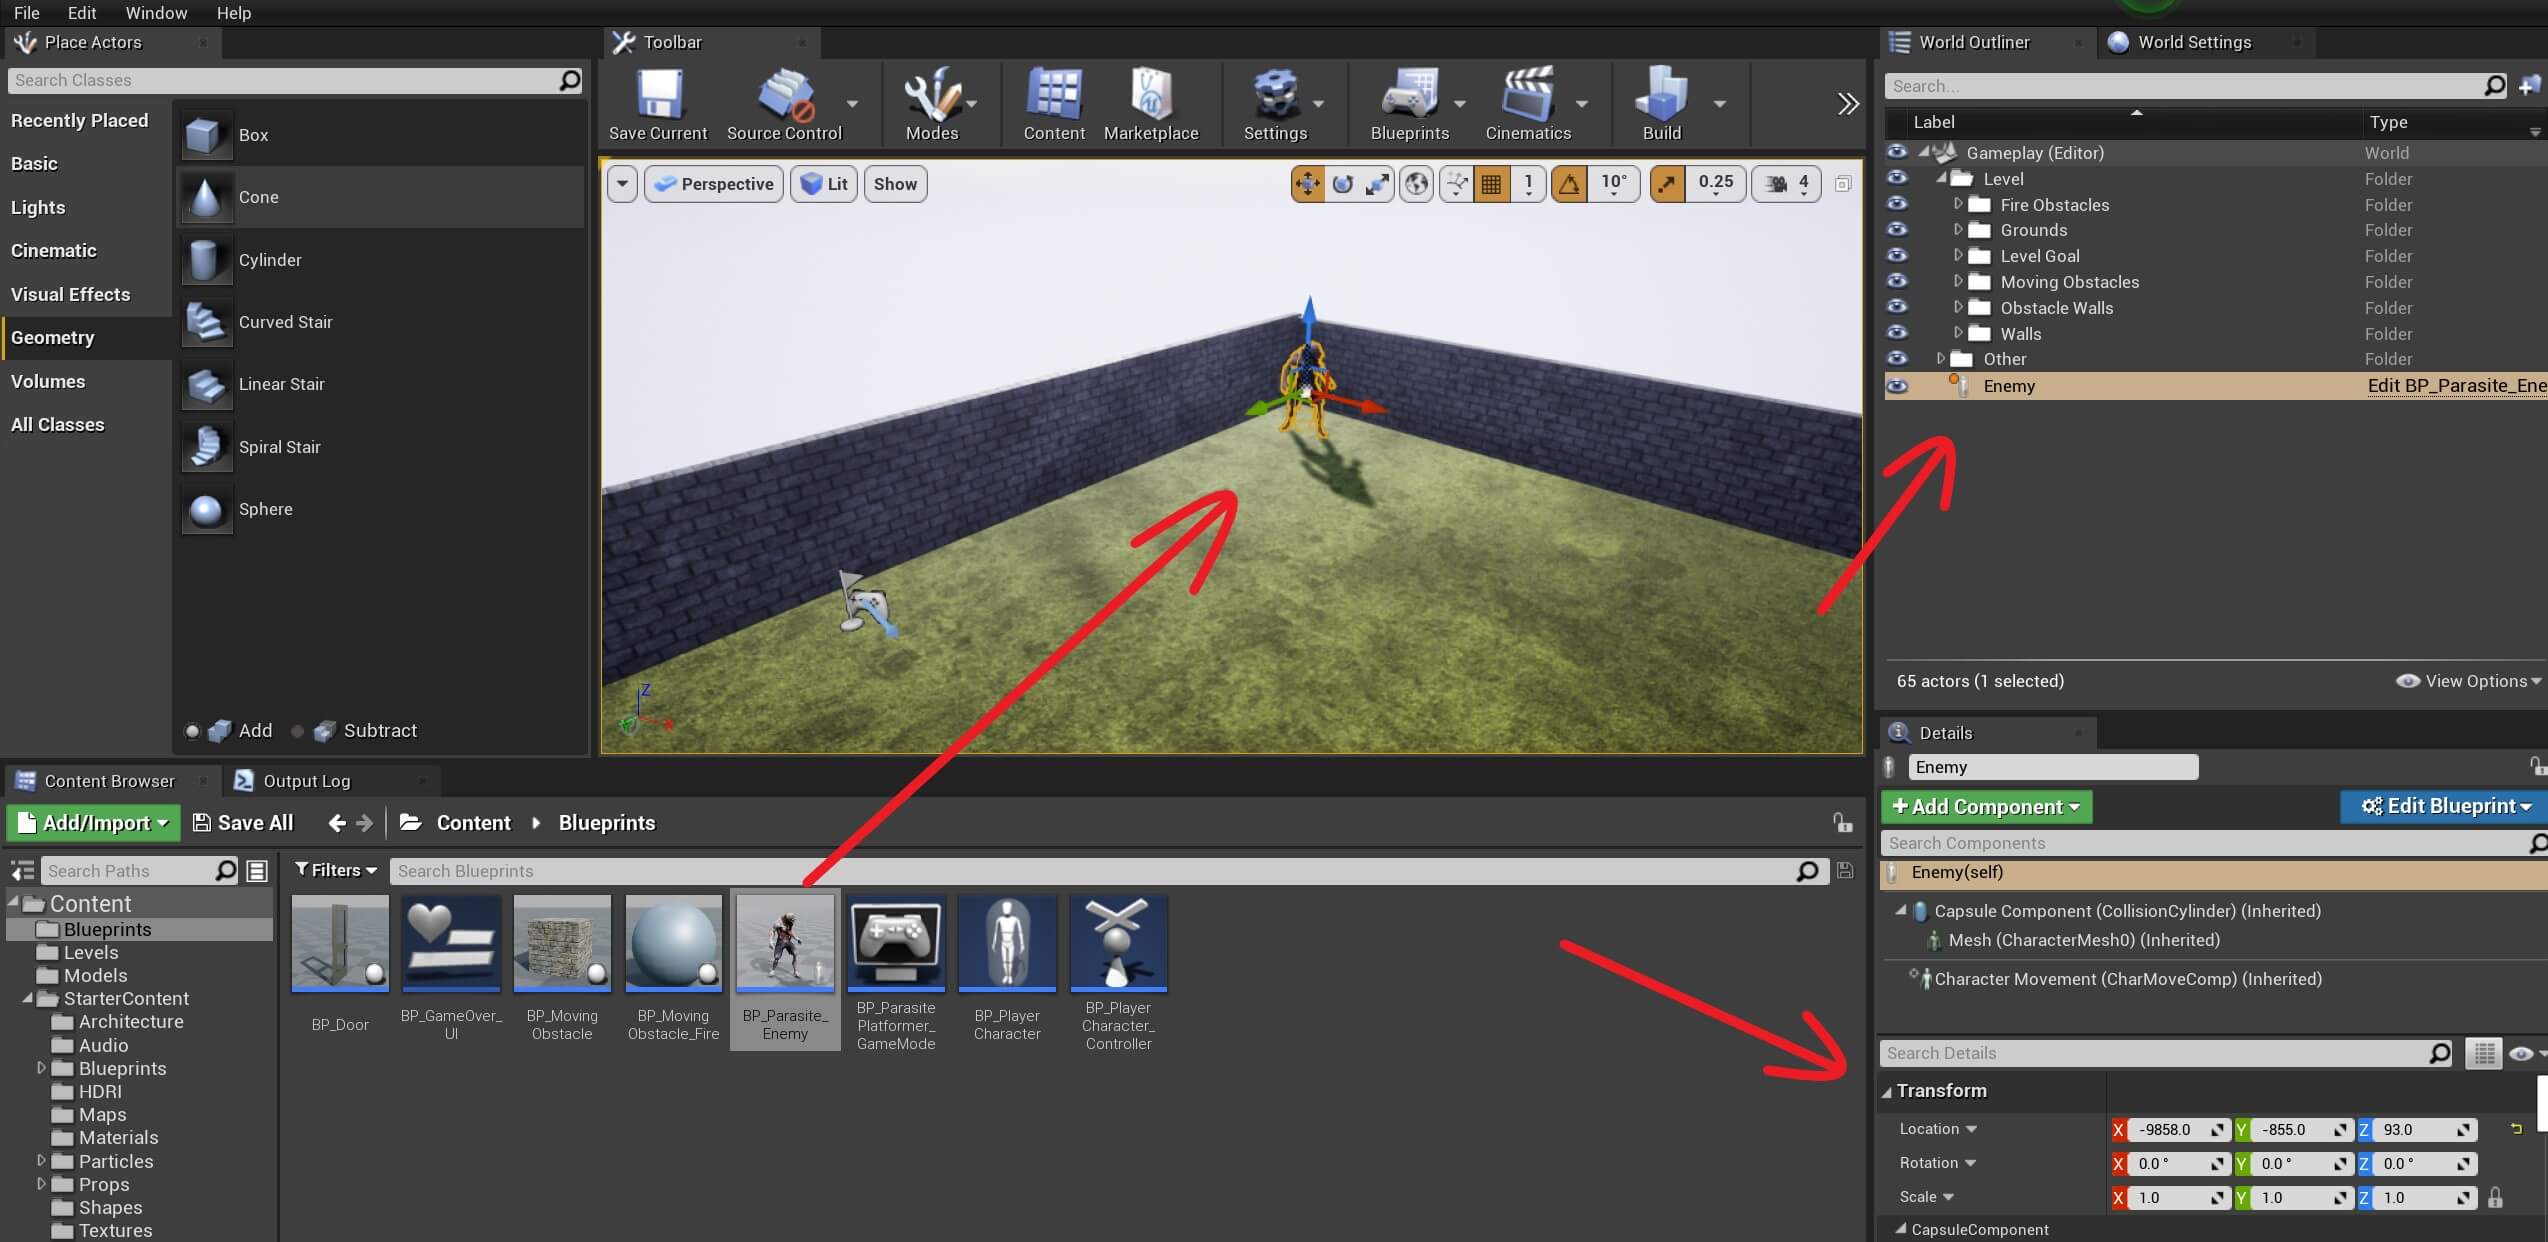
You can also create a new folder under the Level folder in the World Outliner, name it Enemies and drag the Enemy in that folder.

Comments are closed.