In part 5 of this tutorial series we created a new Fire Obstacle using the inheritance concept.
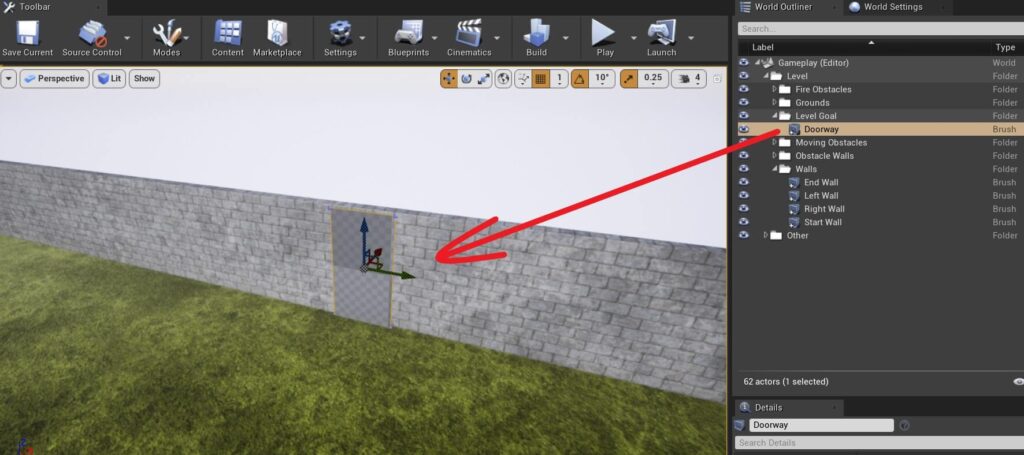
In this part of the tutorial we are going to create the level goal e.g. the end point that the Player needs to reach to win the game.
Additive And Subtractive Brush Type
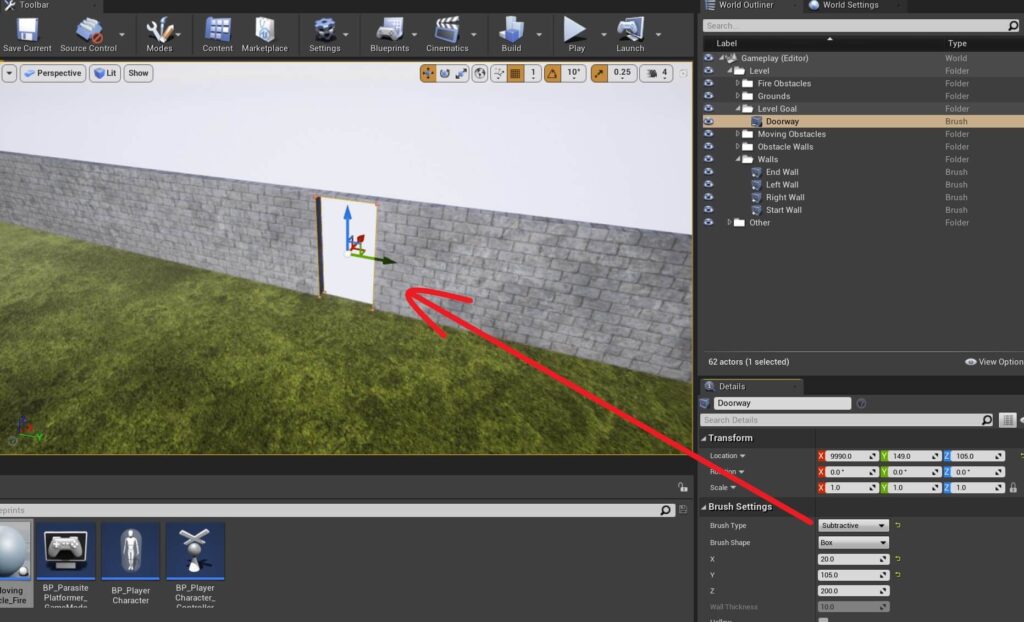
- X = 9990
- Y = 149
- Z = 105
- X = 20
- Y = 105
- Z = 200

When you click on that list you will see two options:

The current option is set to Additive which means the Shape of the Actor, in this case Box, is going to be visible.
But when we change the Brush Type to Subtractive, then it will become invisible and it will make other Actors that are overlapping with it invisible as well:
This way, we will create a box shaped hole inside the End Wall Actor and this is where we will place the door where the PlayerCharacter needs to pass by to win the game.
Because the Doorway Actor is a Box Brush, you can add materials to the sides where the Doorway is subtracting from the End Wall:
This is not mandatory for this tutorial, but I am just showing you the options you have as you can find it useful for your own projects.
Now that we have the Doorway in the End Wall, we can add the two remaining parts for the door.
Inside the Starter Content -> Props folder, locate a 3D object called SM_DoorFrame, drag it inside the level and place it in the Level Goal folder in the World Outliner.
You can also rename the Actor to Door Frame for organizational purposes as that will not affect the game at all.
Set the Location values inside the Transform property to:
- X = 9989
- Y = 154
- Z = -2
Creating The Door Blueprint
When the PlayerCharacter passes through the Door then we win the game. To achieve that, we need to detect the collision between the PlayerCharacter and the Door.
Because of that, we are going to create a custom Blueprint for the Door Actor.

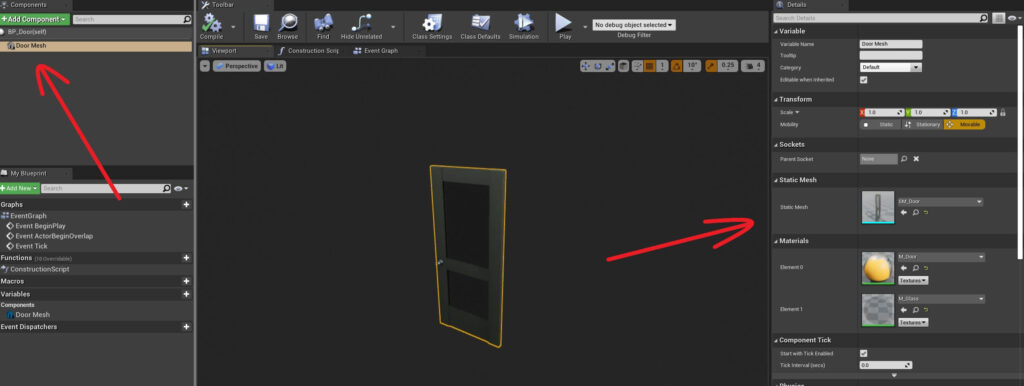
Give the newly created Blueprint a name BP_Door and open it in the Blueprint editor.
In the Components tab click on the Add Component button and filter for Static Mesh component.
When you attach it, rename it to Door Mesh, make it the root component and in the Details tab for the Static Mesh settings select the SM_Door 3D object as the mesh:
To detect collision with the PlayerCharacter we are going to use a Box Collision component.
So click on the Add Component button again, and filter for Box Collision:

When you attach the component rename it to Door Collision.
Inside the Details tab for the Door Collision, under the Transform property set the Location values to:
- X = 50
- Y = -45
- Z = 100
And under the Shape settings set the values for the Box Extend property to:
- X = 7
- Y = 50
- Z = 100

I must repeat again, whenever we make changes like these, we need to press the Compile and Save button in the Blueprint editor otherwise the changes will not be saved.
Adding The Door In The Level
Now that we created the Door Blueprint we can place it in the level. Drag the BP_Door in the level, rename it to Door and place it under the Level Goal folder in the World Outliner.
In the Details tab, under the Transform property set the Location values to:
- X = 9975
- Y = 110
- Z = 8
Also set the Rotation values to:
- X = 0
- Y = 0
- Z = -40
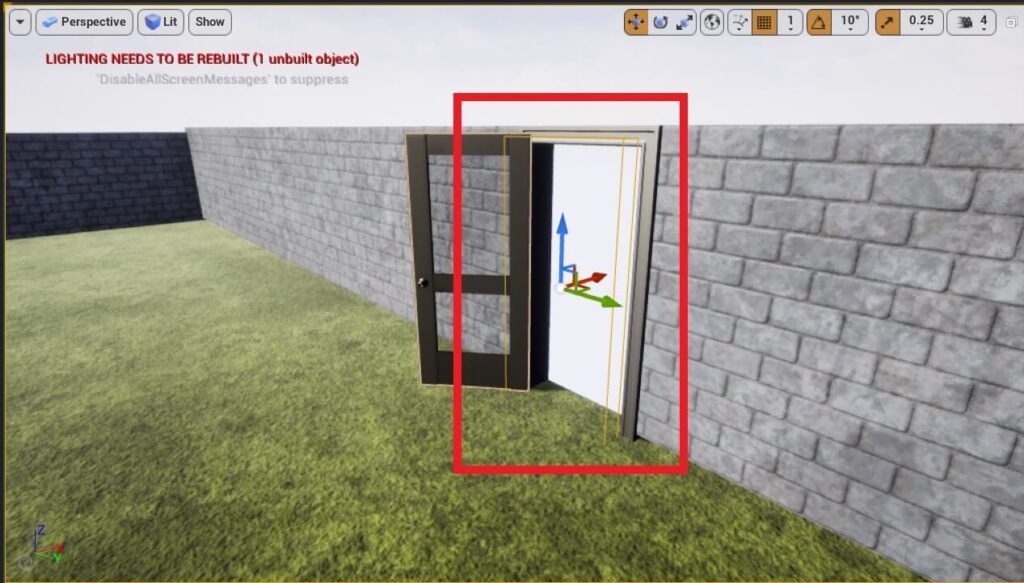
This will place the Door in the correct spot but it will cause one problem which is the Door Collision is now in the End Wall and it is not in the middle of the passway where it needs to be:
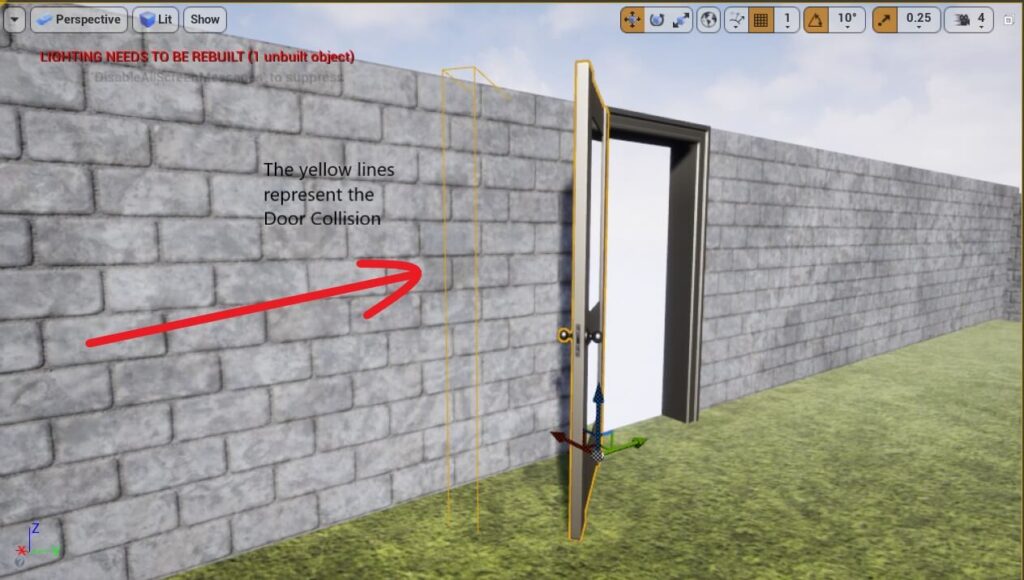
You can fix this by selecting the Door in the World Outliner tab, then select the Door Collision in the Details tab:

Now set the Location values in the Transform property to:
- X = -32
- Y = 25
- Z = 98
And set the Rotation values to:
- X = 0
- Y = 0
- Z = 40
When the PlayerCharacter touches the Door Collision we win the game, but for that to happen we need to code it in the Blueprint editor which we will do when we prepare a few more things for our game.

Comments are closed.