Create A Parasite Platformer Game In Unreal Engine Part 5: Creating The Fire Obstacle Using Inheritance

Table of Contents

Create A Parasite Platformer Game In Unreal Engine Part 5: Creating The Fire Obstacle Using Inheritance

Reading Time: 5 minutes
Level: Beginner
Version: Unreal Engine 4.26

Help Others Learn Game Development

In part 4 of this tutorial series we created the Moving Obstacle Actor and we learned Blueprint coding in more depth.

In this part of the tutorial we are going to learn about inheritance between Blueprints.

A Recap About Inheritance

We talked about the concept of inheritance in the C++ tutorial series.
 
Inheritance allows us to create a custom behavior for a set of objects and then adjust that behavior for a specific object when there is a need for that.
 
The same thing we saw with Blueprints.
 
Every Blueprint we created so far was inheriting one of the already defined Blueprint classes such as Actor, Character, and so on.
 
What’s great about inheritance is that we are not limited to only inherit the Blueprint classes that are already defined like the ones mentioned above, but we can also inherit Blueprints that we created.
 

Creating The Fire Ball Obstacle

In the preview of the game we saw that we have obstacles that serve like solid objects that are going to prevent us from passing and going to our goal, and we also have obstacles that deal damage to the Player when they touch him.

That obstacle is the fire obstacle.

Inside the Blueprints folder, Right Click -> Blueprint Class, but this time instead of inheriting one of the pre-built Blueprint classes, we are going to inherit the Obstacle blueprint that we created which is BP_MovingObstacle.

Inside the search bar filter for BP_MovingObstacle and select it:

Img 1

Give the new Blueprint name BP_MovingObstacle_Fire, and now you will see two same looking Blueprints in your Blueprints folder:

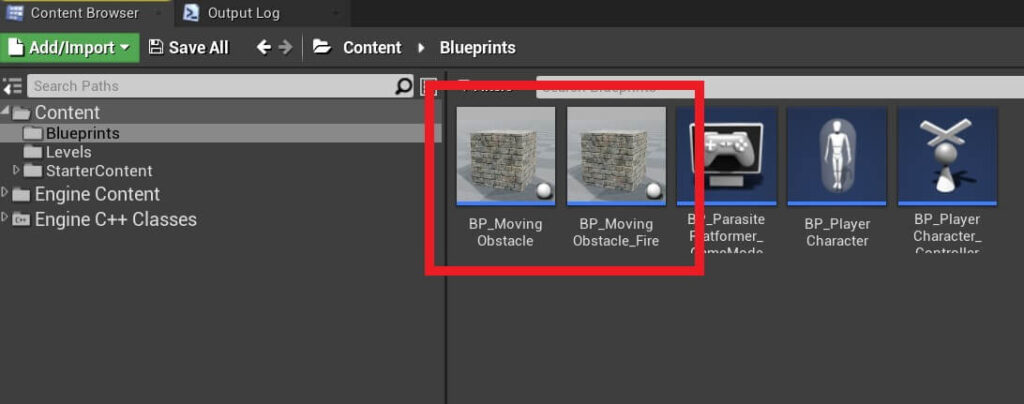
The reason why they look the same is because the BP_MovingObstacle_Fire is inheriting the BP_MovingObstacle Blueprint and thus it also inherits all of its properties.

If we open the BP_MovingObstacle_Fire in the Blueprint editor you will see that it looks exactly the same as BP_MovingObstacle:

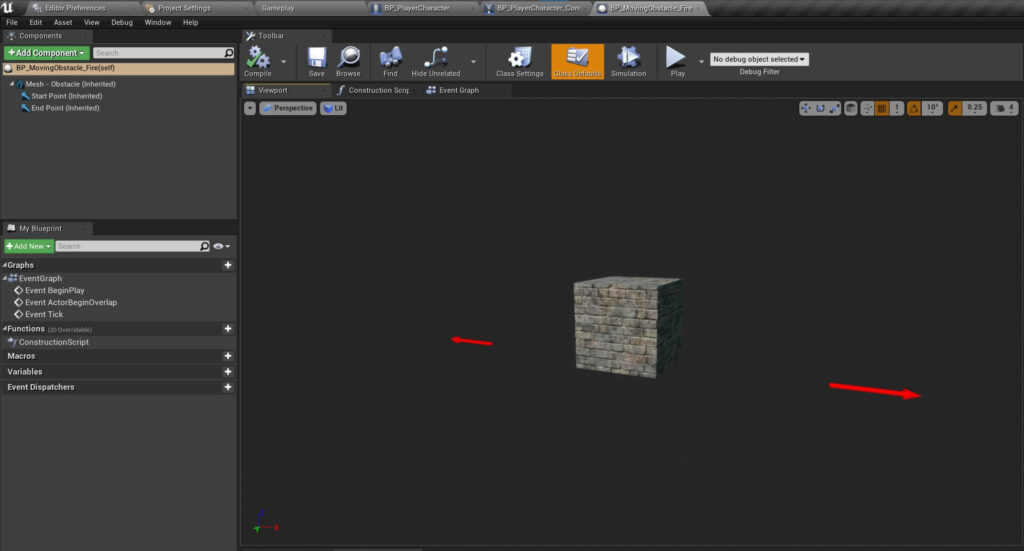
To change its appearance, we need to change the Static Mesh that we inherited from the Moving Obstacle.

Select the Mesh – Obstacle component in the Components tab:

Img 4

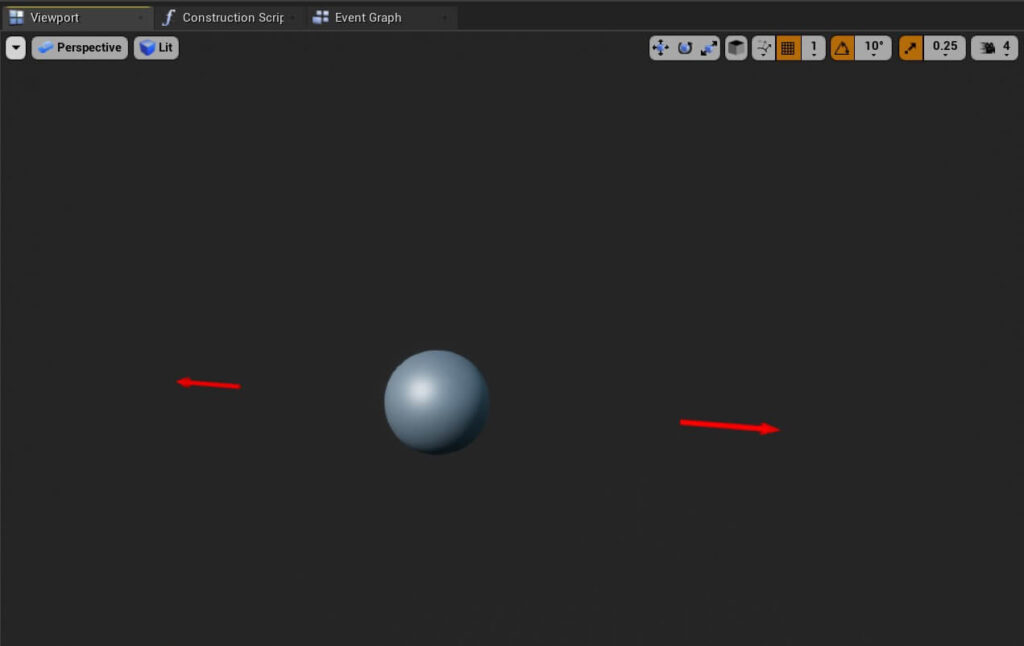
And inside the Details tab for the Static Mesh settings, select the MaterialSphere as the mesh, and for the Materials settings select the M_Basic_Floor material:

Img 5
Now the Fire Obstacle looks like this:


Unreal Engine Particle System

The changes we made to the Fire Obstacle Blueprint will not add the fire effect to it.
 
To add the fire effect we need to use the Particle System component.
 
In the Components tab, click on the Add Component button and filter for particle system:
 
Img 7

You will see that you have two choices, one is Niagara Particle System and Particle System, select the Particle System and rename the component to Fire Particles.

To have the fire effect for the particles, select the Fire Particles component in the Components tab, and in the Details tab for the Particle settings, click on the drop down list for the Template and select the fire particle:

Img 8

If you are wondering how do we have access to this fire particle template, it is located in the Starter Content -> Particles folder.

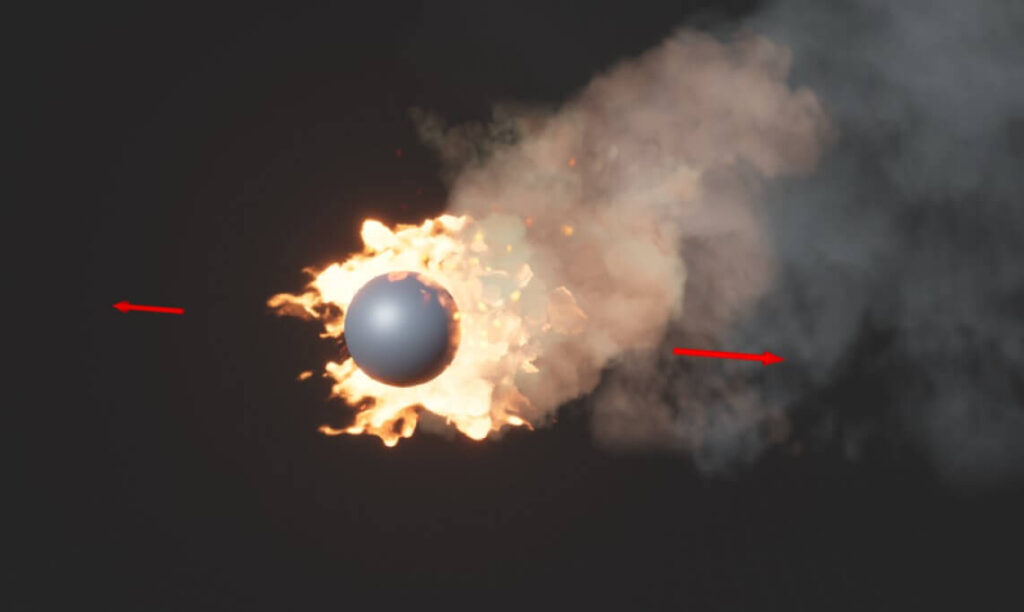
I am going to resize the Fire Particles component by changing the its scale in the Transform property.

First click the lock icon on the right side of the Scale and then set the Scale value to 3 on one of the axis and it will change it for all other axis as well:

Img 9

Now you will have a larger fire circling around the Sphere Mesh for the Moving Fire Obstacle:


Adding The Moving Fire Obstacle In The Level

We are pretty much done with our Moving Fire Obstacle.
 
Now we can add it in the level and form the second wave of obstacles for the PlayerCharacter that he will need to pass to reach the goal of the level.
 
You can do this the same way we did for the Moving Obstacles.
 
Create a new sub folder under the Level folder in the World Outliner tab and name it Fire Obstacles.
Drag the BP_MovingObstacle_Fire in the level, rename it to Fire Obstacle 1 and put it inside the Fire Obstacles Folder.
 
Since the Fire Obstacles are the next wave of Obstacles, you will place them after the Wall Obstacles that the PlayerCharacter will pass when he moves through the Moving Obstacles.
 
You can change the rotation, distance for the Start and end Point, the speed and starting movement for the Fire Obstacles.
 
Since we inherited the BP_MovingObstacle we have the same features for the Fire Obstacles and we don’t have to do anything else to make the Fire Obstacles move.
 
As a practice assignment, I want you to place the Fire Obstacles in the level and adjust their speed and movement.
 
You can revise the previous lecture and use that guide to help you place the Fire Obstacles in the level.
 
This is how it looks like for my level:


Where To Go From Here

In this tutorial we learned how can we reuse the Blueprints we create and extend them to create different versions of the original Blueprint.
 
In the next part of this tutorial series titled Setting Up The Level Goal you will learn some nice tricks that you can do with Geometry Actors and we will also create the door for the level.
 

Leave a Comment