In part 5 of this tutorial series we animated the Player through code, showed a neat trick with the Rigidbody 2D component and we cleaned up our code.
In in this part of the tutorial we are going to add some finishing touches and wrap up our game.
Tagging Game Objects

From the drop down list, click on Add Tag… at the bottom:
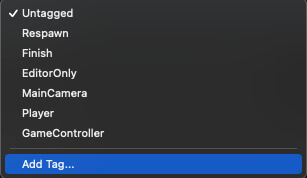
This will open the Tags & Layers tab in the Inspector which we already saw when we created Sorting Layers for the Sprite Renderer component.
We are going to use the exact same method to create new tags for our game objects.
Click on the + button on the right side:

From there, add a new tag called Ground and press the Save button:

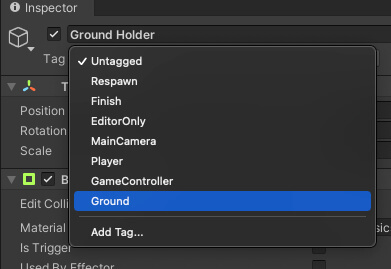
Now when you select the Ground Holder game object you will see that instead of Untagged Ground is displayed next to the Tag label:

Detecting Collision In Code
					private void OnCollisionEnter2D(Collision2D collision)
    {

    }
The OnCollisionEnter2D function will allow us to detect the collision between the Knife, and any other game object that it collides with.
The Collision2D parameter will have the information about the object we have collided, and we can extract information from it such as the tag of the game object we have collided with.
See where I am going with this?
Inside the TagManager declare the following variable:
public static string GROUND_TAG = "Ground";
					private void OnCollisionEnter2D(Collision2D collision)
    {
        if (collision.gameObject.tag == TagManager.GROUND_TAG)
        {
            Destroy(gameObject);
        }
    }
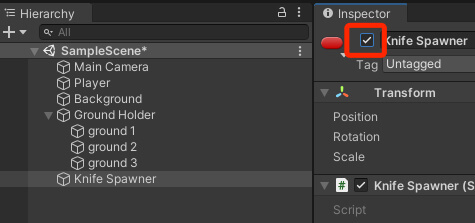
Now when we run the game, we will see that every Knife who hits the ground e.g. Ground Holder game object will be destroyed and removed from the game:
A Better Way To Compare Strings
					private void OnCollisionEnter2D(Collision2D collision)
    {
        if (collision.gameObject.CompareTag(TagManager.GROUND_TAG))
        {
            Destroy(gameObject);
        }
    }
Deactivating Game Objects
					private void OnCollisionEnter2D(Collision2D collision)
    {
        if (collision.gameObject.CompareTag(TagManager.GROUND_TAG))
        {
            gameObject.SetActive(false);
        }
    }
Calling SetActive on a game object and passing the false parameter will deactivate the game object in the game.
That game object will stop running in the game until we activate it again, if needed of course.
For the current game we will not activate the Knifes again, but for future games we will reuse game objects by activating them again after they are deactivated.
Of course, to activate the game object just pass true as the parameter in the SetActive function.
If we run the game now the out come will be the same but there will be one difference.
Since the Knifes are being deactivated, they will still be in the game, but they will not be visible and they will not affect the game in their deactivated state.
Inside the editor, we can see all the deactivate Knifes in the Hierarchy tab:
As you can see all the deactivated game objects are visible in the Hierarchy tab and we can even move them in the level from the Scene tab and activate them manually as you saw from the video.
Of course, we can’t do any of this when the game is exported for your desired platform, but I just wanted to show you the difference when you are using Destroy vs SetActive.
When a game object is destroyed it is completely removed from the game and erased from the computer memory.
But when the game object is deactivated, it is still present in the game and computer memory.
It is not visible because any component attached on the deactivated game object will not run, but we can activate a deactivated game object any time in our game if we have a reference to it.
We will see examples of this a lot as reusing game objects is one of the ways how we optimize our games in Unity.
OnTriggerEnter2D
					private void OnTriggerEnter2D(Collider2D collision)
    {
        if (collision.CompareTag(TagManager.GROUND_TAG))
        {
            gameObject.SetActive(false);
        }
    }
As you can see the code is exactly the same with a small difference that this time we are calling the CompareTag function on the collision parameter.
The reason for that is the Collision2D object doesn’t have a function CompareTag, so we need to call the gameObject property for the Collision2D object and then call the CompareTag.
But the Collider2D object has a function CompareTag and we can call it directly without the need to access the gameObject property of the Collider2D object.
If we run the game now this is what we will see:
Now when we test the game, everything will work correctly:
Solid VS Trigger Colliders
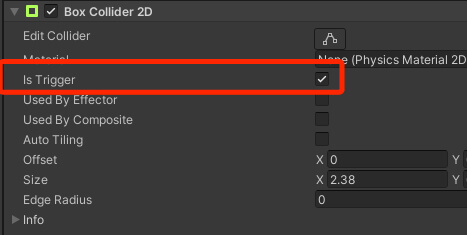
Now uncheck the Is Trigger checkbox for the Box Collider 2D component of the Knife Prefab and run the game:
Since the Is Trigger checkbox is not checked, the collider of the Prefab game object is solid and it stands on the Ground Holder when it collides with it.
Now make sure that you check the Is Trigger checkbox for the Knife Prefab collider and run the game again:
Killing The Player And Restarting The Game
					private void OnTriggerEnter2D(Collider2D collision)
    {
        if (collision.CompareTag(TagManager.GROUND_TAG))
        {
            gameObject.SetActive(false);
        }
    }
Inside the PlayerMovement script we are going to test if the Player collides with the Knife object, but before we do that, we need to tag the Knife object.
Create a new tag Knife using the same steps we explained at the start of this lecture. After you finish you will see a Knife tag in your list as well:

Select the Knife Prefab located in the Prefabs folder and set his tag to Knife.
Inside the TagManager add the following line of code:
public static string KNIFE_TAG = "Knife";
Now inside the PlayerMovement script test for the collision between the Player and the Knife:
					private void OnTriggerEnter2D(Collider2D collision)
    {
        if (collision.CompareTag(TagManager.KNIFE_TAG))
        {

        }
    }
Now you are probably wondering how can we test for collision using OnTriggerEnter2D inside the PlayerMovement script because the Player game object is a solid object e.g. the Is Trigger checkbox is not checked on his collider:
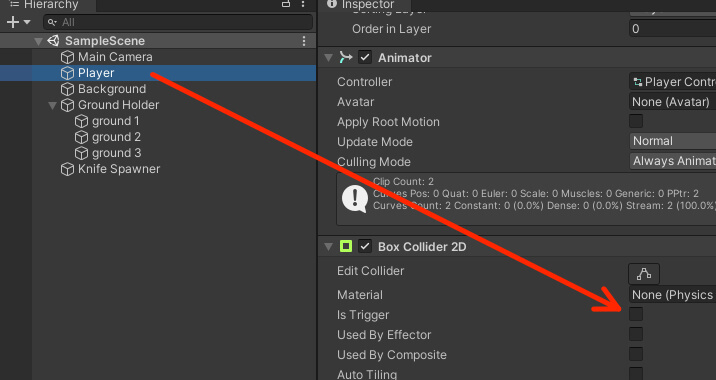
When it comes to OnTriggerEnter2D, it is not required that both game objects that are colliding with each other to have the Is Trigger checkbox checked.
Only one of the colliding game objects can the Is Trigger checkbox checked and the OnTriggerFunction2D will detect that collision even if it’s called on a game object who doesn’t have the Is Trigger checkbox checked.
Which is the case in our current situation.
The collider of the Player is not a trigger, but the collider of the Knife is a trigger, yet we are calling the OnTriggerEnter2D code from the Player’s script.
Now when the Knife hits the Player, the Player game object should die. To simulate that, we have multiple options.
We can reposition the Player game object outside the Camera view by settings his position vector to something like:
					private void OnTriggerEnter2D(Collider2D collision)
    {
        if (collision.CompareTag(TagManager.KNIFE_TAG))
        {
            transform.position = new Vector2(100f, 100f);
        }
    }
Disabling The Sprite Renderer Component
We can also use the Sprite Renderer component and disable it so that it will not render the Player sprite on the screen and we will not see it:
					 private void OnTriggerEnter2D(Collider2D collision)
    {
        if (collision.CompareTag(TagManager.KNIFE_TAG))
        {
            sr.enabled = false;
        }
    }
private bool isDead;
					 private void Update()
    {
        // if the player is dead
        // return e.g. exit out of this function
        if (isDead == true)
            return;

        HandleMovement();
        HandleFacingDirection();
        HandleAnimation();
    }
On line 5 we are testing if isDead is equal to true. We can also perform this test by removing the == and just adding the isDead inside of the if statement:
					private void Update()
    {
        // if the player is dead
        // return e.g. exit out of this function
        if (isDead)
            return;

        HandleMovement();
        HandleFacingDirection();
        HandleAnimation();
    }
Both of these tests on line 5 in the example above and the previous example are testing for the same thing – if isDead is equal to true.
If that is the case we call the return statement on line 6.
We learned that a function that returns a value must have a return statement to return that value, but the Update function is a void function and void functions don’t have a return statement.
Well, a return statement in a void function simply means stop the execution when return is executed.
In our case, if isDead is true, and line 6 is executed e.g. the return statement is executed, then the function will stop its execution there and it will not continue to execute the code that is left inside that function.
This is how it would look like in an image:
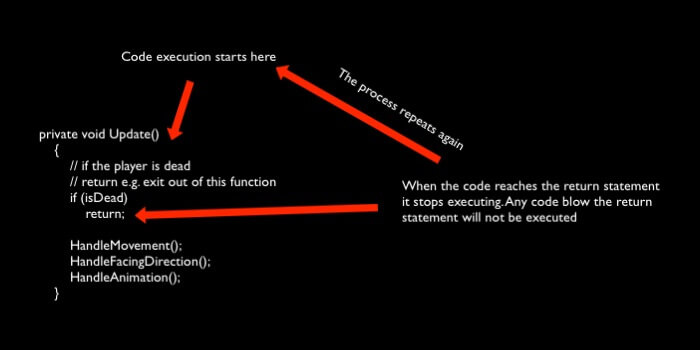
This test that we are performing in the Update function will not allow the Player game object to move after the Knife hits it.
But we also need to program that inside the OnTriggerEnter2D:
					private void OnTriggerEnter2D(Collider2D collision)
    {

        if (isDead)
            return;

        if (collision.CompareTag(TagManager.KNIFE_TAG))
        {
            sr.enabled = false;
            isDead = true;
        }
    }
Restarting The Game When The Player Dies
					void RestartGame()
    {
        UnityEngine.SceneManagement.SceneManager.LoadScene("Gameplay");
    }

    private void OnTriggerEnter2D(Collider2D collision)
    {

        if (isDead)
            return;

        if (collision.CompareTag(TagManager.KNIFE_TAG))
        {
            sr.enabled = false;
            isDead = true;

            Invoke("RestartGame", 2.5f);
        }
    }
On line 3 in the RestartGame function we are calling the SceneManager from SceneManagement package to load a scene with the given name.
The SceneManagement is a set of classes already prepared for us to use for the purpose of loading new levels e.g. scenes or getting information about the scene we are currently in.
We use the SceneManager from that set of classes and we call its LoadScene method passing the name of the scene we want to load.
Currently we passed the name Gameplay, but we don’t have that scene in our game.
This can be easily fixed by going to Assets -> Scenes folder and rename the SampleScene that we have by default to Gameplay.
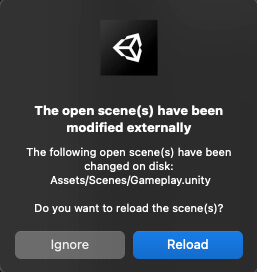
When prompted by the pop up screen click the Reload button:
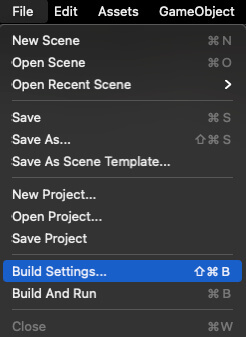
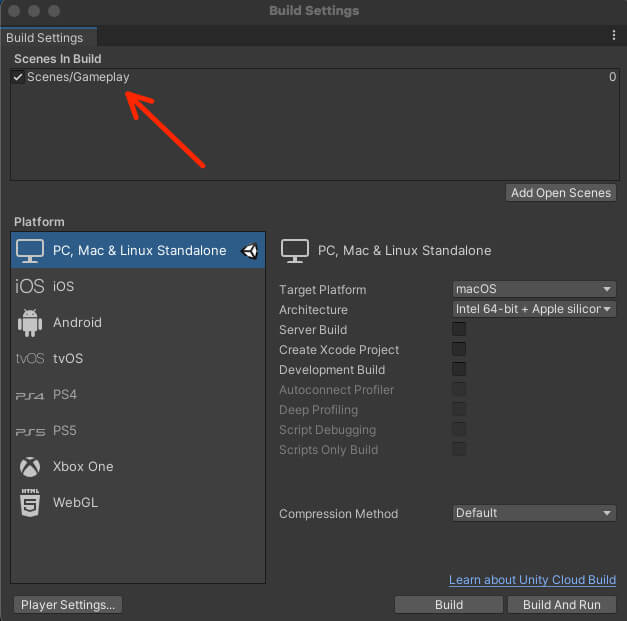
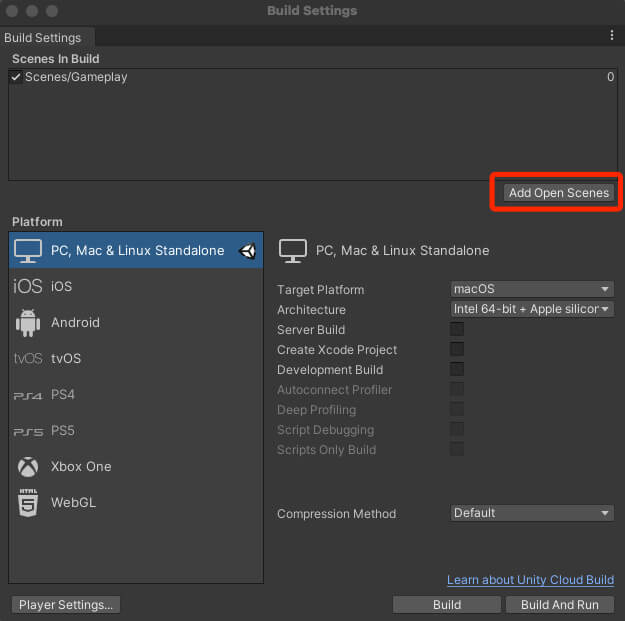
To add a new scene in the build, first you must open that scene from the project e.g. from the Scenes folder double click the desired scene and open it.
After that you need to click on the Add Open Scenes button from the Build Settings:
On line 17 we use the Invoke function to call the RestartGame after 2.5 seconds which we denoted with the second parameter.
					using System.Collections;
using System.Collections.Generic;
using UnityEngine;

public class PlayerMovement : MonoBehaviour
{
    [SerializeField]
    private float moveSpeed = 5f;

    private float moveX;

    private Vector2 tempPos;

    private SpriteRenderer sr;

    [SerializeField]
    private float min_X = -2.28f, max_X = 2.28f;

    private Animator anim;

    private bool isDead;

    private void Awake()
    {
        sr = GetComponent<SpriteRenderer>();
        anim = GetComponent<Animator>();
    }

    private void Update()
    {
        // if the player is dead
        // return e.g. exit out of this function
        if (isDead)
            return;

        HandleMovement();
        HandleFacingDirection();
        HandleAnimation();
    }

    // function responsible for moving the player
    void HandleMovement()
    {
        moveX = Input.GetAxisRaw(TagManager.HORIZONTAL_AXIS);

        tempPos = transform.position;

        tempPos.x += moveX * moveSpeed * Time.deltaTime;

        // call the handle bounds function before
        // you re-assign the position back to
        // transform.position
        HandleBoundsRestriction();

        transform.position = tempPos;
    }

    // function for handling the bounds restriction
    void HandleBoundsRestriction()
    {
        if (tempPos.x > max_X)
            tempPos.x = max_X;
        else if (tempPos.x < min_X)
            tempPos.x = min_X;
    }

    // function for handling the facing direction
    void HandleFacingDirection()
    {
        if (moveX > 0)
            sr.flipX = false;
        else if (moveX < 0)
            sr.flipX = true;
    }

    // function for handling the animation
    void HandleAnimation()
    {
        if (moveX != 0)
            anim.SetBool(TagManager.WALK_ANIMATION_PARAMETER, true);
        else
            anim.SetBool(TagManager.WALK_ANIMATION_PARAMETER, false);
    }

    void RestartGame()
    {
        UnityEngine.SceneManagement.SceneManager.LoadScene("Gameplay");
    }

    private void OnTriggerEnter2D(Collider2D collision)
    {

        if (isDead)
            return;

        if (collision.CompareTag(TagManager.KNIFE_TAG))
        {
            sr.enabled = false;
            isDead = true;

            Invoke("RestartGame", 2.5f);
        }
    }

} // class
Now we can run and play our game until we get bored, which is never he he he he.
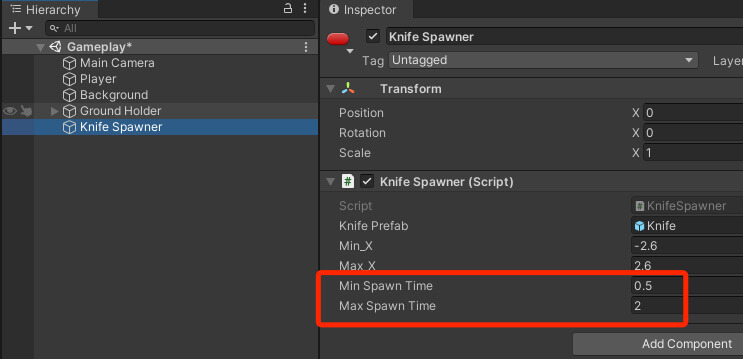
You can also change the time interval for the spawning of the Knifes by selecting the Knife Spawner and changing the min and max spawn time values in the Inspector tag:
Now run and test the game:


Comments are closed.