So, pointers huh, the scariest part of C++ programming, well, that’s at least what people think.
You see even though object oriented programming languages are based on the same concept e.g. creating objects out of classes(more on this in upcoming lectures), there are some things that are specific to some programming languages, like pointers for C++.
And people who come from Java, Swift, C# and so on, they think that pointers is some hard to grasp concept, when in reality, same as anything else in programming, when you understand what is going on you see that the concept is very easy.
The Computer Memory
In order to understand how pointers work, we first need to understand what happens behind the scenes when we work with variables.
You see, whenever you create a new variable, a chunk of computer memory is allocated for that variable. And this goes for every piece of our game.
For every component of our game a chunk of computer memory is allocated to store that variable, object, or part of your game.
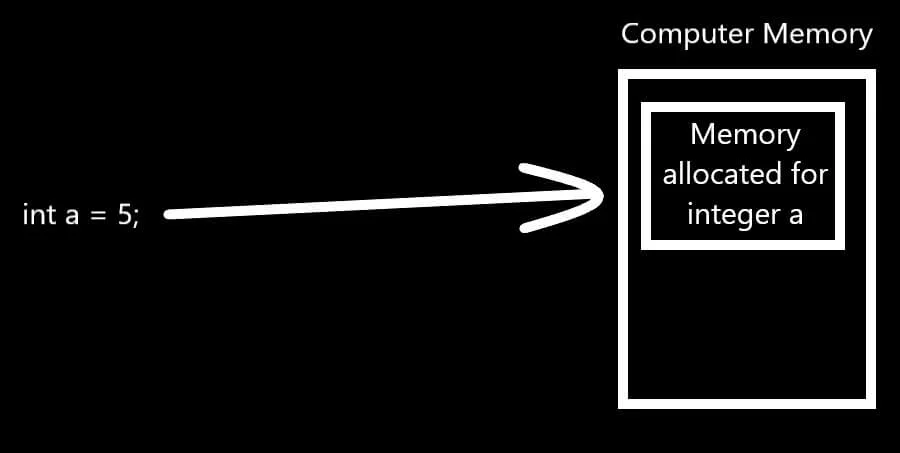
For example:

So What Are Pointers?
From the example above you see that when we create integer a, memory is allocated for that integer to store it.
Now, pointers are used to point to that spot in memory e.g. the memory address of the variable that we created.
Let’s take a look at an example:
					int a = 5;

std::cout << "The value of a is: " << a;
If you run the app you will see “The value of a is: 5” is printed in the console, which is what we expected.
But if I add the following line of code:
std::cout << "\nThe memory ADDRESS of a variable is: " << &a;
When you run the app you will see this in the console:

First we have the value of a which is 5, and we saw that already. But then we have the memory address of that variable which is 0039F994.
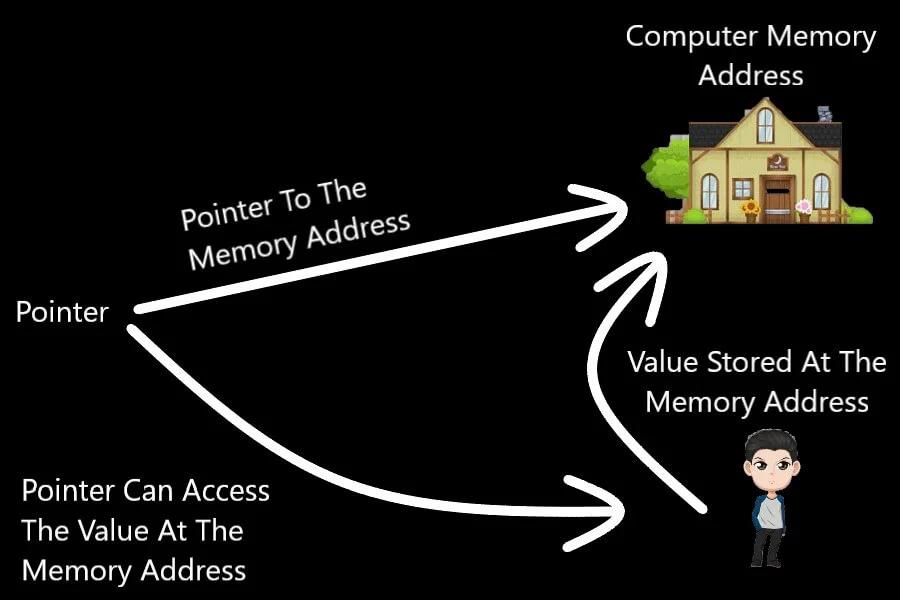
This is the memory address that I was talking about which this image illustrates:

And this is what happens with every variable that we create, a memory address is created for that variable and that memory address has its own id assigned so that the variable can be found when it is needed, same as with variable a in the example above.
Declaring Pointers
Now that we know what are pointers, how do we declare a pointer?
Using the previous example with variable a, we can declare a pointer to it’s memory spot:
					int a = 5;

int* pointerTo_a = &a;
To denote that a variable is a pointer you add the ” * ” character, and you can see in the declaration above that we put the ” * ” after int, and you can put it after the variable type or before the name of the variable like this:
int *pointerTo_a = &a;
Or even in the middle:
int * pointerTo_a = &a;
But the important thing to know is that the ” * ” character will denote that this variable is a pointer.
And as you can see you can’t assign a to the pointer variable, because again a pointer points to the spot in memory, and this is the value we need to assign to it.
That’s why you see the ” & ” sign before the ” a ” variable, because the & sign reveals the memory address or memory id of the particular variable and that’s the value we assign to the pointer.
What Can We Do With Pointers?
Now that we have a pointer to variable a, let us perform a few tests:
					// this will reveal the value that is stored at this memory location
    std::cout << "The value stored at pointerTo_a is: " << *pointerTo_a;

    // this will reveal the memory address e.g. memory location where the variable is stored
    std::cout << "\nThe memory address of pointerTo_a is: " << pointerTo_a;
If you run the app now, this is what you will see in the console:

As you can see from the pointer we can get information about the value of the variable located at that memory address or memory id, and we can get the memory id itself.
So the conclusion is that the pointer stores the memory address of a variable, and at that memory address we can get the value of the variable.
What Is The Purpose Of Pointers?
From the examples we saw so far, we can summarize the relationship between a variable and it’s memory address like this – the memory address is a house, and the variable lives at that house.
So if we want to know the value of the variable we can get it from the memory address, or translating this into our example above if we want to know who lives in the house we simply get that information from the house:

Now that we visualized the relationship of pointers, memory address and variables, let us take a look at one example:
					int a = 5;
    int* pointerTo_a = &a;

    std::cout << "The value of a is: " << a;
    std::cout << "\nThe memory address of a is: " << &a << "\n";

    std::cout << "\nThe value of pointerTo_a is: " << *pointerTo_a;
    std::cout << "\nThe memory address of pointerTo_a: " << pointerTo_a << "\n";
If you run this app it will print this to the console:

As you can see, the value of “a” is 5, and we get the same value from the memory address where the pointer is pointing.
Now I am going to change the value using the pointer, and modify the print code so that it prints the value of “a” before and after:
					int a = 5;
    int* pointerTo_a = &a;

    std::cout << "The value of a is: " << a;
    std::cout << "\nThe memory address of a is: " << &a << "\n";

    *pointerTo_a = 65;

    std::cout << "\nThe value of a is: " << a;
    std::cout << "\nThe memory address of a is: " << &a << "\n";
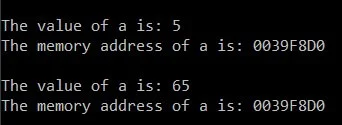
When you run this app you will see this in the console:

First we see the value of “a” is 5, and the memory address is “0039F8D0” then we change that value using the pointer to 65, and in the next print we see that the value of “a” has changed to 65 but the memory address remained the same e.g. “0039F8D0“
We didn’t manipulate the variable “a” at all, yet we were able to change it’s value using the pointer.
And this is the purpose of pointers. We can use them to manipulate values by accessing them from their memory address.


Comments are closed.