Let’s say we have to calculate the position of the player in our game, can use a function for that:
CalculatePlayersPosition();
But what if we need to perform this calculation multiple times? No problem, we can call the function multiple times:
					CalculatePlayersPosition();
CalculatePlayersPosition();
CalculatePlayersPosition();
CalculatePlayersPosition();
CalculatePlayersPosition();
Even though this seems like the solution, it’s not.
You see this can get tedious pretty quickly if you have more code that you need to call multiple times which is something that happens often in programming.
So there must be a better solution to this, and there is my friend.
The For Loop
Instead of calling the code multiple times on every place when we need it, we can use a loop to do that for us.
The structure of a loop goes like this:
					for(int i = 0; i < 5; i++)
{
    std::cout << "Executed from loop \n";
}
If you run this code inside the main function you will see this printed in the console:
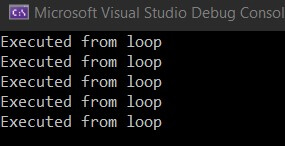
As you can see we wrote one line of code but the loop executed it 5 times. Let’s break down how a loop works:
First of all, this is called a for loop, hence the opening for at the start, inside the parenthesis we add the condition that will run the loop.
First we create an integer i and set its value to 0, then we add a condition which is i < 5, this means that the loop will run as long as i is less than 5, and at the end we increment the value of i by 1 using ++.
We need to increment the value of i at the end of the loop so that the loop will eventually finish.
You can see that the code is printed in the console 5 times, we made that happen by using the condition i < 5, if you change that condition to i < 10 and run the app, you will see the code printed 10 times in the console.
Now what’s important for us to understand is that the starting value of i is 0, and after every loop iteration that value will be increased by 1.
We can test that by changing the code a little:
					for (int i = 0; i < 5; i++)
    {
        std::cout << "The value of i is " << i << "\n";
    }
If you run this app this is what you will see printed in the console:

As you can see at the end of the loop iteration the value of i will increase by 1 which is denoted with i++ in the loop condition.
And when I say end of loop iteration I mean this:
					for (int i = 0; i < 5; i++)
    {
        // START OF THE LOOP ITERATION

        std::cout << "The value if i is " << i << "\n";

        // END OF THE LOOP ITERATION
    }
Basically when all the code inside the loop executes that’s the end of the loop’s current iteration.
So before the next iteration starts, i will be incremented by 1. This will be very useful later on in our development.
Of course, for this example I used only one line of code that is printing to the console, but we can also call functions or larger blocks of code inside a for loop, and we will see examples of that.
The While Loop
The for loop is not the only loop we can use to iterate through our code, there is also a while loop which goes like this:
					while(condition is true)
{
    // execute code
}
The while loop has a different structure then a for loop. The condition we provide needs to be true so that we can execute the code inside the while loop.
Let’s see how that looks like using the same example from the for loop:
					int i = 0;

while(i < 5)
{
    std::cout << "The value if i is " << i << "\n";
    i++;
}
When you the app you will see the same lines printed in the console as we saw in the example with for loop, except that this time we are using a while loop.
Here we declared the iteration variable outside the while loop, the condition for the loop is i < 5, same as with the for loop, and after we execute the code we want, then we increment the value of i by 1 inside the while loop.
It is really important that your while loop condition eventually becomes false or otherwise you will get stuck in an infinite loop.
You can test that by removing the i++ from the while loop like this:
					int i = 0;

while(i < 5)
{
    std::cout << "The value if i is " << i << "\n";
}
I don’t recommend that you test this out because your program will crash and you will have to restart it again, but if you are curious then give it a go.
The important thing to remember is that the while loop condition needs to eventually become false, otherwise your game will crash.
Comments are closed.