The variables who saw so far are useful and we will use them every time throughout our development.
But the issue with them is that they can only store one value e.g.
					Health = 100;

or

Power = 10;
But sometimes we will need a single variable to store multiple values. This is where arrays come into play.
Creating An Array
As we already mentioned, an array can hold multiple values, and an array can be of any type, which means we can create an array of integers, floats, strings and so on.
Declaring an array goes like this:
int DamagePoints[10];
The main difference between creating an array and a single variable is by using [] when you declare an array.
The number inside the [] denotes how many elements this array can have.
Which means we created an array of integers which has 10 elements, or better yet it can hold 10 elements.
I say it can hold 10 elements because we didn’t initialize the values of the elements inside the array.
Thich means even though this array has 10 elements they all have a default value. This value varies from programming language to programming language.
In some programming languages the default value for numbers is 0, in other programming languages is some arbitrary value.
And this default value is assigned if we explicitly don’t assign any value to the variable when we declare it.
Another important thing to understand is that arrays are fixed size, meaning if we declare an array to have 10 elements, then that array can only have 10 elements, it can’t have more or less.
Initializing Array Values
So how can we initialize the values inside the array?
We access the elements inside the array with indexes, and array indexes are zero based meaning the first element in the array is not at index 1, instead it’s at index 0.
So if you want to change the value of the first element in the array you would type:
DamagePoints[0] = 20;
This will set the value of the first element in this array to 20.
Arrays are tightly connected to loops and we can use loops to process arrays.
Same as how the first element inside the array is at index 0, the last element in the array is at the size – 1 of the array.
In order to understand this let’s write this line of code inside the main function:
std::cout << "Number of elements in the array is: " << + std::size(DamagePoints);
If you run this app you will see this printed in the console:

The size() function will return the number of elements inside this array which in this case is 10.
Going back to what I said about the index for the last element in the array, it is always size() – 1, in this case the size is 10 – 1 = 9 so the last element is at index 9.
Let’s take a look at that in action:
					int DamagePoints[10];

    for (int i = 0; i < std::size(DamagePoints); i++)
    {
        std::cout << "\nThe value of element is: " << DamagePoints[i];
    }
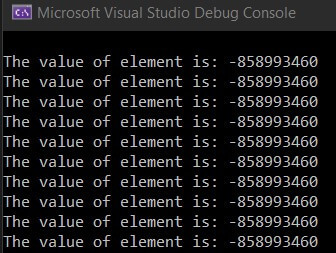
If you run this app you will see this printed in the console:

As I already mentioned, the default values of the integers will be printed. Let us now initialize the values with our own code:
					int DamagePoints[10];

    // FIRST WE INITIALIZE ARRAY VALUES
    for (int i = 0; i < std::size(DamagePoints); i++)
    {
        DamagePoints[i] = rand();
    }

    // THEN WE PRINT THOSE VALUES
    for (int i = 0; i < std::size(DamagePoints); i++)
    {
        std::cout << "\nThe value of element is: " << DamagePoints[i];
    }
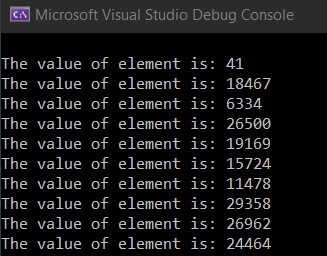
If you run this app you will see this printed in the console:

First we initialize the array elements using rand function.
The rand function will return a number between 0 and RAND_MAX per documentation found online, that’s why you see these random numbers generated in the array.
Then we use the same line of code from the previous example to print the new values of the elements in the array and you saw the result.
There is also another way to initialize the elements of the array and it goes like this:
int DamagePoints[5] = {43, 53, 11, 63, 78};
When you declare the array you can open curly brackets {} and inside type the values of the elements in the array separating them by coma.
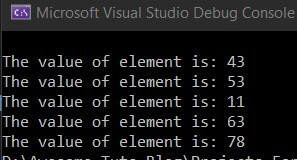
If you print the values now:
					 for (int i = 0; i < std::size(DamagePoints); i++)
    {
        std::cout << "\nThe value of element is: " << DamagePoints[i];
    }
This is what you will see in the console:

This is what you will see in the console:
What About While Loop?
In the lecture about loops we introduced while loop along with for loop.
From the example we saw here where we used for loop to process the array it’s only normal to think that we can also use while loops to process arrays.
In theory yes that is true and here is the demonstration using the previous example:
					int DamagePoints[5] = {43, 53, 11, 63, 78};

    int i = 0;
    while (i < std::size(DamagePoints))
    {
        std::cout << "\nThe value of element is: " << DamagePoints[i];

        i++;
    }
If you run the app you will see the same result we saw previously. But when it comes to practice a while loop is not used to process arrays.
There are other uses for a while loop which we will see as soon as we start creating games, but when it comes to processing arrays you will always use a for loop.


Comments are closed.