Downloading Visual Studio
As with any software the journey starts by downloading it, and in this post we are going to Visual Studio which we are going to use to code our games.
Click on the following link: https://visualstudio.microsoft.com/downloads/ or go on google.com and type in the search bar download visual studio and click on the first link.
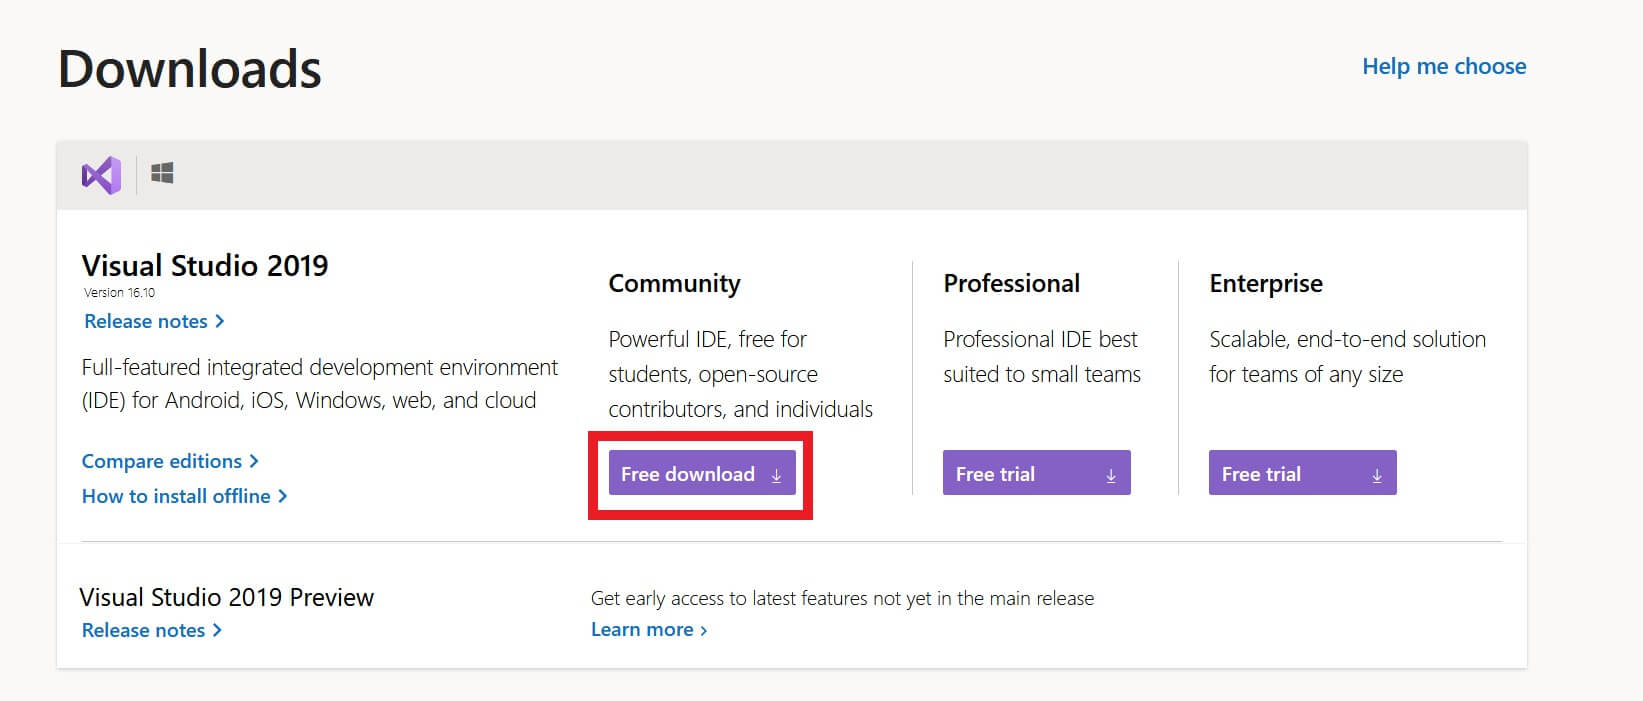
On the download page we are going to download the latest Visual Studio which currently it’s version 2019, and we are going to download the free version, so click the button where it says “Free download“:
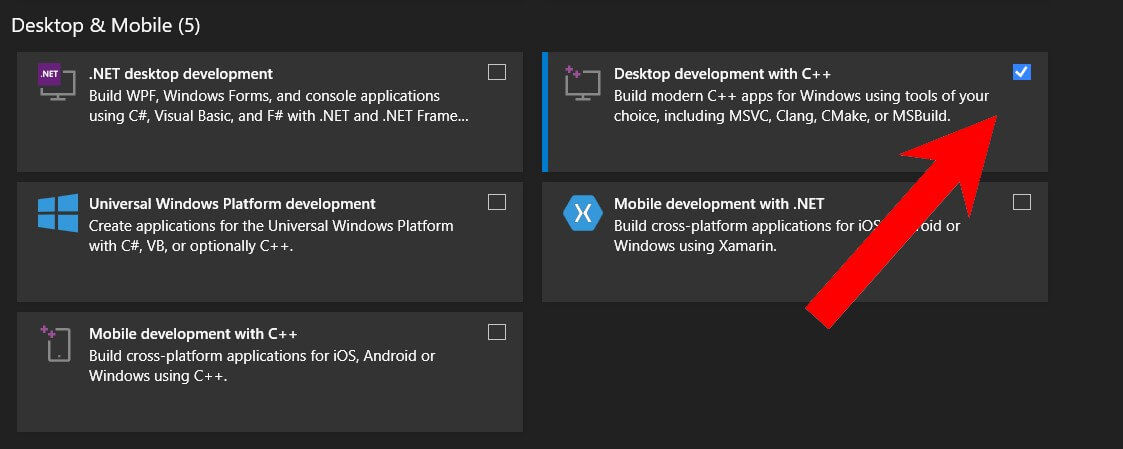
Under Desktop & Mobile, you are going to check the checkbox for Desktop development with C++:
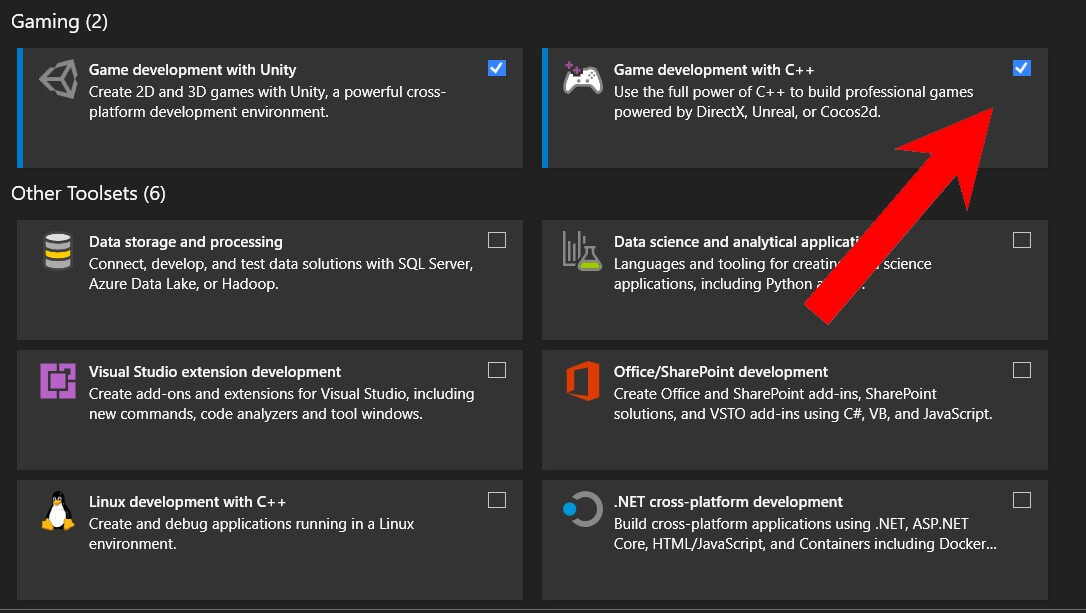
Under Gaming, you are going to check the checkbox for Game development with C++:
Also make sure to click the dropdown list on the side where it says Desktop development with C++ and check the checkbox to download the additional tools:
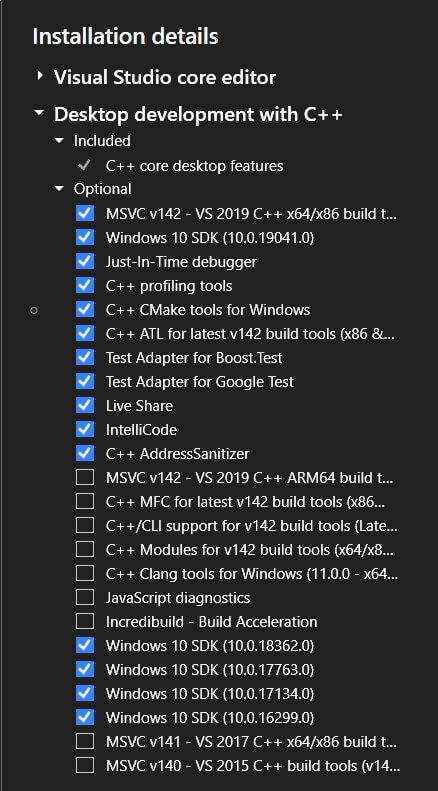
Do the same thing for the additional tools under Game development with C++:
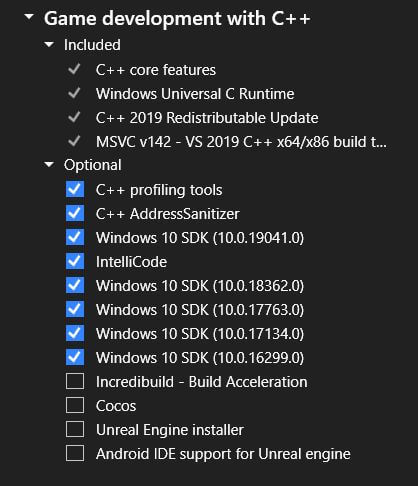
After that click the download button and wait until the process of downloading and installing Visual Studio finishes.
Creating Your First Visual Studio Project
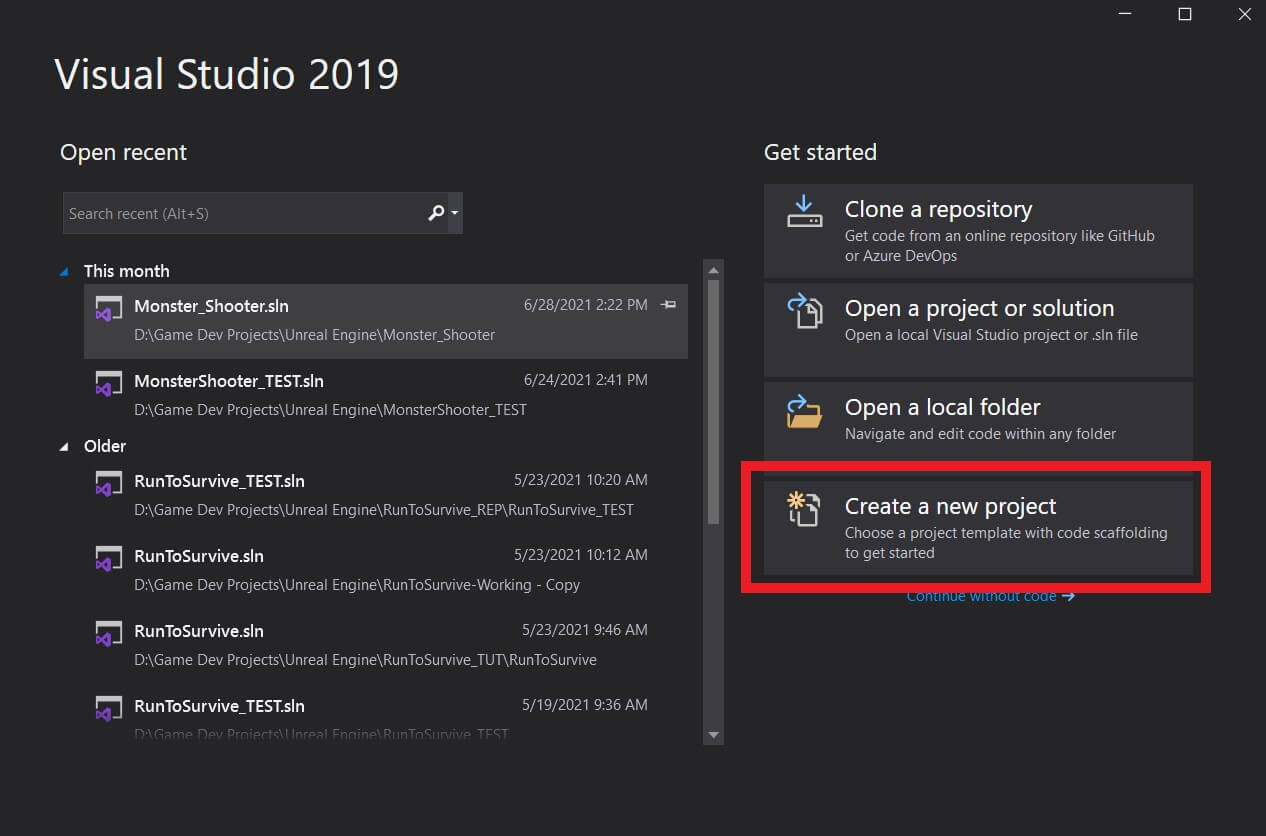
When Visual Studio finishes downloading, double click on it and open it. In the new opened window you are going to click on Create a new project:
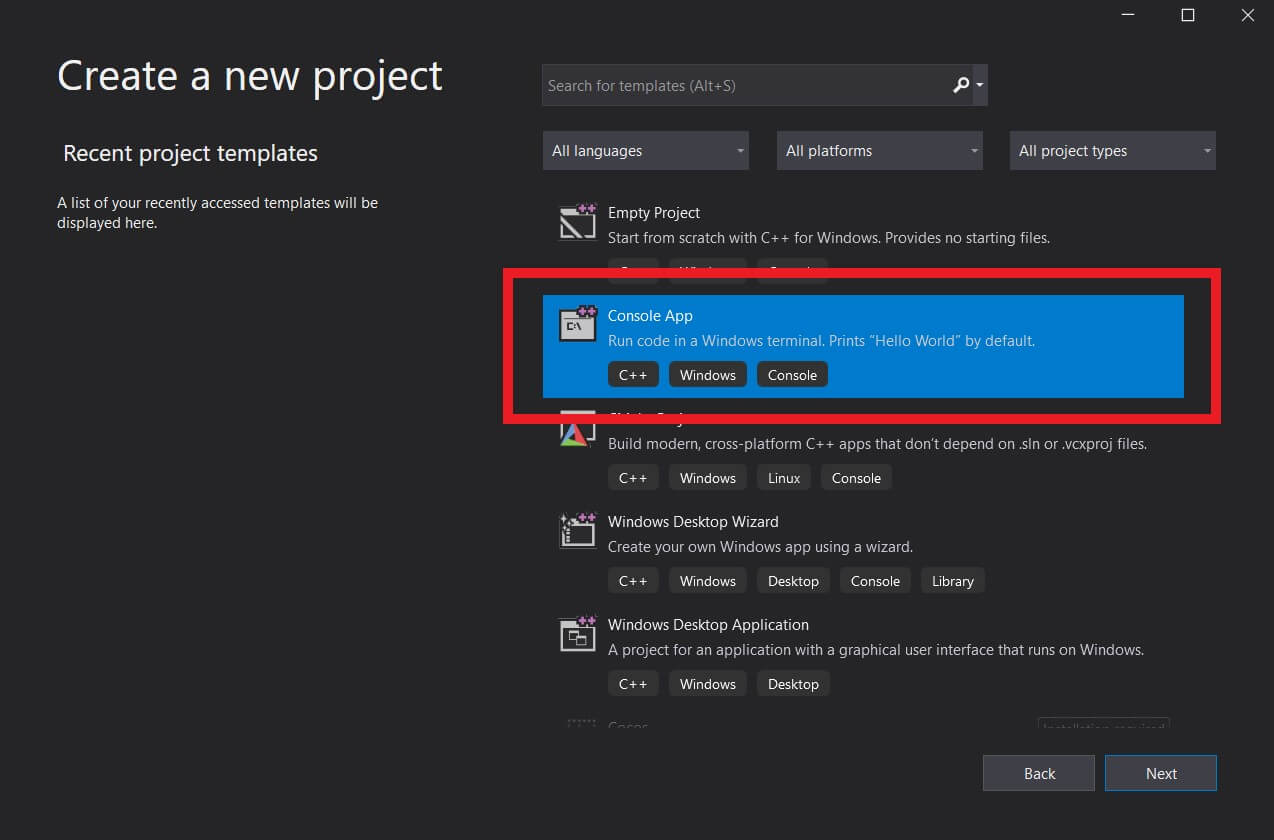
In the next window you are going to click on the Console App which will create a project that will allow us to print to the console and this is important because any change we make in the code we are going to print that change to the console to see the outcome:
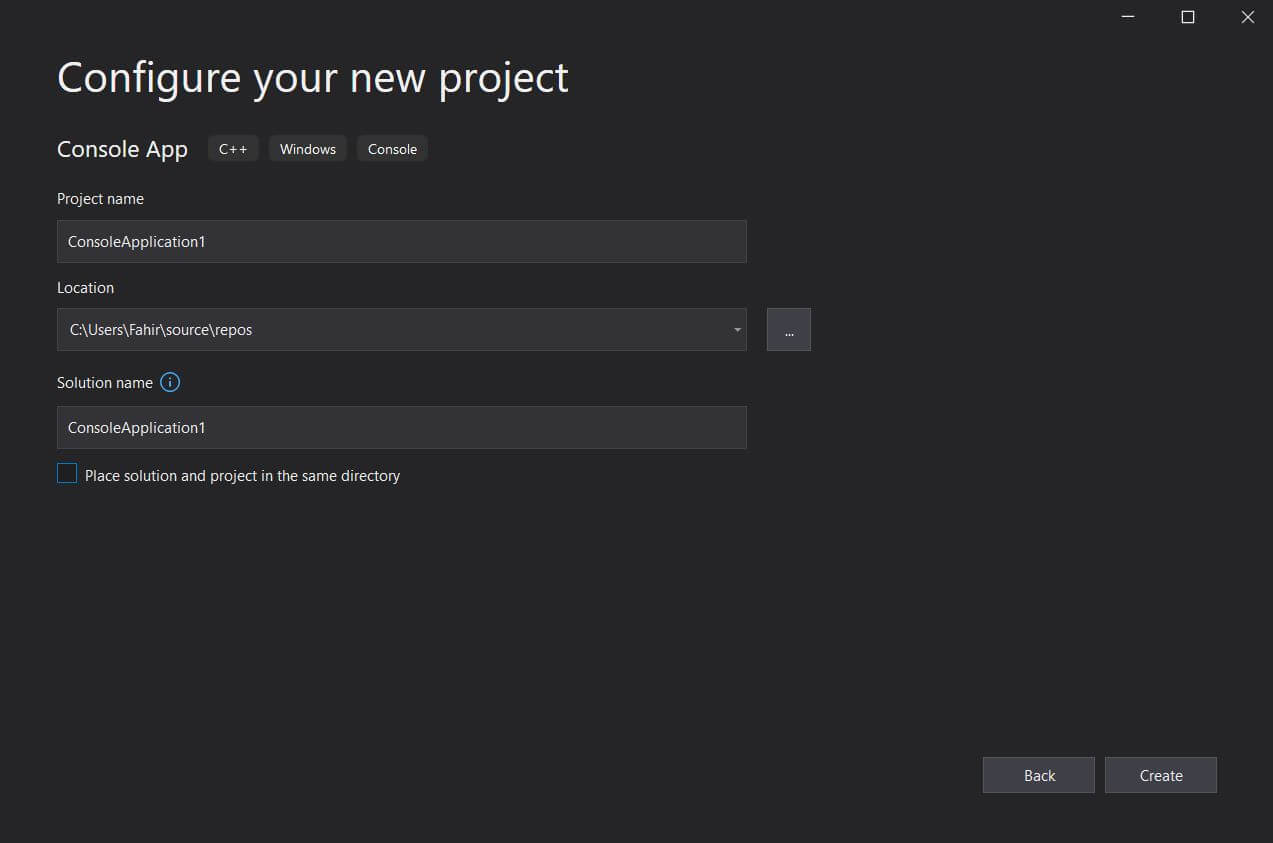
In the next window give your project a name and set the location where you want to store the project in your local machine and click the Create button:
When the setup finishes your project will be created and this is what you will see:
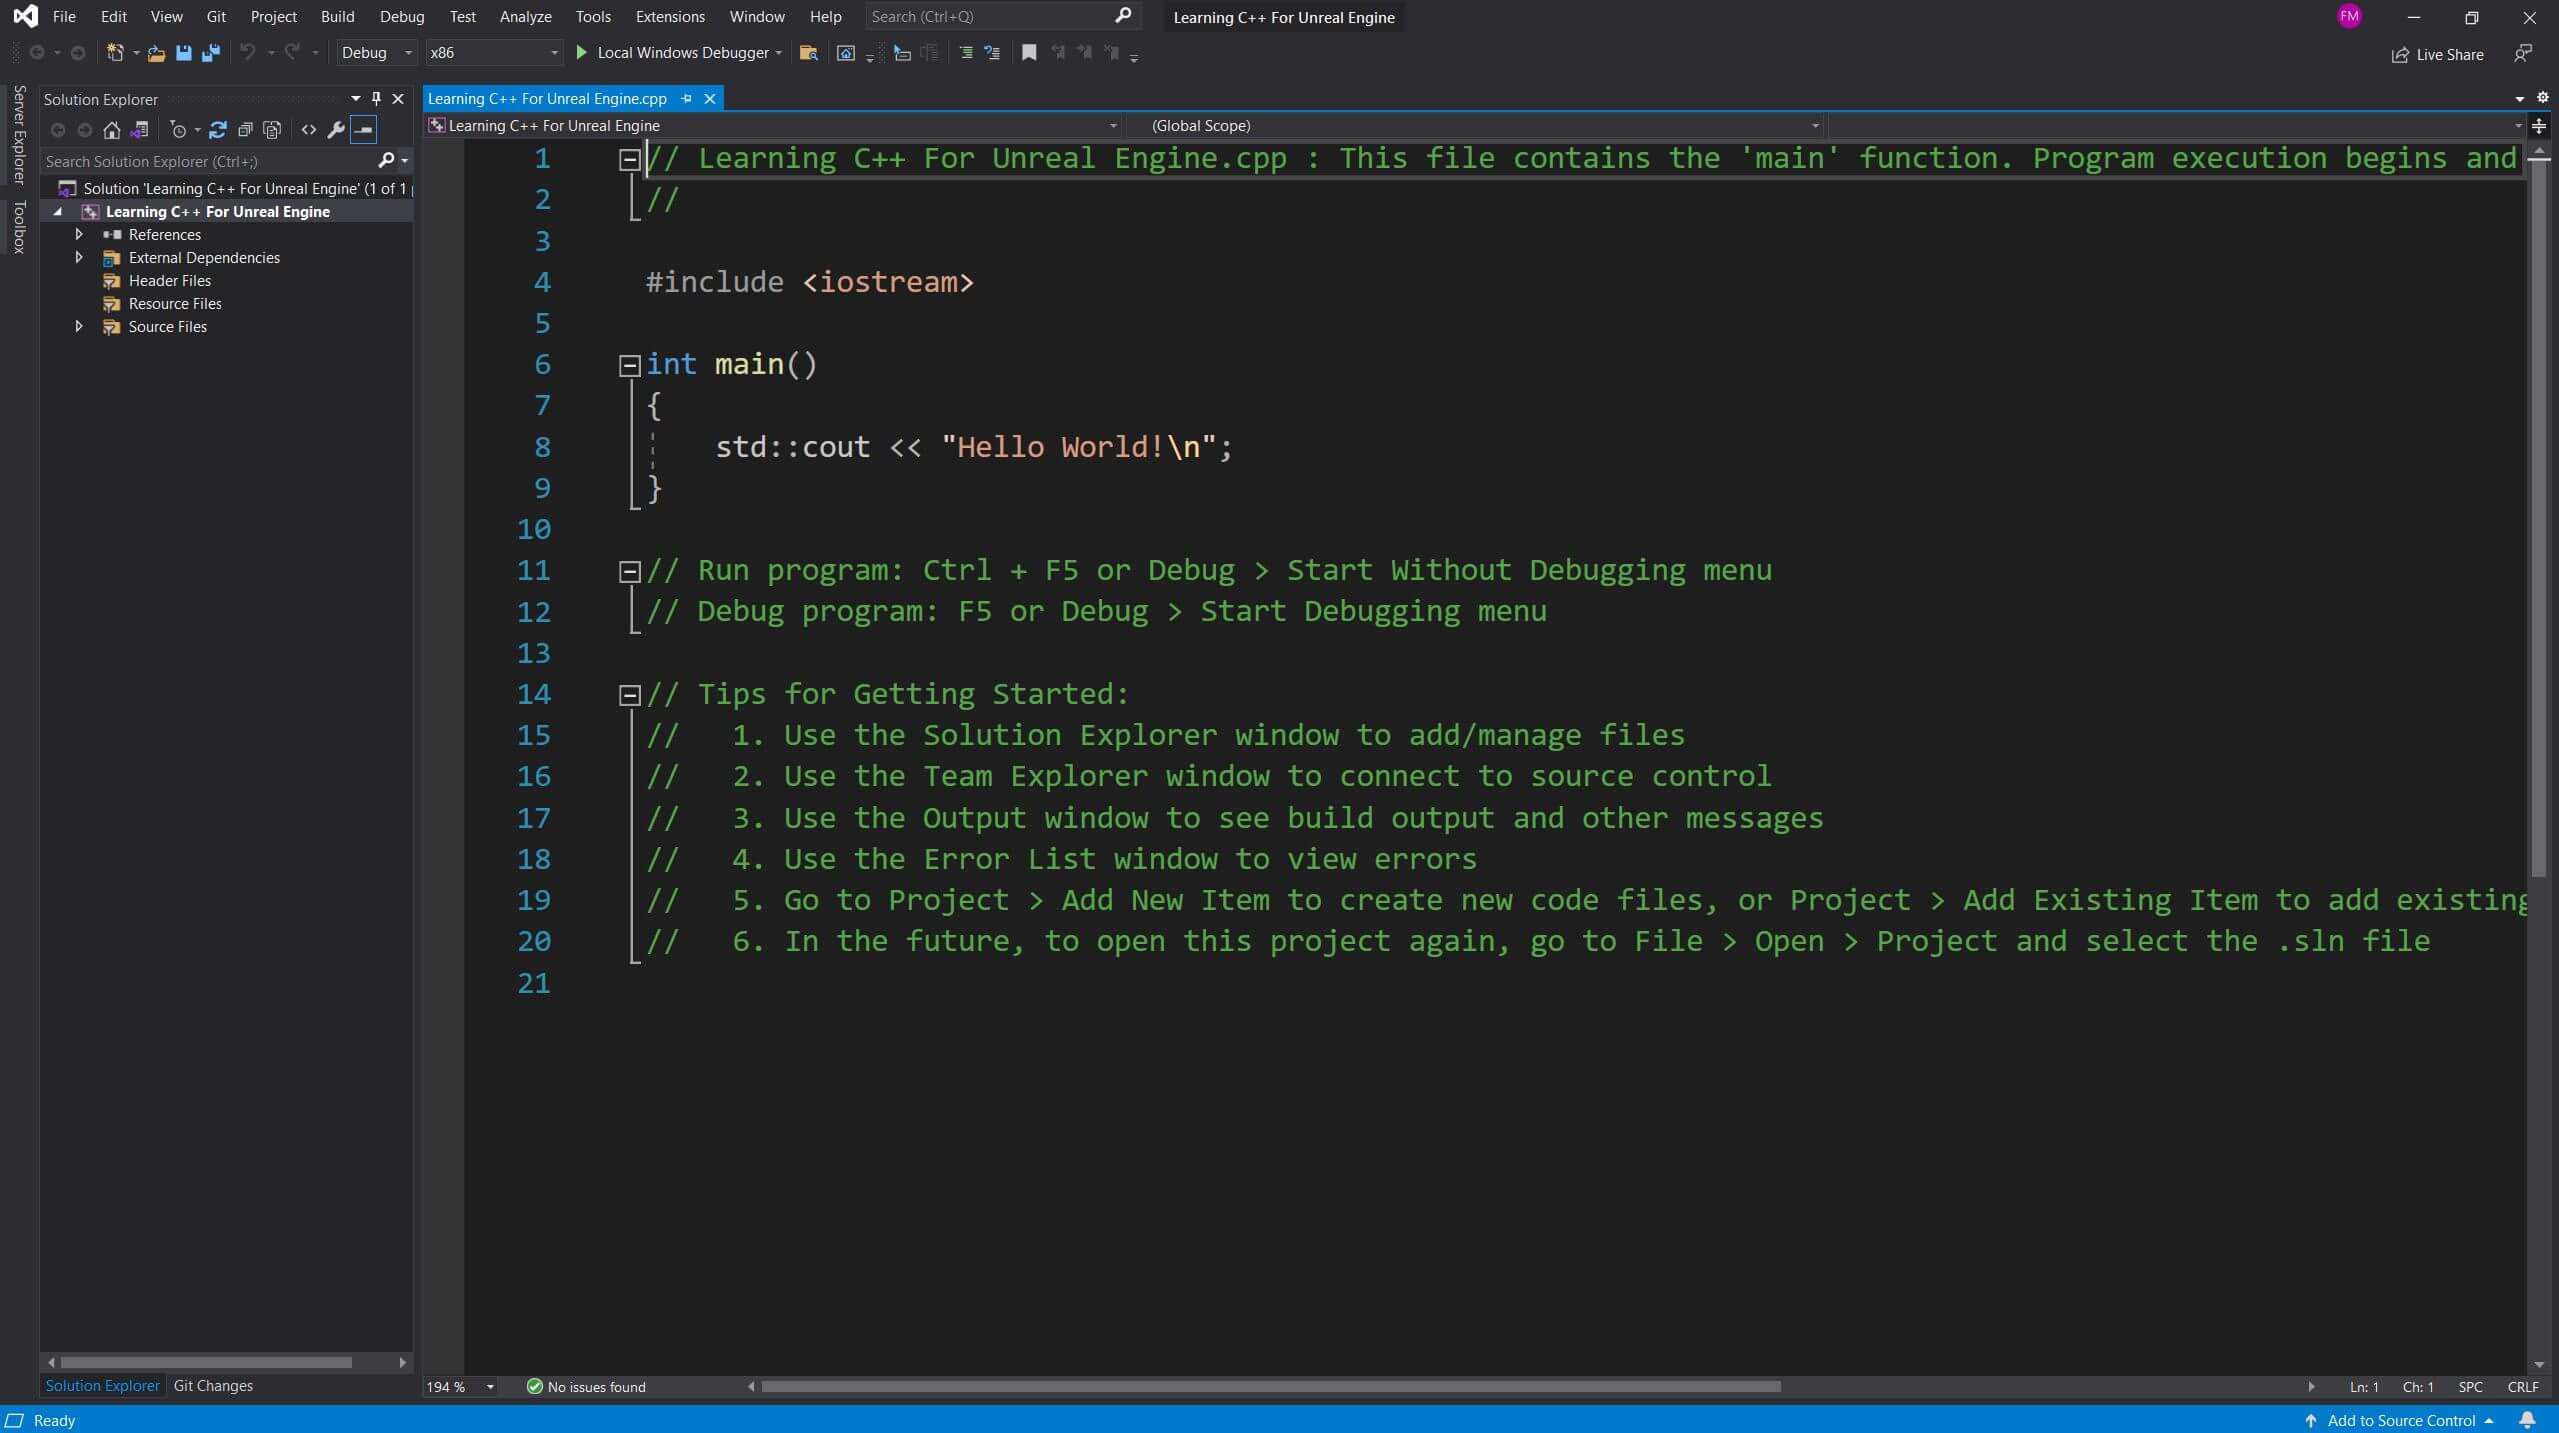
Now we have a new project ready and this is the project that we will use during the process of learning how to program in C++.

Comments are closed.