When we created our LearningHowToProgram script the structure of the script was like this:
					public class LearningHowToProgram : MonoBehaviour
{
}
And you were probably wondering what is this public, class, MonoBehaviour and what does all that mean?
I didn’t explain those parts on purpose because in order to get to these points we first had to pass all the other topics we covered so far.
Because the basis of all basis in object oriented programming is a class. And if you tried to learn programming before, you probably heard the phrase “a class is a blueprint for creating objects”, but what does that mean?
How To Create A Class
In order for me to explain this in a way that you will understand it without any problems, we are going to create a new script by Right Click -> Create -> C# Script.
At the moment we don’t care about organizing our project so you can save the script wherever you want in your assets folder.
Give the script a name Player and remove the Start and Update functions as well as the : MonoBehaviour part so that you get this:
					public class Player
{

}
The idea of a class being a blueprints is a way for us to model a behaviour in a single class, then we can create multiple objects out of that class that will have the modelled behaviour.
In this case we have a Player class, and in a game that you create you can have multiple characters, all these characters have features and functions like walking, attacking, picking up items, and so on.
All these features can be modelled in a single class and we can create multiple objects representing our game characters from that single class.
You can think of this like a car factory, you have a blueprint for one type of car, let’s say Mercedes-Benz S class, you can create 100 copies of S classes out of that one blueprint, or even more.
But you are using one blueprint that has all the characteristics and features which that particular car posses.
How can we apply that to our Player class?
Let’s give our Player class a few variables which will help us understand better what is going on. Inside the Player class add the following variables:
					public class Player
{

    int health;
    int power;
    string name;

}
These 3 variables are just an example of what features the characters or players in our game can have.
So no matter how many characters you have in your game, they all have a health property to determine when they will die, a power property to determine how strong the character is, and a name property to determine the name of the character.
This is a blueprint that we can use to create objects out of this class, and any object we create will have these 3 properties.
Object? What Is That?
In order to create objects out of this class we first need to create a constructor by typing the following line of code inside the player class:
					public Player()
{
}
					int health = 100;
int power = 55;
string name = "Warriror";
And inside the constructor we can type:
					public Player()
{

    Debug.Log("Health is: " + health);
    Debug.Log("Power is: " + power);
    Debug.Log("Name is: " + name);

}
Now that we have the constructor in place, we can go back in our LearningHowToProgram script and inside the Start function of the script type the following line of code:
Player warrior = new Player();
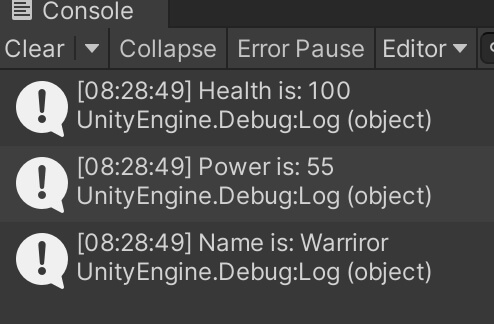
If we run the game this is what we will see in the Console:

Now that we have created a class we can treat it as a variable, same as other variables that we saw so far, except in this case the warrior is a type of Player variable e.g. the type is the class name that we use to create the object.
We use the “new” keyword to create a new object and we call the constructor to construct that object.
It’s not the first time we see the “new” keyboard, we stumbled upon this keyword in our lecture about arrays but I didn’t want to explain it then because we needed more info to be able to understand what the keyword is doing.
In the console you can see that all the initial values we set for the variables are printed.
You will also notice that the code we put in the Player constructor has been executed as soon as we created a new object out of its class which indicates that the constructor, same as a function, executes the code that’s between it’s curly brackets {} as soon as it’s called.
Usually the code we put in a constructor is the code that will be used for initialization of the particular class, this is in general programming, when it comes to Unity all the initialization code will go inside the Start or Awake function which we will introduce later on.
This is because the majority of classes that we will create will inherit from MonoBehaviour which is a requirement if we want to attach a particular script on a game object in our scene inside the editor.
Creating Different Objects From A Single Class
					Player warrior = new Player();

Debug.Log("-----");

Player archer = new Player();

Debug.Log("-----");

Player knight = new Player();

Debug.Log("-----");

Player wizard = new Player();
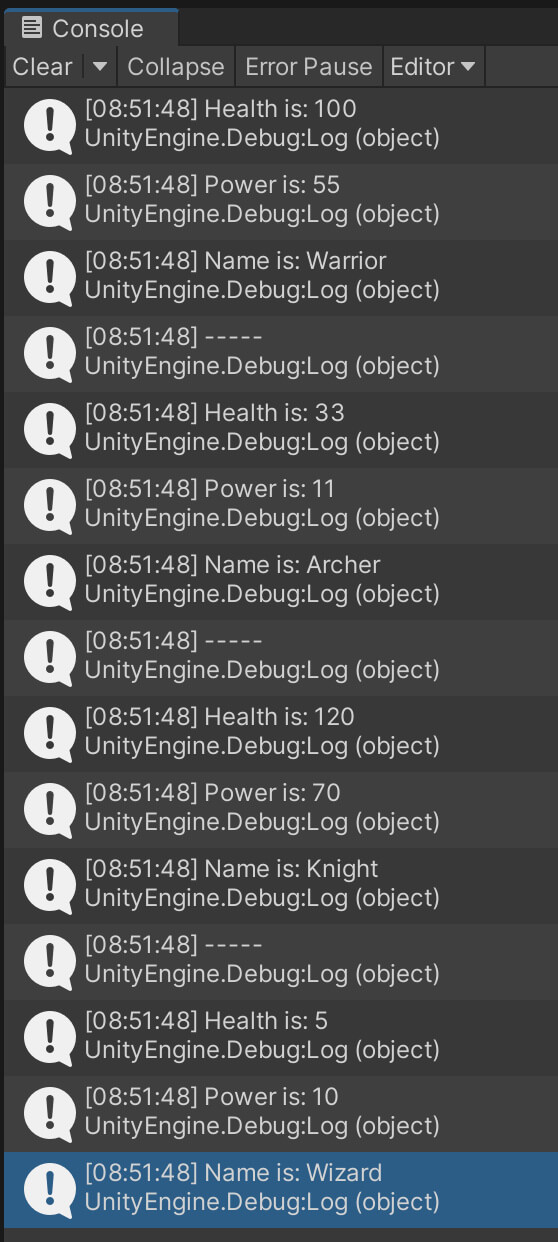
When you run the game you will see the same lines printed in the console from all 4 constructors. I added the Debug.Log(“—–“); to separate the outputs from one another so that we can see better.
As I already said, any object we create with the current Player class will have the same values for all 3 variables. Let’s change that.
We can create a new constructor below the existing one, but this constructor will have parameters that will allow us to set custom values for the 3 properties that we defined inside the class:
					public Player(int pHealth, int pPower, string pName)
{
    health = pHealth;
    power = pPower;
    name = pName;

    Debug.Log("Health is: " + health);
    Debug.Log("Power is: " + power);
    Debug.Log("Name is: " + name);
}
This constructor has 3 parameters which have the same names like our properties but with p in front of every name. This is just so that we can differentiate the parameter variables from the class variables.
This is where the naming convention comes in that we talked about. We can also add the _ before the variable names inside the class and we can name the parameter variables without the _, again for differentiating the variables.
But nonetheless we can also move forward with the current setup.
Now we can write the same lines of code we wrote before with the difference that we can initialize the class variables by passing parameters in the constructors for every object:
					Player warrior = new Player(100, 55, "Warrior");

Debug.Log("-----");

Player archer = new Player(33, 11, "Archer");

Debug.Log("-----");

Player knight = new Player(120, 70, "Knight");

Debug.Log("-----");

Player wizard = new Player(5, 10, "Wizard");
When we run the game this is what we will see in the Console:

This is how we can create different objects that will act on their own in our game, but they are all created from the same class. And this is what the phrase “a class is a blueprint for creating objects” means.
The "This" Keyword
					public Player(int health, int power, string name)
{
    this.health = health;
    this.power = power;
    this.name = name;

    Debug.Log("Health is: " + health);
    Debug.Log("Power is: " + power);
    Debug.Log("Name is: " + name);}
As you can see I used the same names for the class variables and parameter variables, but when I assign the parameter variables to the class variables I am using the “this” keyword in front of them.
The “this” keyword refers to the the class itself e.g. when you type this.name it refers to the name of the class where this keyword is used in our case the Player class.
So when you type this.name = name; the compiler knows that the this.name is the class variable and the name variable after the equals sign is the parameter variable so it will assign the value we passed as a parameter to the name property of the class.
You can try the same lines of code we wrote before by running the game and you will see that nothing has changed in terms of the output and the structure we already set, but we did change our code a little bit.
This proves the fact that in programming there are always multiple ways to solve a problem, and one doesn’t necessarily needs to be better than the other, keep this in mind when we move forward with our lectures.
Of course, there are more ways how we can manipulate the variables and other properties of the class, we are not just bound by the constructor and the values we can pass to the constructor.
But I don’t want to overwhelm you and put all that info in a single blog post, instead we are going to stop here as this is enough for us to get to know this new concept. In the next blog post we will further extend our class by providing it more functionality and make it more flexible.
Where To Go From Here
In this lecture you learned about the basis of every single thing that we will create in our game – classes.
To continue your learning journey you can take a look at our Extending The Functionality Of The Class Lecture which is the next lecture in this tutorial series.


1 thought on “C# Programming With Unity – Classes And Objects”
wonderful explanation