In video games, the small effects add up to making your game look stunning.
Things like playing the jump sound when you press the jump button, or leaving bullet debris on the wall when the bullet hits it and so on.
One of these gameplay add-ons is the x-ray effect which allows you to see through other gameplay elements like walls, doors, even characters.
And popular games like Batman Arkham Asylum have this effect:
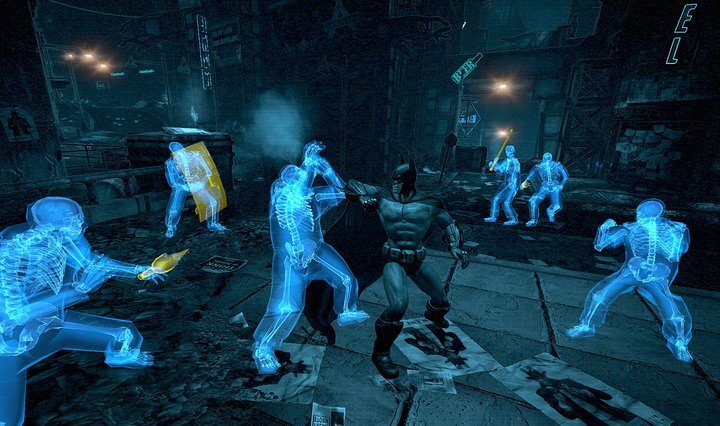
Other notable games that have this effect are Mortal Kombat – which they implement when the characters perform special attacks on each other.
And Sniper Elite – which they implement when the bullet hits the enemy and you can see where the bullet goes through to kill the enemy.
In this post, we’re going to see how can we create that effect inside Unity using 3 different approaches.
Before we begin, this is not a beginner tutorial. If you’re a complete beginner and you never created a game in Unity, then don’t start this tutorial because you’ll not understand a single thing.
Instead, we recommend you go through our beginner series. If you’re a complete beginner who never coded a single game in Unity, start with the tutorial in the link below:
Getting Started With Unity And C#
If however, you know how to create basic games in Unity on your own, then you can follow this tutorial to implement this effect in your game.
What Is a Shader?
Since the main premise of this effect is going to be a shader, we’ll start with explaining what a shader is.
A shader is a script where you write code that determines how the colors will be rendered based on various scenarios like lighting and material configuration.
Unity already has default shaders that are available with any project we create. To see the available shaders first we need to create a material by Right Click -> Create -> Material:
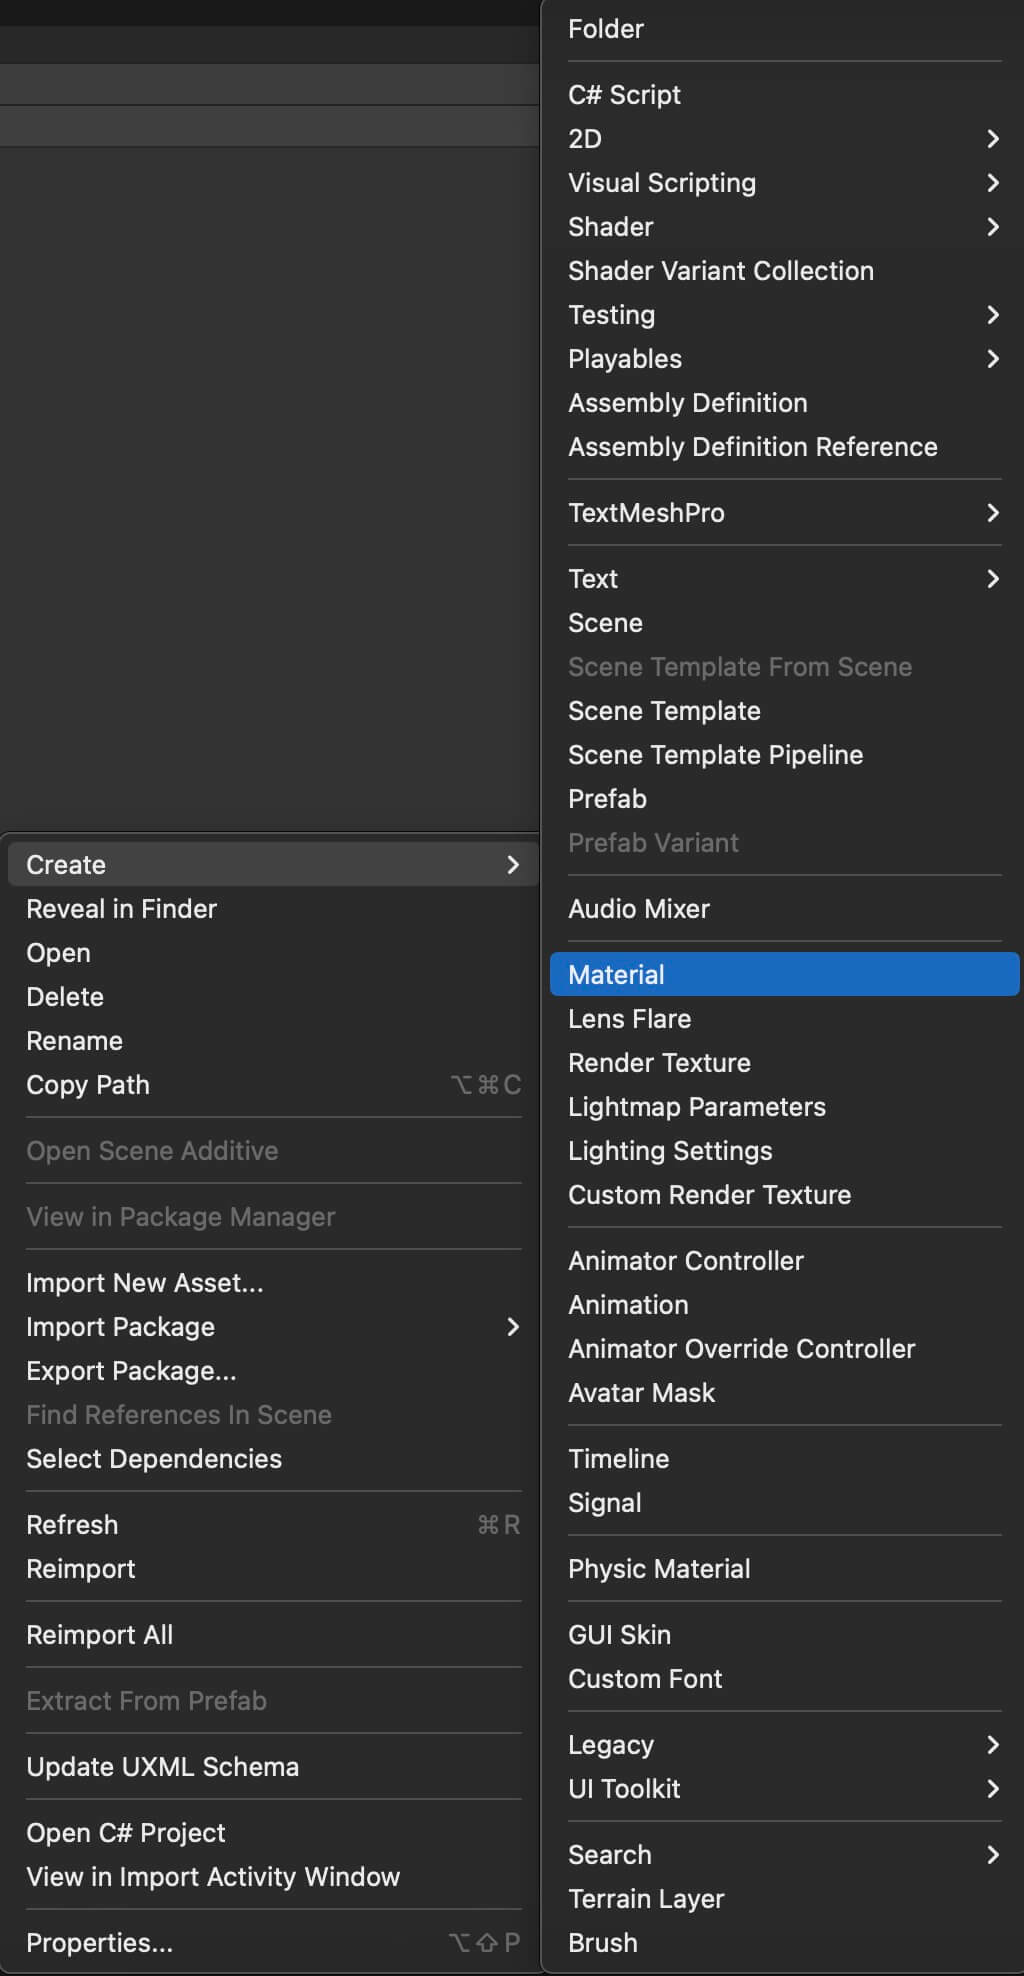
After we create the material, select it by Left Clicking on it, then in the Inspector tab you can see its options.
The default created material is using the Standard shader and here are its options:
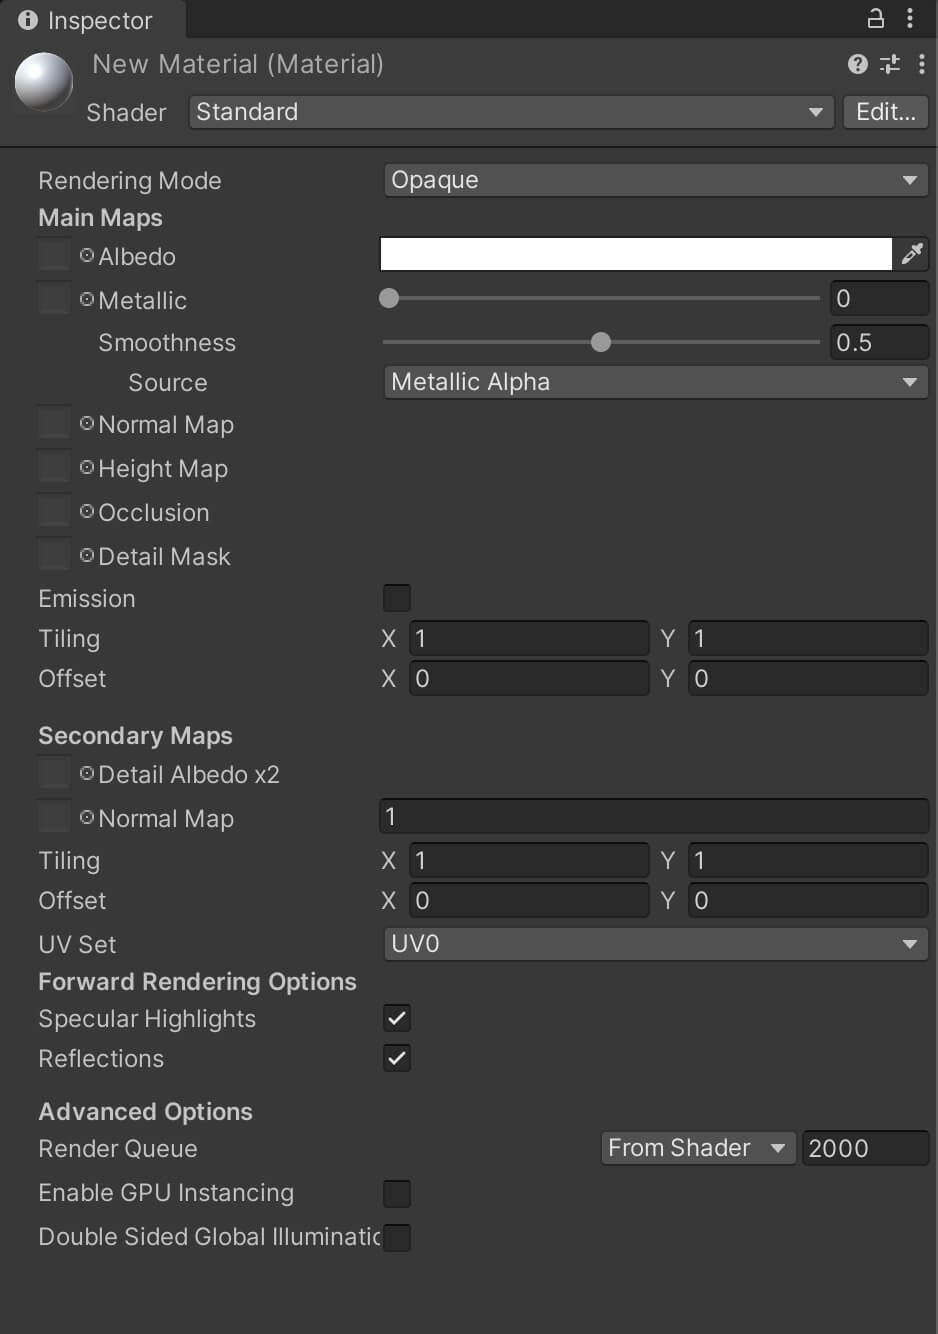
You can see which shader the material is using in the Shader option:
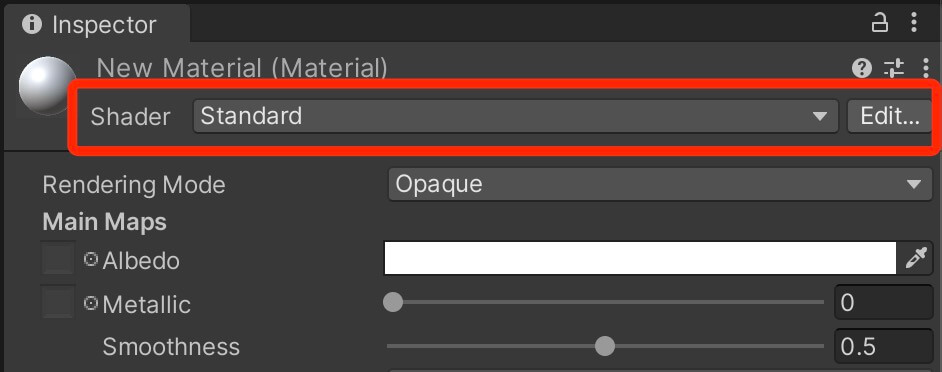
You can click on the drop-down list where it says Standard and see other available shaders:
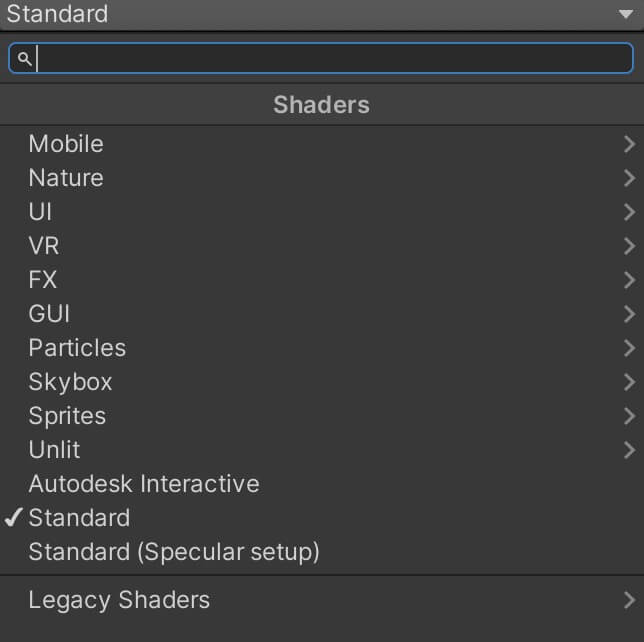
These are the default shaders that come with every Unity project we create. And these shaders determine how the material will look like when it’s applied on a 3D objects.
Now, shaders are a topic on its own, and we’ll cover them in-depth in a separate post. This was just a brief explanation what are shaders to those who don’t know, and now we’ll move on to our first example of how to make a game object visible through other game objects.
Making a Game Object Visible Through Other Game Objects With a Custom Shader
Inside your Unity project, create a new folder and name it shader scripts. Inside of that folder Right Click -> Create -> Shader -> Standard Surface Shader:
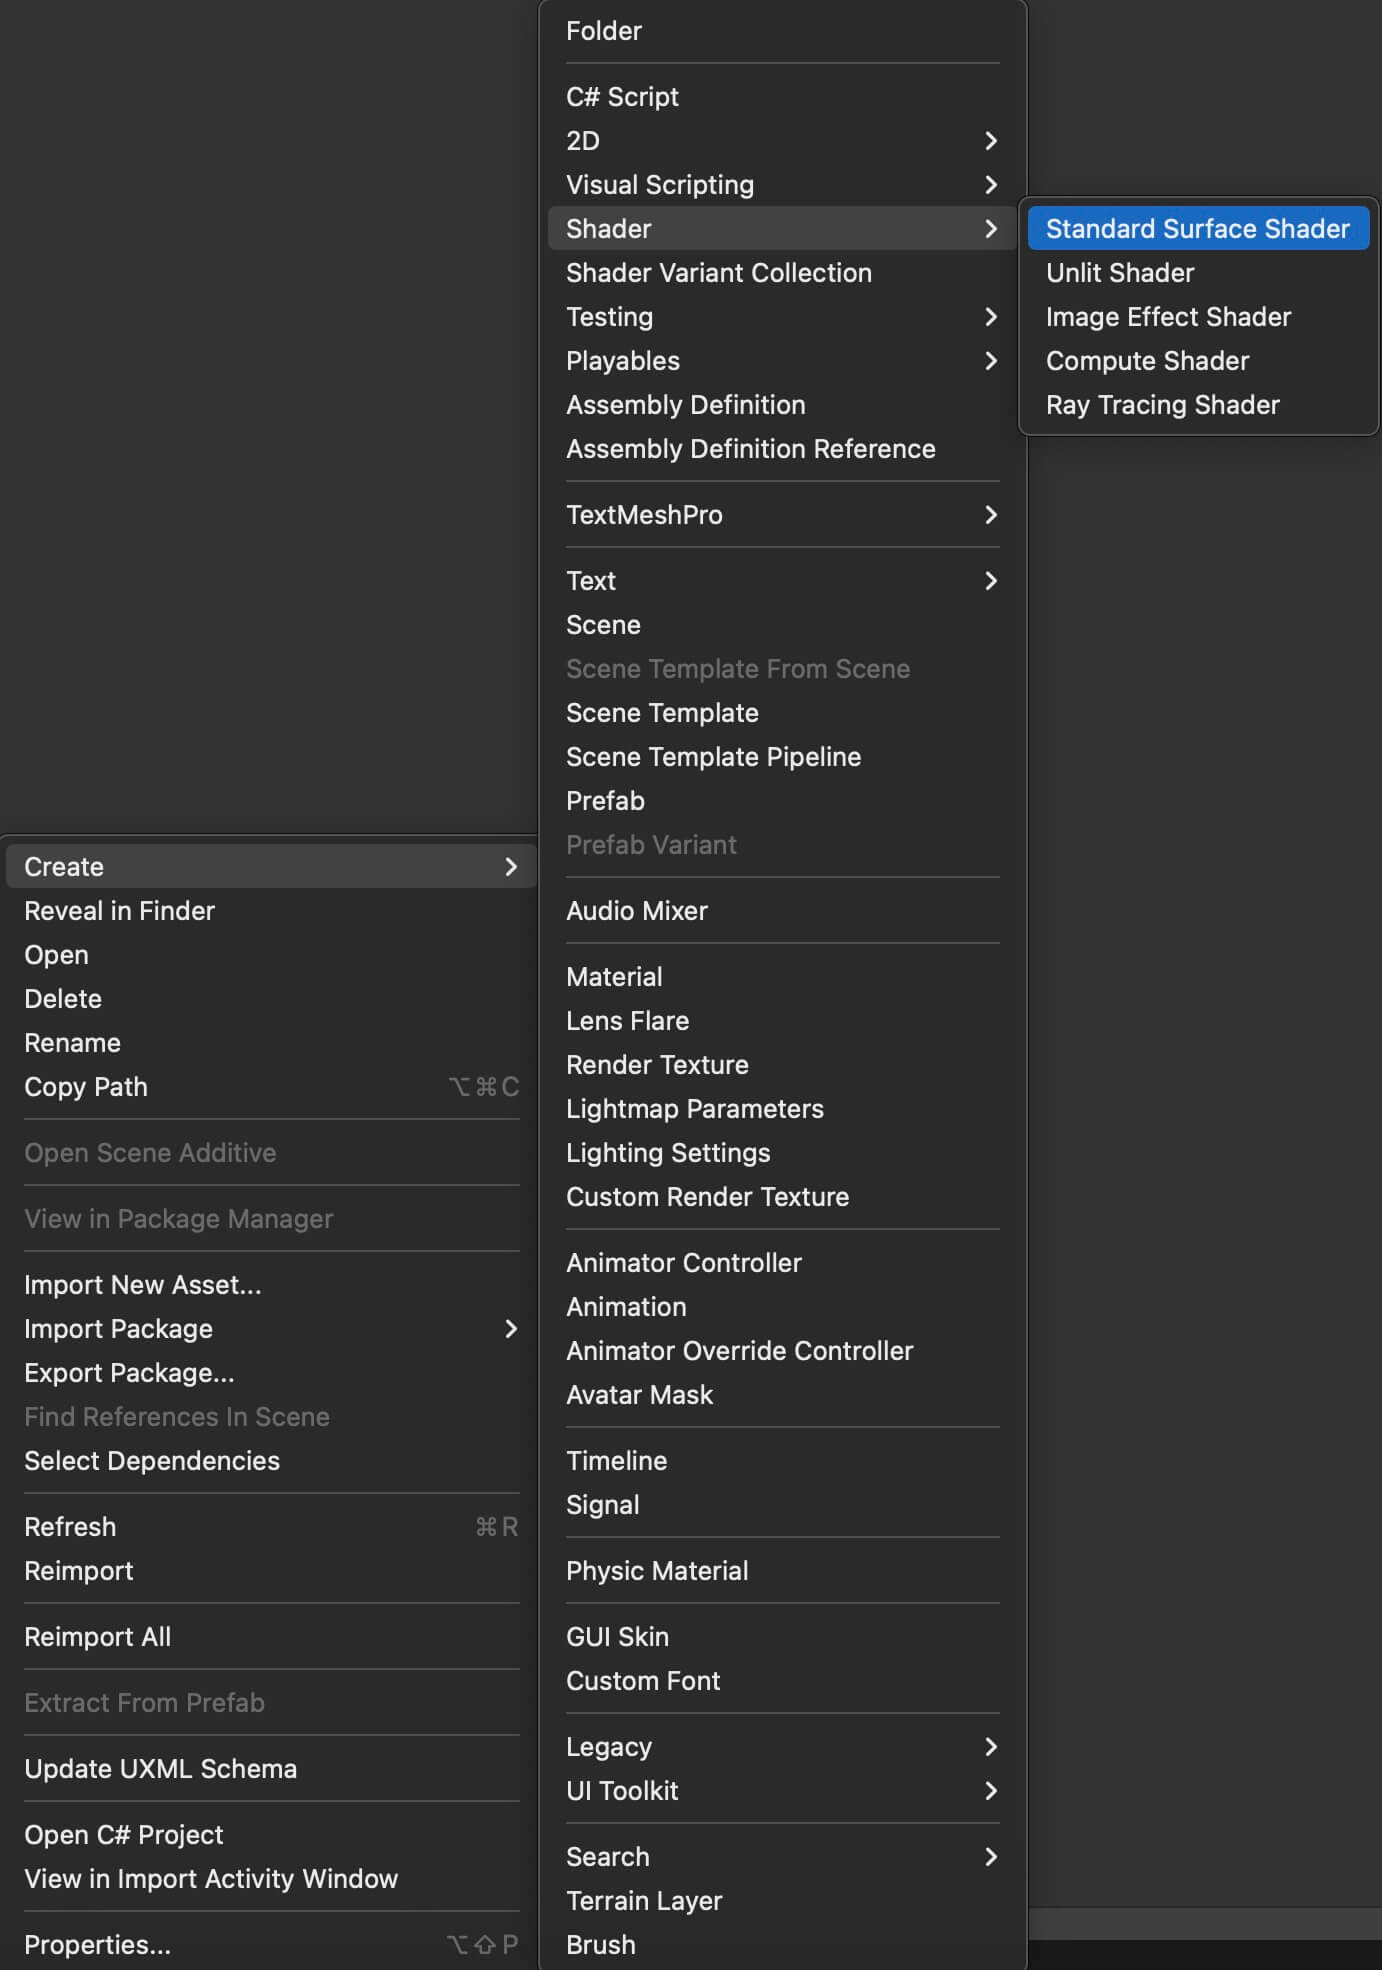
Give the shader script name SeeThrough and open it in Visual Studio. Paste the following code inside the SeeThrough shader script:
					Shader "FX/SeeThrough" {
    Properties {
        _Color ("Main Color", Color) = (1,1,1,1)
        _MainTex ("Base (RGB)", 2D) = "white" {}
        _OccludeColor ("Occlusion Color", Color) = (0,0,1,1)
    }
    SubShader {
        Tags {"Queue"="Geometry+5"}
        // occluded pass
        Pass {
            ZWrite Off
            Blend One Zero
            ZTest Greater
            Color [_OccludeColor]
        }
        // Vertex lights
        Pass {
            Tags {"LightMode" = "Vertex"}
            ZWrite On
            Lighting On
            SeparateSpecular On
            Material {
                Diffuse [_Color]
                Ambient [_Color]
                // Emission [_PPLAmbient]
            }
            SetTexture [_MainTex] {
                ConstantColor [_Color]
                Combine texture * primary DOUBLE, texture * constant
            }
        }
    }
    FallBack "Diffuse", 1
}
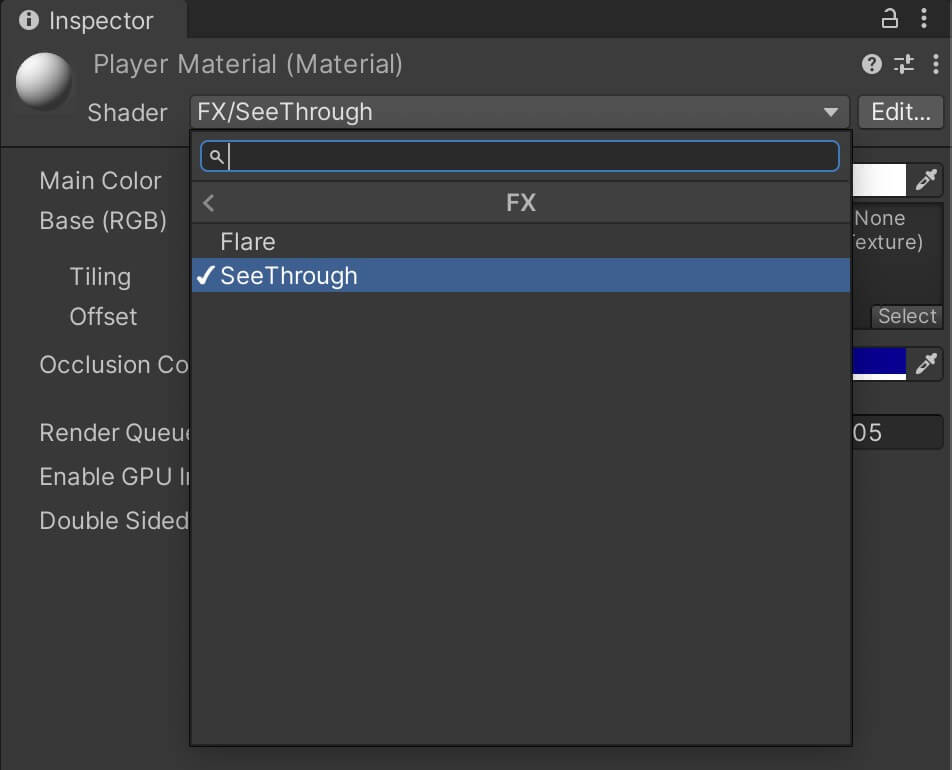
Now that we have the shader, create a new material by Right Click -> Create -> Material. Give it a name Player Material and in the Inspector tab for the Player Material under for the Shader click the drop-down list then select FX -> SeeThrough:
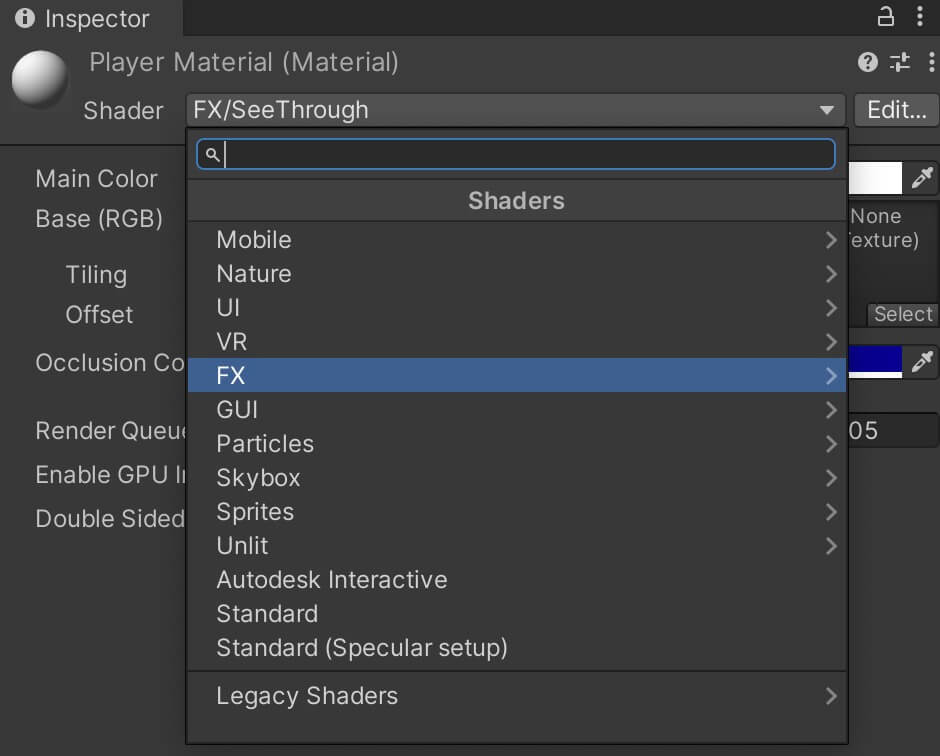
Moving forward let’s inspect the shaders code and explain what is going on. First, the shader is made out of various code block sections.
On line 1 have the Shader declaration. The FX/SeeThrough means that we’ll find the shader under FX -> SeeThrough when we want to selected it from the drop-down list, which we already did for the Player Material.
Next, we have the Properties block.
The Properties fields lets you define properties that can be changed in the Inspector tab.
First we declare the variable name e.g. _Color, then inside parentheses we give the variable a name, in this case Main Color. Then we give it a type – Color. And finally after the equals sign we give the variable its default values.
We repeat that same process for the Main Texture of the material, and the Occlude Color which will be the color of the game object behind other objects when it has this material attached on it.
And here are the declared options inside the Inspector tab:
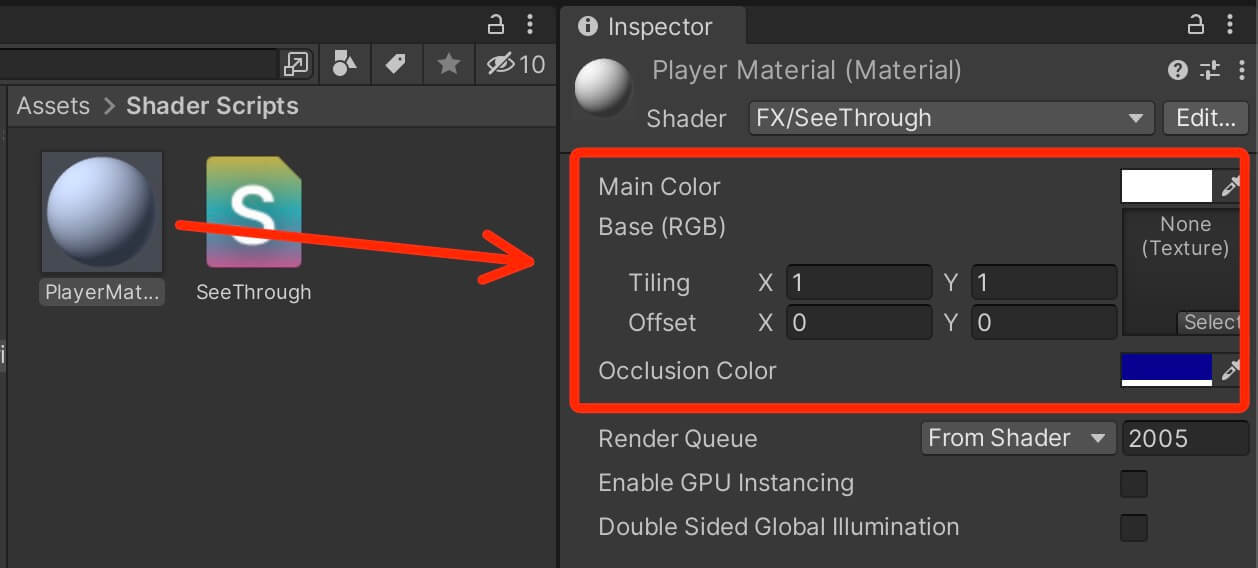
The SubShader code block starting on line 7 is where the shader definition goes e.g. the code which will define the shader’s behavior.
The code that will make the material holding this shader visible behind other objects is in the first Pass block:
					Pass {
        Tags {"Queue"="Geometry+5"}
        ZWrite Off
        Blend One Zero
        ZTest Greater
        Color [_OccludeColor]
    }
The Queue = Geometry + 5 tag will make sure that objects with this shader will wait until all other objects are drawn, and only then it will draw the object with this shader after it determines if it should be drawn in front or behind a certain object.
The ZWrite Off and ZTest Greater are responsible for making the shader render the material behind other objects.
The Color property indicates the color of the object holding this material when it’s behind other objects. In this case it’s going to use the color we defined with the variable _OccludeColor.
This is how it looks like when we attach the material on a game object:
Creating a Silhouette Shader
Let’s take a look at another example of how we can make a game object visible through other game objects by creating a different shader.
In your Shader Scripts folder Right Click -> Create -> Shader -> Standard Surface Shader. Give it a name Silhouette, open it in Visual Studio and paste the following code inside:
					Shader "FX/Silhouette" {

	Properties {
		_MainTex("Main Texture", 2D) = "white" { }
		_SilhouetteColor("Silhouette Color", Color) = (0.0, 0.0, 1.0, 1.0)
	}

	SubShader {
		// Render queue +1 to render after all solid objects
		Tags { "Queue" = "Geometry+5" }

		Pass {
			// Don't write to the depth buffer for the silhouette pass

			ZWrite Off
			ZTest Greater

			// First Pass: Silhouette
			CGPROGRAM

			#pragma vertex vert
			#pragma fragment frag

			#include "UnityCG.cginc"

			float4 _SilhouetteColor;

			struct vertInput {
				float4 vertex:POSITION;
				float3 normal:NORMAL;
			};

			struct fragInput {
				float4 pos:SV_POSITION;
			};

			fragInput vert(vertInput i) {
				fragInput o;
				o.pos = UnityObjectToClipPos(i.vertex);
				return o;
			}

			float4 frag(fragInput i) : COLOR {
				return _SilhouetteColor;
			}

			ENDCG
		}

		// Second Pass: Standard
		CGPROGRAM

		#pragma surface surf Lambert
		#include "UnityCG.cginc"

		sampler2D _MainTex;

		struct Input {
			float2 uv_MainTex;
		};

		void surf(Input IN, inout SurfaceOutput o) {
			float4 col = tex2D(_MainTex, IN.uv_MainTex);
			o.Albedo = col.rgb;
		}

		ENDCG
	}

	FallBack "Diffuse"
}
Again we have the properties which is a texture and a color declared on lines 4 and 5. These properties, same as the ones in the previous shader will be visible in the Inspector tab when we select the material which uses this shader.
In the SubShader on line 10 we have the Queue = Geometry + 5 which will draw the object holding this shader after other objects are drawn because it will check if the object holding this shader needs to be drawn behind or in front of other objects.
Now the Pass code block is slightly different than what we saw in the previous shader.
Again we’re using ZWrite Off and ZTest Greater to make sure the object is rendered behind other objects.
The CGPROGRAM on line 19 indicates the start of the block where the “actual shader code” is and it’s simply HLSL or high level shader language.
Pragma at lines 21 and 22 are declarations of vertex function called vert on line 21, and fragment function called frag on line 22.
The vertex function actually represents a vertex shader which transforms shape positions into 3D drawing coordinates.
The fragment shader compute the renderings of a shape’s color and other attributes.
The #include on line 24 means we’re including UnityCG.cginc which has the render functions that Unity provides.
We need to use the include keyword because shader scripts are not like C# scripts. They don’t inherit functionality from other shaders like C# classes do, so anything we want to use we need to include it.
float4 on line 24 is actually a Vector 4 variable which contains variables for x, y, z, and w.
Struct vertInput on line 28 is basically an object that contains two variables. The first one is a float4 or Vector 4 variable which we’ll use to pass the vertices of the 3D model holding this shader.
float3 normal variable will be used to pass the information about the normal maps on the shader.
On line 33 we have the fragInput struct which has one float4 variable that will give us information about the screen space position.
The vert function on line 37 uses UnityObjectToClipPos which will transform the mesh vertex position from local object space to clip space.
And the frag function on line 43 will return the silhouette color which we specified.
Then we indicate the end of the shader code on line 47 with ENDCG.
The new shader code block from line 51 to line 67 is taking a texture inside a surface function and with the help from tex2D function it will use the float2 parameter that’s passed along with the texture parameter and return a color on the texture at the point where float2 indicates.
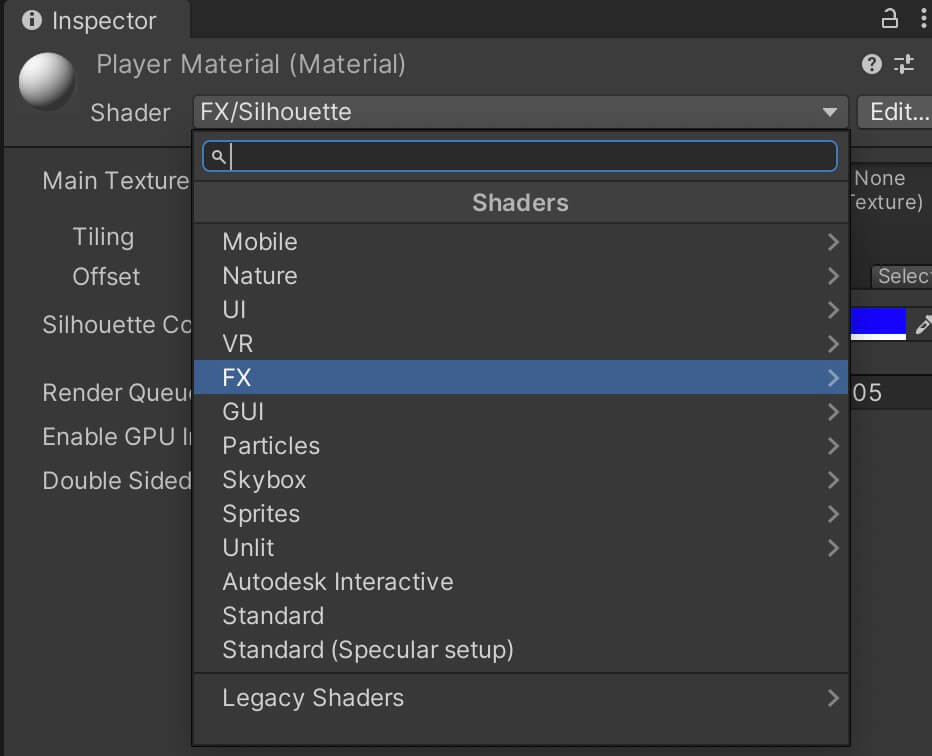
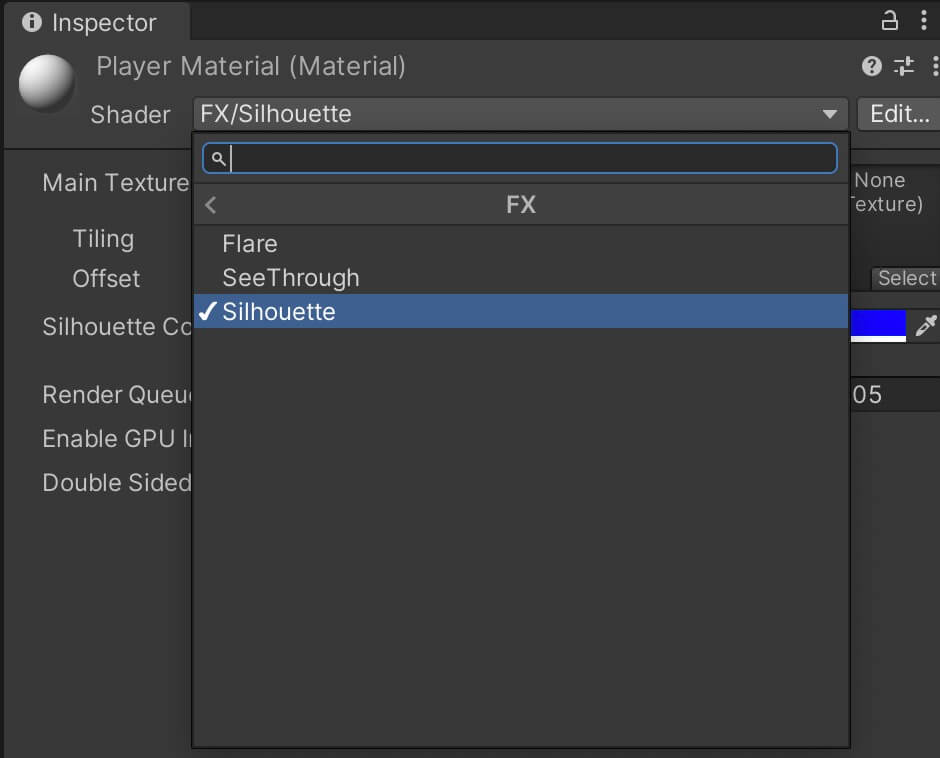
To test this shader, select the Player Material and for the shader select FX -> Silhouette:
This is how the new shader looks like when we test the game:
Making A Game Object Visible Only When It's Behind Other Objects
Now we’re going to invert the effect we saw in the previous two examples and make the game object visible only when it’s behind other objects.
Inside your Shader Scripts folder Right Click -> Create -> Shader -> Standard Surface Shader and name it Visible Behind Objects.
Open the new shader and paste the following code inside:
					Shader "FX/Visible Behind Objects"
{
    Properties
    {
        ObjectColor("Object Color", Color) = (1, 1, 1, 1)
    }
    SubShader
    {
        Tags {
            "Queue" = "Transparent+10"
        }

        Pass
        {

            ZWrite On
            ZTest Greater

            CGPROGRAM
            #pragma vertex vert
            #pragma fragment frag

            #include "UnityCG.cginc"

            struct appdata
            {
                float4 vertex : POSITION;
            };

            struct v2f
            {
                fixed4 color : COLOR;
                float4 vertex : SV_POSITION;
                float3 worldPos : TEXCOORD0;
            };

            uniform fixed4 ObjectColor;

            v2f vert (appdata v)
            {
                v2f o;
                o.vertex = UnityObjectToClipPos(v.vertex);
                o.color = ObjectColor;
                o.worldPos = mul(unity_ObjectToWorld,v.vertex).xyz;
                return o;
            }

            fixed4 frag (v2f i) : SV_Target
            {
                if (i.worldPos.y < 0.0) discard;
                return i.color;
            }

            ENDCG
        }
    }
}
This shader makes the game object transparent e.g. invisible which is denoted on line 10 in the code above.
Then inside the Pass block we use the ZWrite and ZTest to make sure the object will be rendered e.g. visible when it’s behind other objects.
The vertext function declared on line 20 and the fragment function declared on line 21 help us achieve that by using the v2f struct to draw the color specified in the ObjectColor declared on line 5.
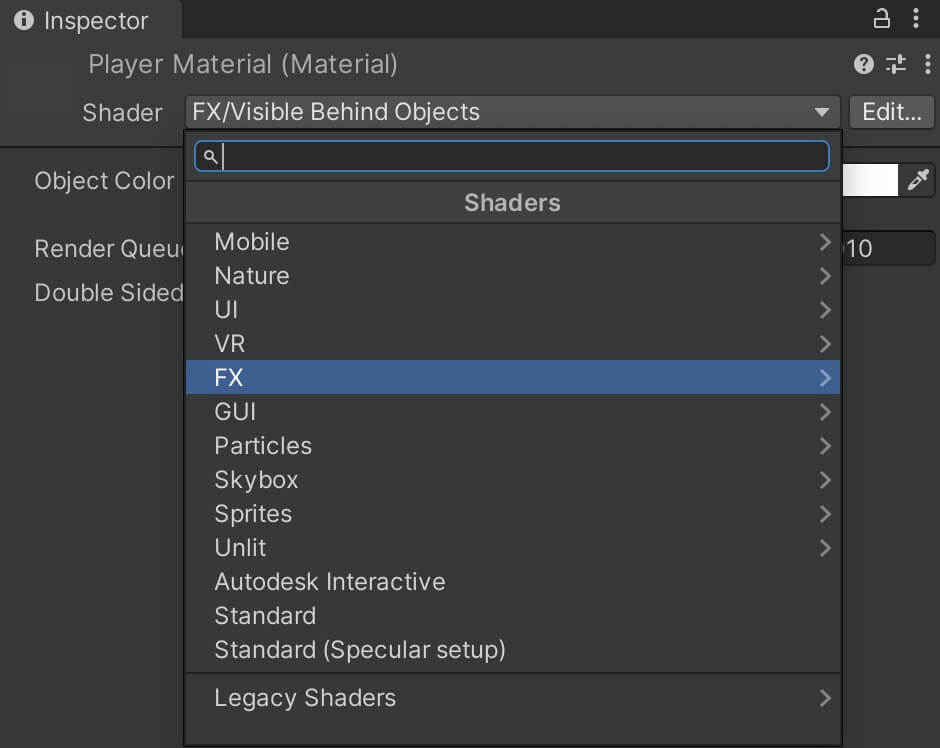
To test it out, select the Player Material and inside the Inspector tab select the Visible Behind Objects shader:
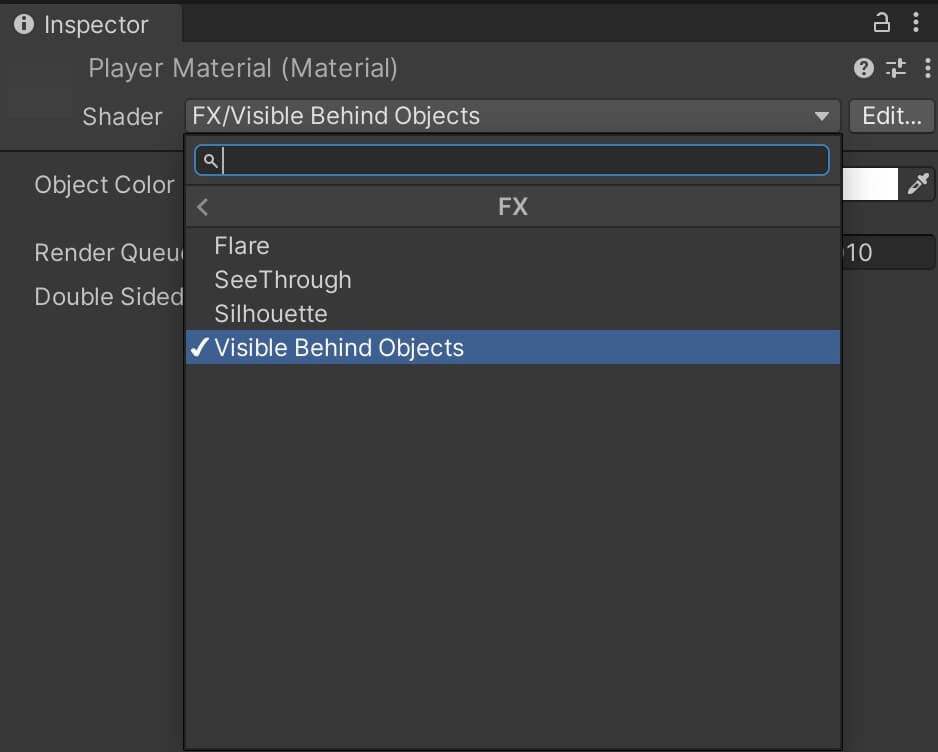
This is how the shader looks like when we run the game:
Game Object Visible Behind Wall But Pixelated
Here’s another example how to make game objects visible behind wall but with an addition – we’re going to make the visible objects pixelated.
Create a new shader, name it PixelateBG and add the following code insde:
					Shader "FX/PixelateBG"
{
	Properties
	{
		[Toggle] _Pixelate("Pixelate", Float) = 0
		_PixelSize ("Pixel Size", Range(0.01, 0.1)) = 0.05
	}
	SubShader
	{
		Tags { "Queue"="Transparent" }

		GrabPass
        {
        }

		Pass
		{
			CGPROGRAM
			#pragma vertex vert
			#pragma fragment frag

			#include "UnityCG.cginc"

			float _PixelSize;
			float _Pixelate;

			struct v2f
			{
				float2 uv : TEXCOORD0;
				float4 grabPos : TEXCOORD1;
				float4 vertex : SV_POSITION;
			};

			sampler2D _GrabTexture;

			v2f vert (appdata_base input)
			{
				v2f output;

				output.vertex = UnityObjectToClipPos(input.vertex);
				output.grabPos = ComputeGrabScreenPos(output.vertex);

				return output;
			}

			float4 frag (v2f input) : SV_Target
			{
				float4 col;

				if (_Pixelate == 1)
				{
					col = tex2Dproj(_GrabTexture, floor(input.grabPos / _PixelSize));
				}
				else
				{
					col = tex2Dproj(_GrabTexture, input.grabPos);
				}

				// Convert to grey scale
				// The constants 0.3, 0.59, and 0.11 are because the human eye is more sensitive to green light, and less to blue.
				col = dot(col.rgb, float3(0.3, 0.59, 0.11));

				// Split grey scale into 4 GameBoy colors
				if (col.r <= 0.25)
				{
					col = float4(0.06, 0.22, 0.06, 1);
				}
				else if (col.r > 0.25 && col.r <= 0.5)
				{
					col = float4(0.19, 0.38, 0.19, 1);
				}
				else if (col.r > 0.5 && col.r <= 0.75)
				{
					col = float4(0.55, 0.67, 0.06, 1);
				}
				else if (col.r > 0.75)
				{
					col = float4(0.6, 0.74, 0.06, 1);
				}

				return col;
			}
			ENDCG
		}
	}
}
The properties on lines 5 and 6 will allow us to edit these values in the Inspector tab. We’ll use them to determine if the object behind the wall will be pixelated as well as the size of the pixel.
The v2f struct will have the position information of the object which is behind the wall and that information will be passed from vert (appdata_base input) function.
The shader will then use that information to make the object in those positions pixelated.
This time, the shader will be attached on the wall object, so select the wall object and set the PixelateBG shader:
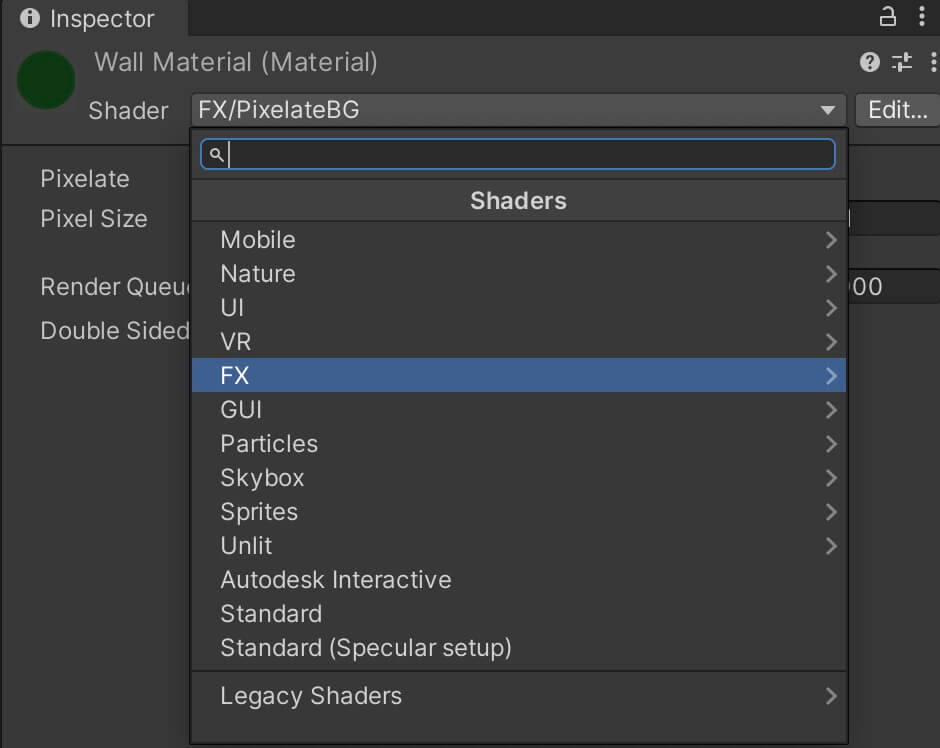
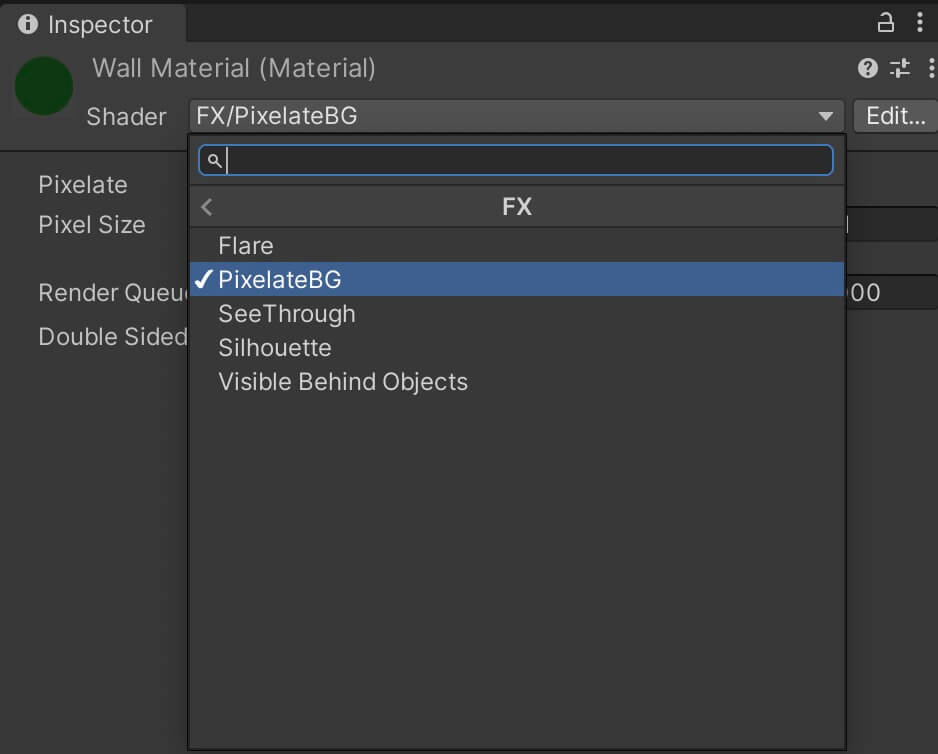
Let’s test it out and see how it works in the game:
Using A C# Script To Make A Game Object Visible Behind Other Objects
Let’s take a look at how can we use C# and some simple coding to show game objects we specify behind other game objects.
The idea here is that we’re going to use the alpha channel of the material color to make the material transparent.
In this example we’ll use the Standard shader, so depending on the shaders you use in your games the settings might change. But what’s important to remember is to have the alpha channel option on the shader.
So the first thing is to set the material to Standard shader, rendering mode to Transparent, and set the source to Albedo Alpha:
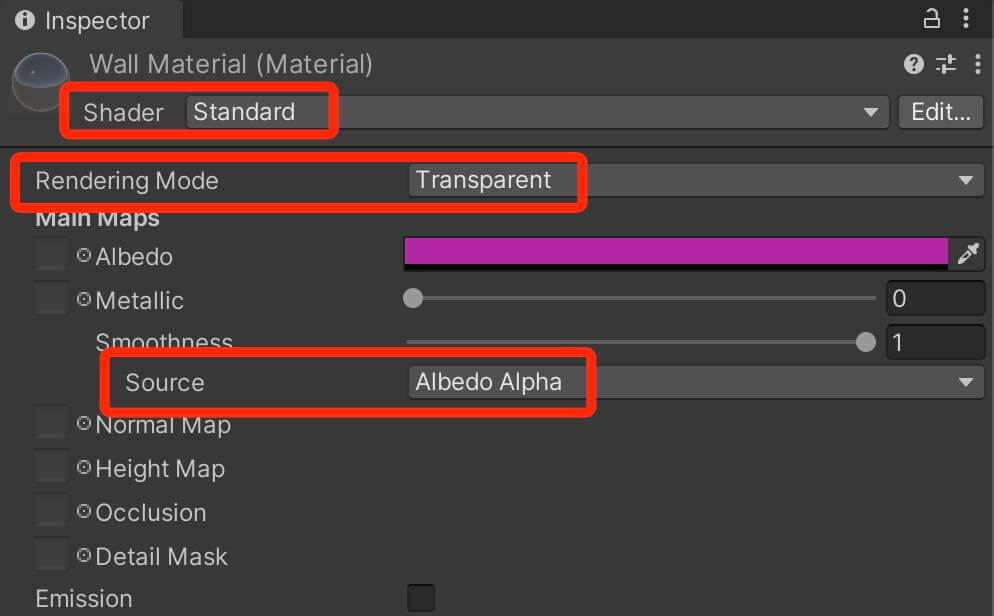
With these settings, we can open the color palette of the material, change the alpha channel and make the game object holding the material transparent:
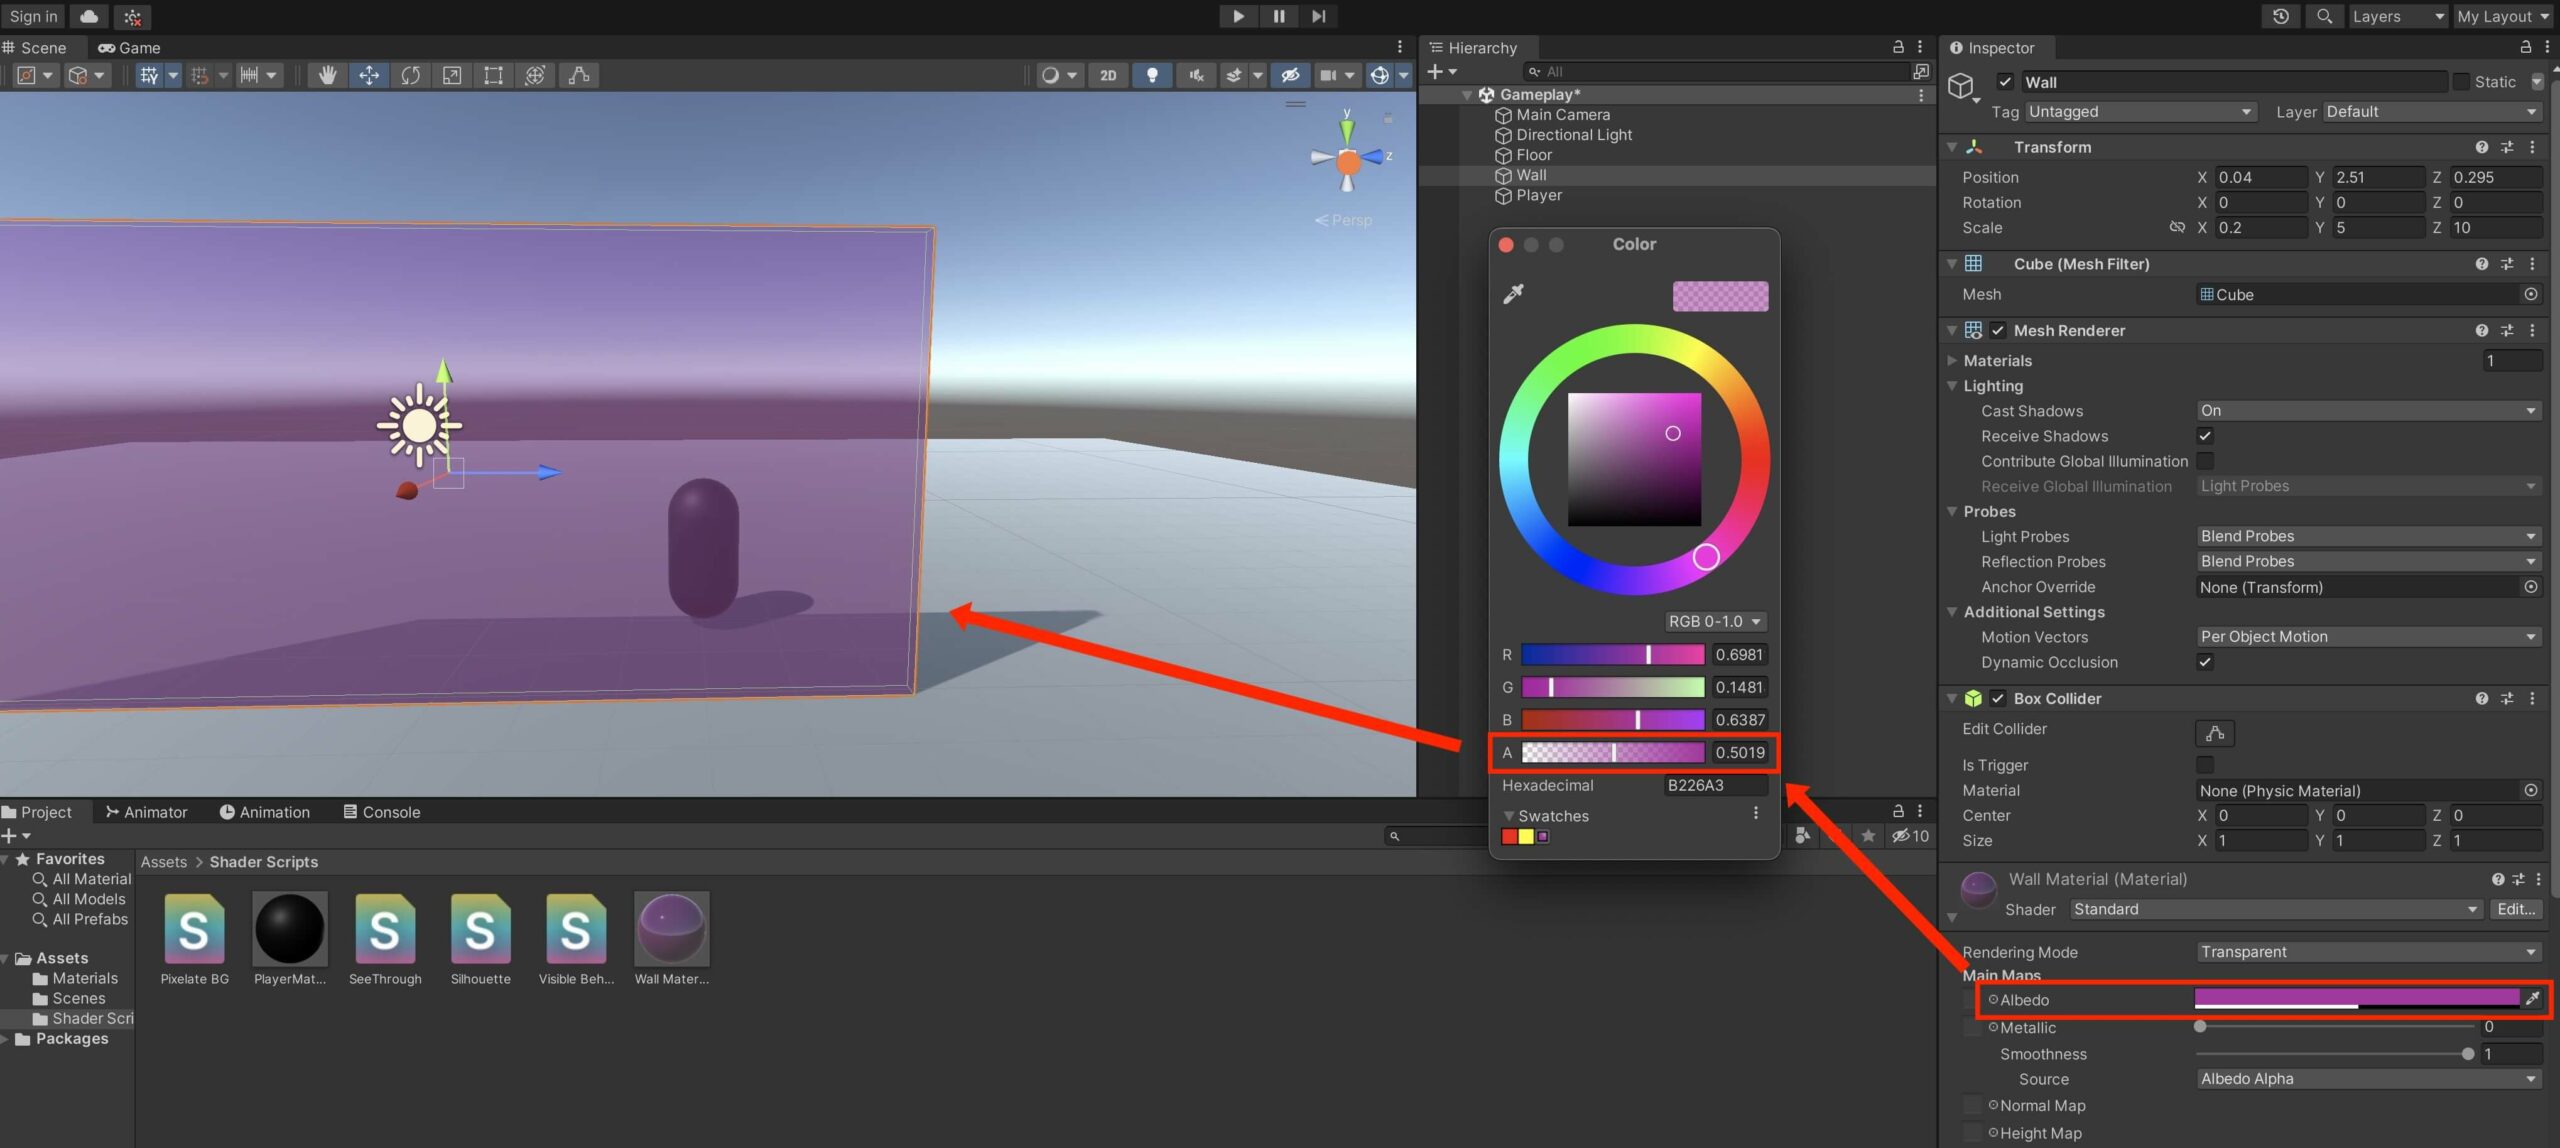
And the best part is, we can do the same thing via C# code. But before we do that, since we’re going to detect collision on the wall we need to add a trigger collider to the wall and a rigid body:
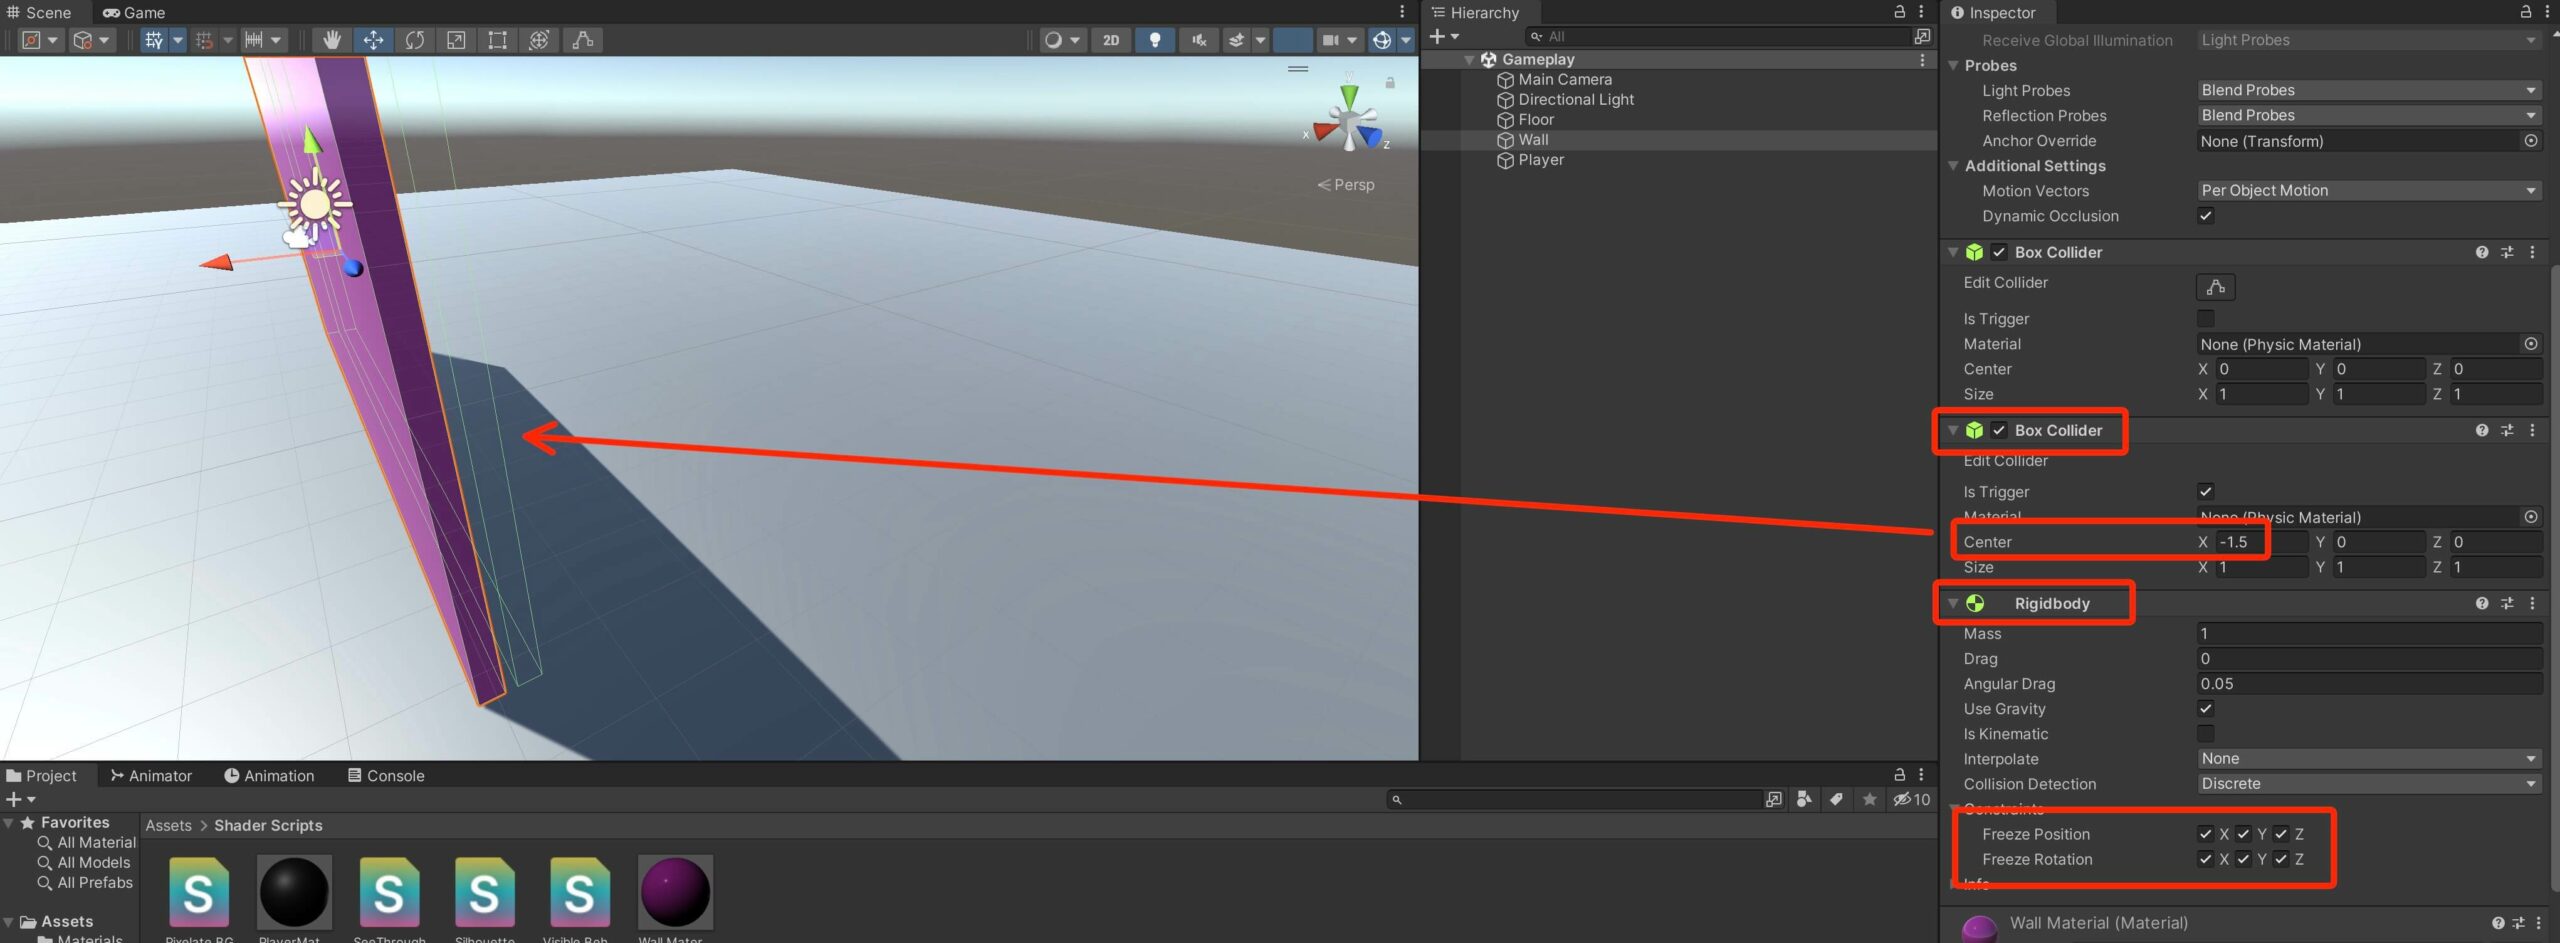
We moved the collider a little behind the wall because that’s where the player will collide which will make the wall transparent. And we also set the rigid body to freeze the position and rotation of the wall to make it static.
Next, create a new C# script, name it Wall, and paste the following code inside:
					using UnityEngine;

public class Wall : MonoBehaviour
{
    private Renderer rend;
    private Color materialColor;

    // string for storing player tag
    // we never recommend hardcoding strings
    // instead always declare it as a variable
    // we do it using the TagManager class
    // where we make all our string static
    // so we can use them across the whole game
    // but for this small example we can declare
    // the player tag string here
    private string PLAYER_TAG = "Player";

    private void Awake()
    {
        rend = GetComponent<Renderer>();
        materialColor = rend.material.color;
    }

    void MakeTransparent(bool transparent)
    {
        if (transparent)
        {
            materialColor.a = 0.5f;
        }
        else
        {
            materialColor.a = 1.0f;
        }

        rend.material.color = materialColor;
    }

    private void OnTriggerEnter(Collider other)
    {
        if (other.CompareTag(PLAYER_TAG))
        {
            MakeTransparent(true);
        }
    }

    private void OnTriggerExit(Collider other)
    {
        if (other.CompareTag(PLAYER_TAG))
        {
            MakeTransparent(false);
        }
    }
}
This is how the effect looks like when we test the game:
Of course, this is the idea behind how this effect works. You can use lerp to set the material to transparent over specified time. You can also resize the trigger collider to set the material to transparent when the object is closer or further away from the wall and so on.
Where To Go From Here
You can use the shader scripts from this tutorial as is in your games or you can expand upon them and add more functionality to suit your needs.
For more advanced Unity tips and tricks you can check out the link below:

Comments are closed.