When creating a game in Unity the most important thing is to structure your project in a way that you can expand it later by adding new updates to the game.
This is done from the beginning when you start creating parts of your game, not like what you see on all YouTube tutorials and low-quality courses where they just open a project and start creating things at random.
If you don’t have a proper structure and you decide after 6 months to add a new feature in your game, it can break other features, and then you’ll have to deal with bugs that are hard to solve.
And what’s worse, if you use a project with a bad structure in your portfolio and the game studio you applied for sees that, it’s an immediate rejection.
To solve this problem we use Object Oriented programming and design patterns principles. And one concept that helps us implement that is called Interface.
Before we start, this tutorial is not for complete beginners. If you don’t know how to create basic games with Unity and you’re not familiar what are classes, variables, and functions, you should first go through our C# beginner series and then come back to this lecture.
What Is A C# Interface And How Do We Create One?
An Interface is a container that holds functions that can have parameters but are empty e.g. not implemented inside the Interface itself.
The functions are implemented by the class which implements that particular interface.
To create an interface, simply create a new C# script in Unity and add the following lines of code:
					public interface ICharacterBehavior
{
    public void Walk();
    public void Attack();
}
Besides adding the “interface” keyword in the declaration the coding standard is to put “I” in front of the name of the Interface so that when we implement it in a class we’ll immediately know this class is implementing an Interface.
To implement the Interface in a class, we just add a comma (,) after the MonoBehavior keyword:
					public class Doctor : MonoBehaviour, ICharacterBehavior
{

}
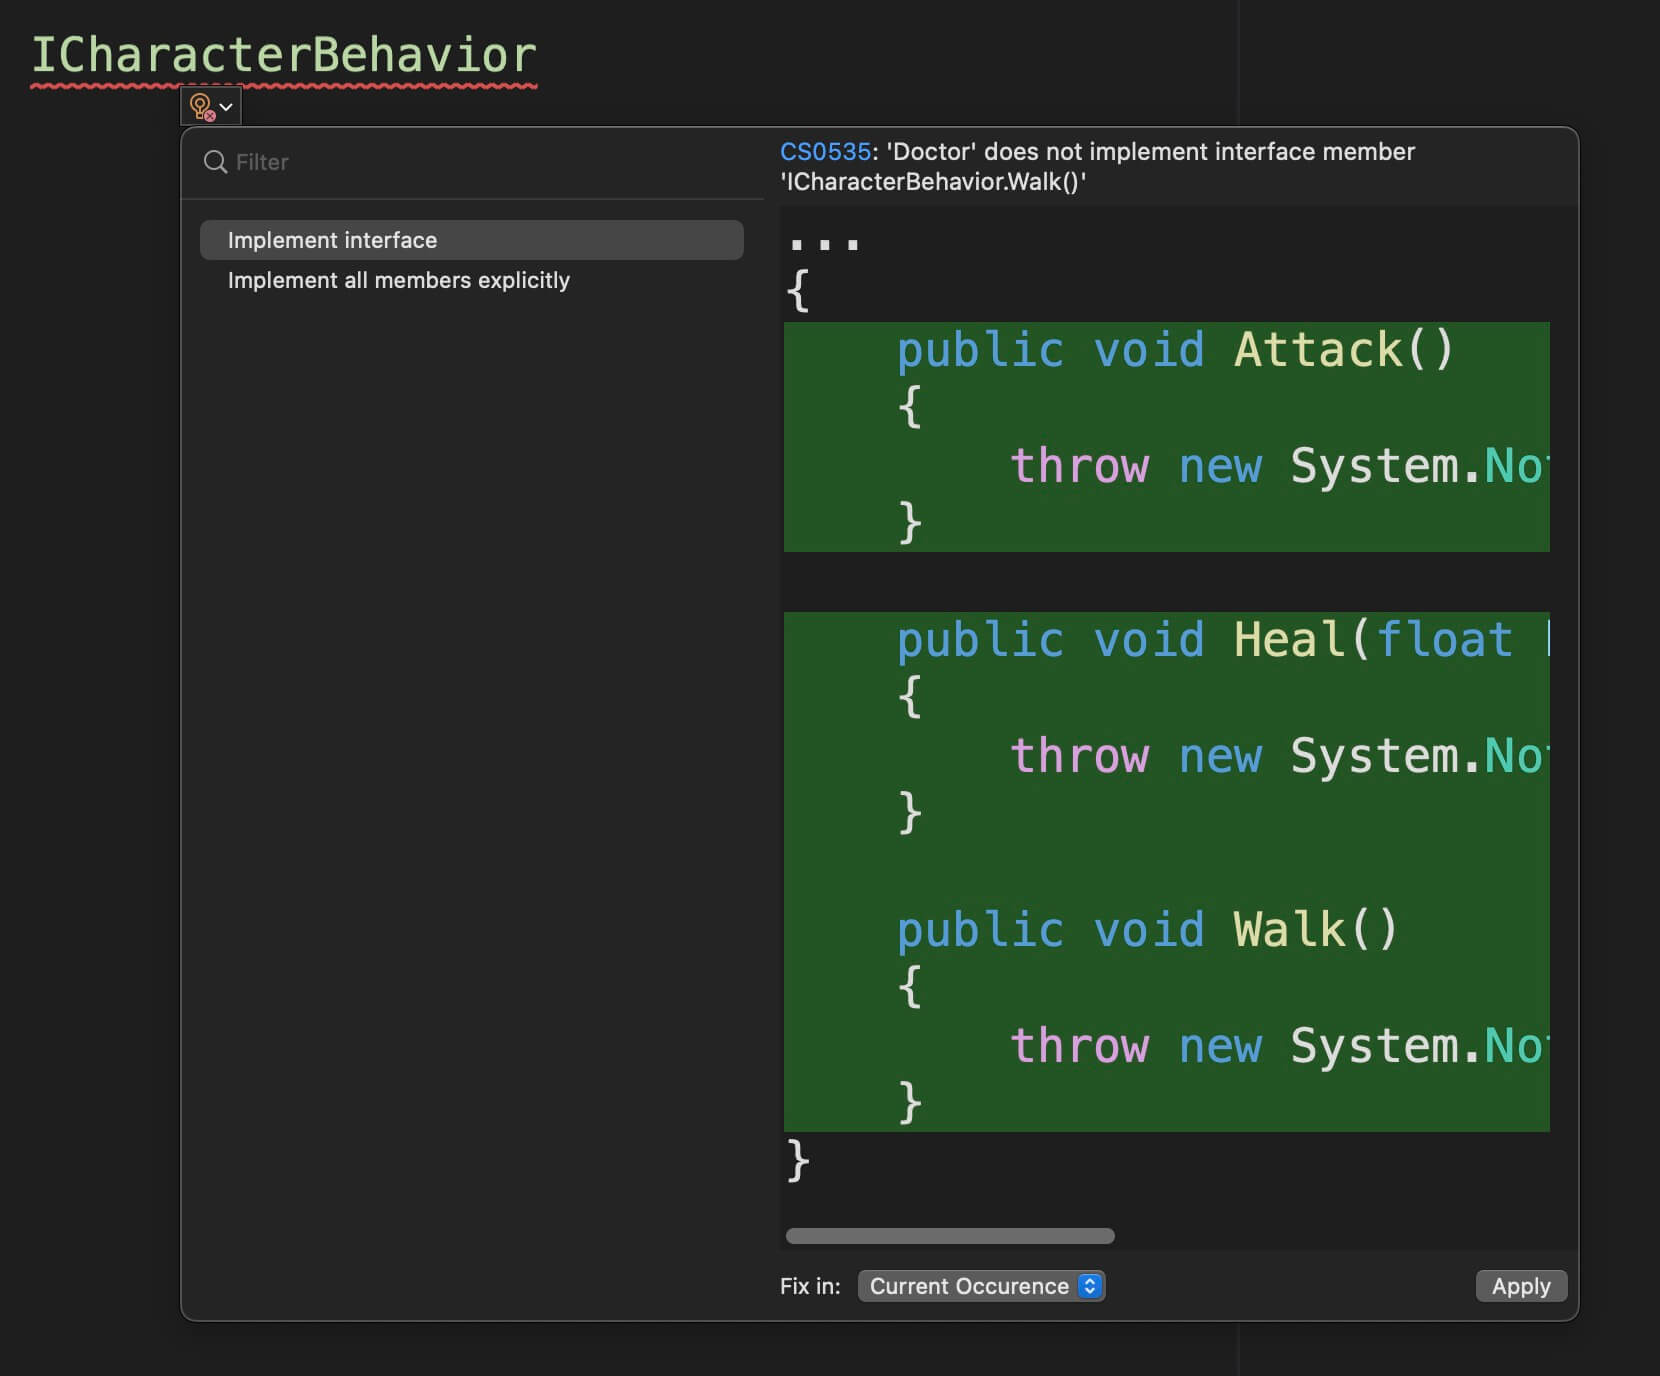
When you declare that you implement an Interface, you’ll immediately receive a red warning because you need to implement all functions that are declare inside the interface:

You can either hover over the Interface name and on the drop-down list implement the Interface using auto-complete:
Or you can implement it yourself by adding the functions one by one:
					public class Doctor : MonoBehaviour, ICharacterBehavior
{
    public void Walk()
    { }

    public void Attack()
    { }
}
As you can see, the signature of the functions declared in an Interface must be the same when you implement them in a class.
If the function has parameters, you need to declare that function with the same parameters.
Implementing Doctor Player’s Movement Using The Interface Function
Let’s use the interface we created to implement the movement behavior of our Doctor game character.
I’ve already prepared the animations of the character and created a script that will play those animations:
					using UnityEngine;

public class AnimationController : MonoBehaviour
{
    // hard coding strings is a bad idea despite all the tutorials and courses
    // teaching you to declare strings in functions
    // so always have either a static class that contains all your strings
    // or declare them like this
    private string WALK_PARAMETER = "Walk";
    private string ATTACK_PARAMETER = "Attack";

    private Animator animController;

    private void Awake()
    {
        animController = GetComponent<Animator>();
    }

    public void Play_WalkAnimation(bool isWalking)
    {
        animController.SetBool(WALK_PARAMETER, isWalking);
    }

    public void Play_AttackAnimation(bool isAttacking)
    {
        animController.SetBool(ATTACK_PARAMETER, isAttacking);
    }
}
Also, inside the Doctor script we got a reference to the AnimationController script inside the Awake function:
					private AnimationController animController;

    private void Awake()
    {
        animController = GetComponent<AnimationController>();
    }
Since we’re are going to move the Doctor character via transform, we are going to declare two variables that are going to help us with that:
					private float moveSpeed = 5f;

    // hard coding strings is a bad idea despite all the tutorials and courses
    // teaching you to declare strings in functions
    // so always have either a static class that contains all your strings
    // or declare them like this
    private string X_AXIS = "Horizontal";
Now, inside the Walk function we implemented from ICharacterBehavior Interface we are going to add the following lines of code:
					public void Walk()
    {
        float h = Input.GetAxisRaw(X_AXIS);

        Vector2 tempPos = transform.position;
        Vector2 tempScale = transform.localScale;

        if (h > 0)
        {
            // move the character on the X axis
            tempPos.x += moveSpeed * Time.deltaTime;

            // change the characters facing direction
            tempScale.x = 1f;

            // animate the character's movement
            animController.Play_WalkAnimation(true);

        }
        else if (h < 0)
        {
            // move the character on the X axis
            tempPos.x -= moveSpeed * Time.deltaTime;

            // change the characters facing direction
            tempScale.x = -1f;

            // animate the character's movement
            animController.Play_WalkAnimation(true);
        }
        else
        {
            // character stopped moving put him in idle animation
            animController.Play_WalkAnimation(false);
        }

        transform.position = tempPos;
        transform.localScale = tempScale;
    }
And lastly we are going to call that function inside the Update function so that we can execute it:
					void Update()
    {
        Walk();
    }
Now we can run the game and test the Doctor character’s movement:
Implementing Doctor Player’s Attack Using The Interface Function
Now that the Doctor character is moving, we can add attack functionality.
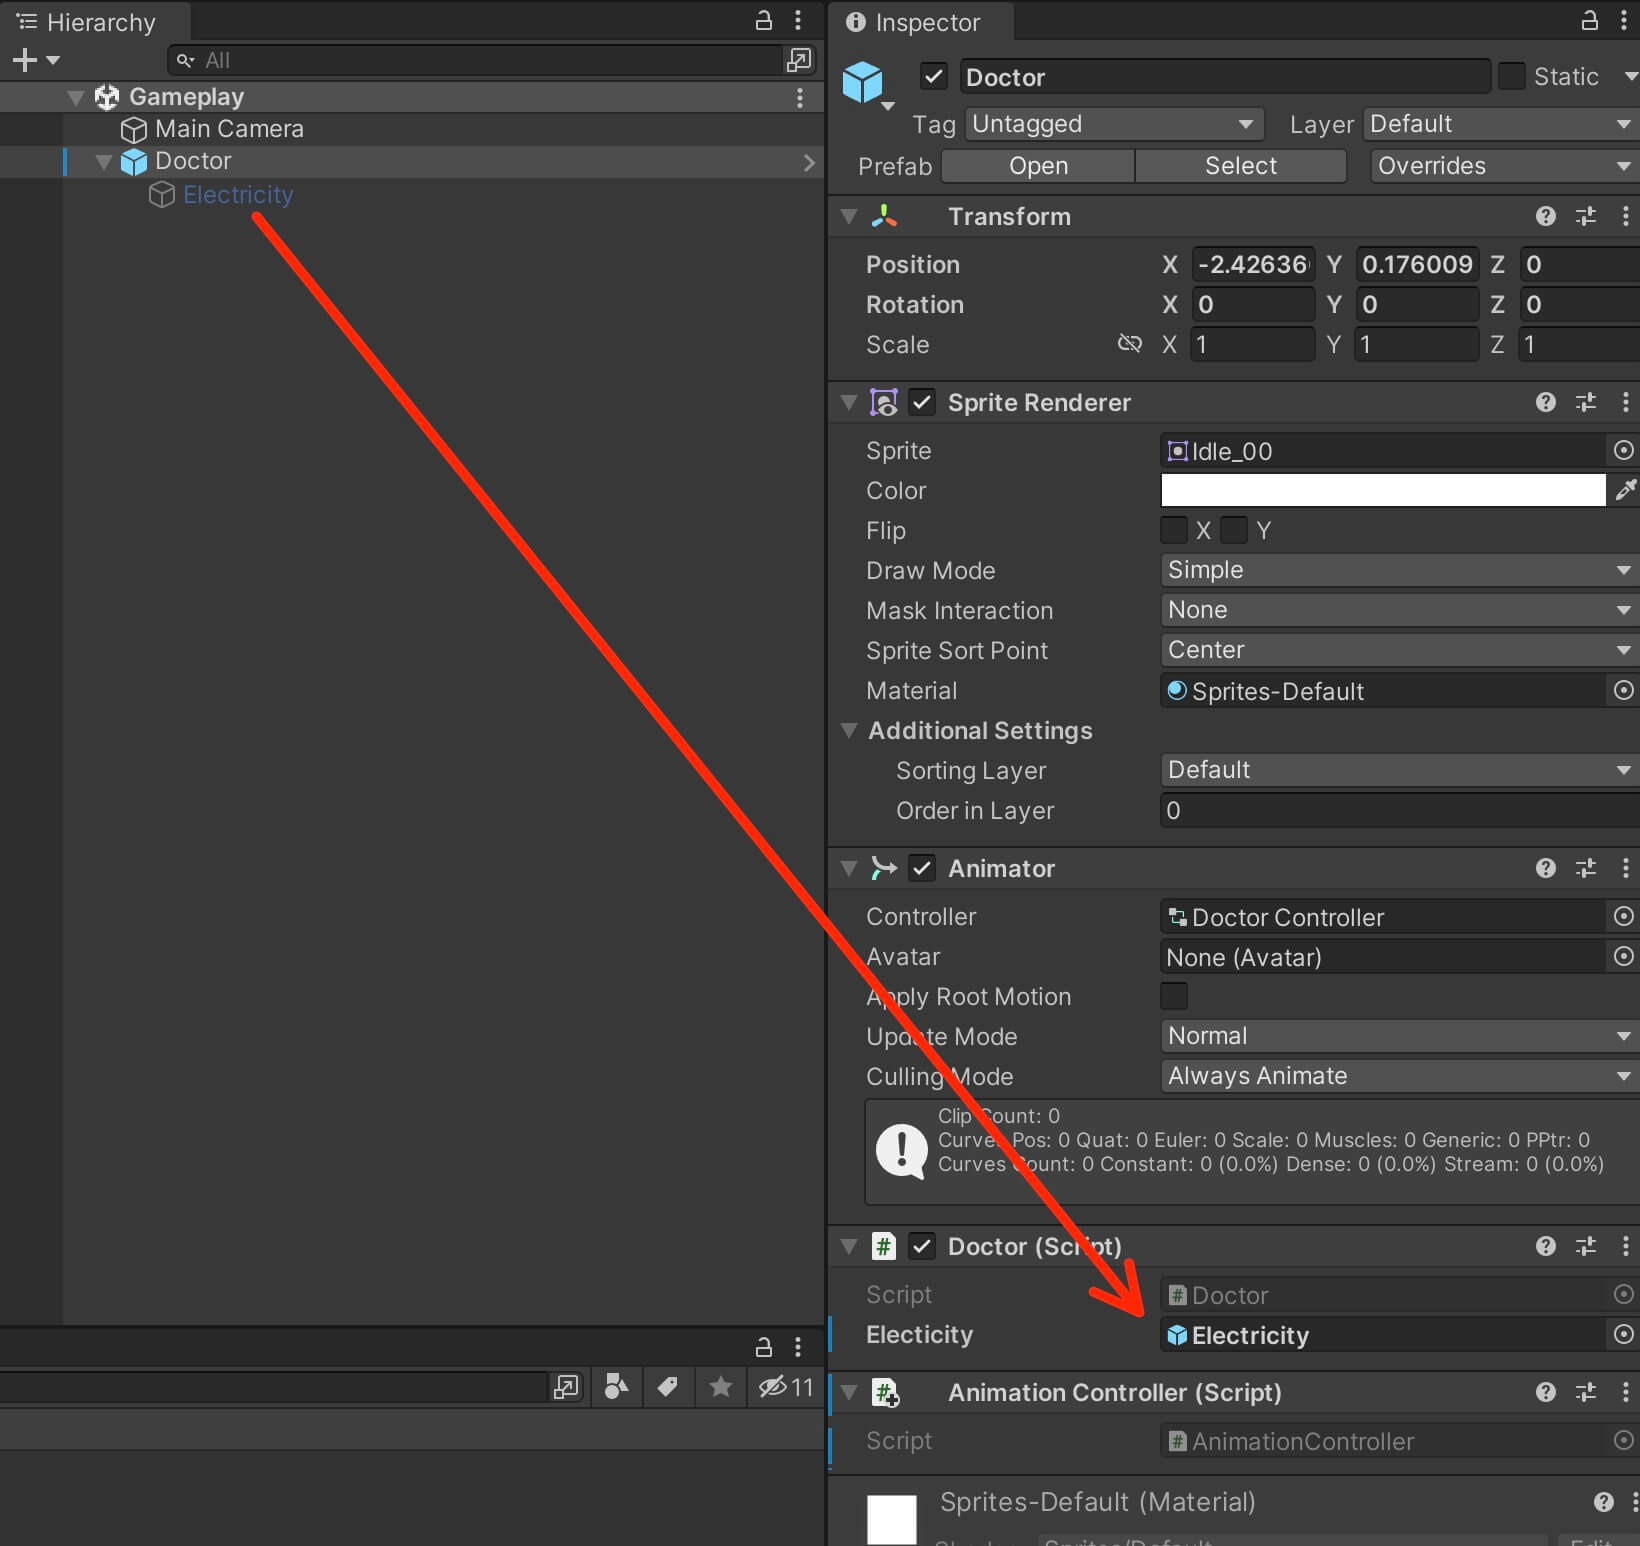
Since I’m using a separate game object which has the electricity animation for the Doctor’s gun, I’ve created a variable as a reference to that game object:
					[SerializeField]
    private GameObject electicity;
This game object is a child of the Doctor character in the Hierarchy and I’ve dragged and dropped it’s reference inside the script:
Inside the Attack function we’re going to add the following code:
					public void Attack()
    {
        if (Input.GetKeyDown(KeyCode.K))
        {
            animController.Play_AttackAnimation(true);
            electicity.SetActive(true);
        }
        else if (Input.GetKeyUp(KeyCode.K))
        {
            animController.Play_AttackAnimation(false);
            electicity.SetActive(false);
        }
    }
One reminder, if you’re using this code for your own project, with the current setup the character will be able to move while he’s attacking.
To prevent that you can add a boolean variable:
private bool canMove = true;
And inside the Attack function disable the player from moving while he’s attacking:
					public void Attack()
    {
        if (Input.GetKeyDown(KeyCode.K))
        {
            animController.Play_AttackAnimation(true);
            electicity.SetActive(true);

            // don't allow player to move while he's attacking
            canMove = false;
        }
        else if (Input.GetKeyUp(KeyCode.K))
        {
            animController.Play_AttackAnimation(false);
            electicity.SetActive(false);

            // when attacking ends player can move
            canMove = true;
        }
    }
Also, inside the Walk function at the beginning we need add the following condition:
					public void Walk()
    {
        float h = Input.GetAxisRaw(X_AXIS);

        Vector2 tempPos = transform.position;
        Vector2 tempScale = transform.localScale;

        if (h > 0)
        {
            // move the character on the X axis
            tempPos.x += moveSpeed * Time.deltaTime;

            // change the characters facing direction
            tempScale.x = 1f;

            // animate the character's movement
            animController.Play_WalkAnimation(true);

        }
        else if (h < 0)
        {
            // move the character on the X axis
            tempPos.x -= moveSpeed * Time.deltaTime;

            // change the characters facing direction
            tempScale.x = -1f;

            // animate the character's movement
            animController.Play_WalkAnimation(true);
        }
        else
        {
            // character stopped moving put him in idle animation
            animController.Play_WalkAnimation(false);
        }

        // only move the player if he's not attacking
        if(canMove)
            transform.position = tempPos;

        // allow the player to change direction while he's attacking
        transform.localScale = tempScale;
    }
The condition we added on line 38 is preventing the player from moving, but it allows him to change direction so that he can attack enemies on the left and right sides.
This is what it looks like in the preview:
Implementing Hazard Player’s Movement Using The Interface Function
Now we’re going to use the same interface to model the behavior of our Hazard character.
Inside the Hazard script, we’ve implemented the interface:
					public class Hazard : MonoBehaviour, ICharacterBehavior
{
    public void Walk()
    { }

    public void Attack()
    { }
}
To make the two players different, we’re going to use Rigidbody2D to move the Hazard character so we’re going to declare the following code:
					private Rigidbody2D myBody;
private float speed = 5f;
And of course, inside the Awake function get a reference to the Rigidbody2D component:
					private void Awake()
    {
        myBody = GetComponent<Rigidbody2D>();
    }
We also have a reference to the AnimatorController class that we used to animate the Doctor character.
Inside the Walk function, we are going to add the following code:
					public void Walk()
    {
        // same as with the Doctor character
        // we didn't hardcode the string variable
        float h = Input.GetAxisRaw(X_AXIS);

        Vector2 tempScale = transform.localScale;

        if (h > 0)
        {
            myBody.velocity = new Vector2(speed, 0f);
            tempScale.x = -1;

            animController.Play_WalkAnimation(true);
        }
        else if (h < 0)
        {
            myBody.velocity = new Vector2(-speed, 0f);
            tempScale.x = 1;

            animController.Play_WalkAnimation(true);
        }
        else
        {
            myBody.velocity = Vector2.zero;
            animController.Play_WalkAnimation(false);
        }

        transform.localScale = tempScale;
    }
And inside the Update we’ll run the Walk function:
					private void Update()
    {
        Walk();
    }
When we play the game this is how it looks like:
Implementing Hazard Player’s Attack Using The Interface Function
Since the Hazard character attack animation is different from the Doctor character animation, and we’re using a trigger as a parameter to play that animation, we added one more function inside the AnimationController:
					public void Play_HazardAttackAnimation()
{
    animController.SetTrigger(ATTACK_PARAMETER);
}
Now inside the Attack function we’re going to add the following lines:
					public void Attack()
    {
        if (Input.GetKeyDown(KeyCode.K))
        {
            animController.Play_HazardAttackAnimation();
        }
    }
And of course, call the Attack function inside the Update:
					private void Update()
{
    Walk();
    Attack();
}
This is how it looks like in the preview:
Why Is This Approach Better Than What All Other Tutorials And Courses Are Teaching You?
As you saw, we created the same functionality for both characters using the Interface structure.
We even implemented the Walk functions differently by using transform to move the Doctor character and Rigidbody2D to move the Hazard character.
But why is this approach better than if we just implemented characters movement inside their appropriate scripts?
This way is more simple because we model the behavior of all characters inside the Interface.
When you create a game where you have a common behavior for characters, enemies, or any other game object, you can model the behavior inside the Interface and implement that behavior differently for each game object.
And if somewhere down the line you decide to add new features in your characters, you first model that feature inside the Interface, and then you implement it in every character.
You can also invoke Interface functions on game objects that have implemented that interface without getting a reference to that game object.
For example, we can implement the damage function inside the Interface:
public void Damage(int amount);
Inside the game object that has implemented the Interface we implement the function:
					public void Damage(int amount)
    {
        health -= amount;
    }
And when we want to deal damage to that game object we can do that by calling the Interface:
					private void OnTriggerEnter2D(Collider2D collision)
    {
        collision.GetComponent<ICharacterBehavior>().Damage(10);
    }
In the example above, instead of checking if we have the right game object, we’ll invoke the function from the Interface and in turn, it will call this code:
					public void Damage(int amount)
    {
        health -= amount;
    }
Or whichever code we implemented in the particular class where we inherited the Interface.
This allows us to have more control over the structure of our game, and we can easily add new features, improve the current ones, or remove old features and all that without breaking our game or introducing hundreds of bugs.
Modeling Single Behaviors With Interfaces
We can even model single behaviors using an Interface. Using our damage example we can create an IDamageable Interface like this:
					public interface IDamageable
{
    public void TakeDamage(int amount);
}
Now we can deal damage to every game object which implements this Interface and we can do that by calling the Interface itself like we did in the example above:
					private void OnTriggerEnter2D(Collider2D collision)
{
    collision.GetComponent<IDamageable>().TakeDamage(10);
}
And there’s no limit to how many behaviors we can model using the Interface approach and we will not have to get references to different game objects every time we need them, instead we can just use the Interface to invoke their functionality.
Where To Go From Here
You can check out some posts we made, like how to use a Coroutine in Unity or how to implement Delegates and Events in your game.
Unity Coroutines – What Are They And How To Use Them
Delegates And Events In Unity – What Are They And How To Use Them
Or you can check out some of the other blog posts by clicking on the link below: